-
Notifications
You must be signed in to change notification settings - Fork 2
Menu Placement System
This is the user guide to the system. If you are a developer and want to use this system in your application, please also read the documentation of this system. Note that the system in this repository might not be the latest and have minor differences compared to the latest one, especially on the appearance. You can find the latest version here.
The menu placement system updates the position, rotation, and scale continuously to ensure that the menus are always within your reach. It places the menus based on the spatial mapping and your position. For example, it can prevent the menus from being initialized behind the wall if you are standing in front of it. Beyond this basic functionality, it also provides other advanced functionalities like manipulating the menus, adding runtime menus, and saving & loading the offsets.
There are two types of menus in this system: the main menu and the object menu. Main menus are the menu for the whole application, e.g. the main menu cube. Object menus are menus for a specific object.
Both of them have also two variants: floating and compact. The floating variants are used in capacious environments, while the compact variants are mainly used in narrow environments.
The floating main menu stays in your viewing frustum and moves with you. If you are close to a wall, it will be stuck onto it. If you are in a narrow space, the system will switch it to the compact variant, and place it on your right hand if you are using HoloLens 2 or VR devices or still in your viewing frustum but much closer if you are using HoloLens 1.
The object menu stays between you and the target object that the menu refers to if you are far away from the object. And it stays beside the menu if you are close to the object. The exact position is based on your head gaze. For example, if you are looking at the left side (based on the direction of yourself) of the object, the menu will also be placed on the left side.
Similar to main menus, if the space is not enough, they will be switched to compact variants. The compact variants can have the same behavior as above, but they can be displayed on your right hand and controller on HoloLens2 and VR devices, respectively, or still in your viewing frustum but much closer on HoloLens 1. It depends on your position, the spatial mapping, and the distance between you and the target object.
The system also provides a user interface that allows you to do other operations such as manipulating menus.
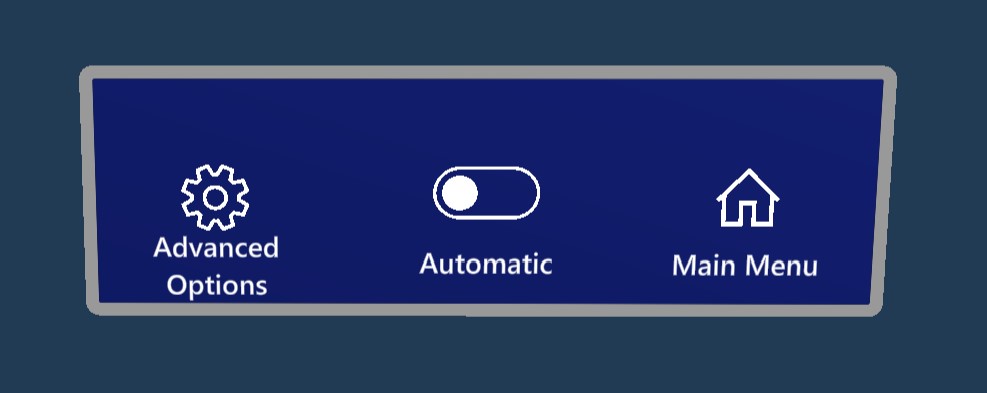
The system control panel is displayed on your right side in your viewing frustum. It has one switch and two buttons. With the switch, you can switch between manual mode and automatic mode. In manual mode, the system does not update the placement of menus. You can open the main menu and the advanced option panel with the other two buttons.

The app bar is a variant of the original app bar in VIAProMa. The system generates one app bar for each menu if it is enabled by the developers. The app bar provides five functionalities: manipulation, retrieve, switch variant, lock & unlock, and close menus as shown in the figure below from left to right. With these buttons, you can manipulate the menu, retrieve your manipulation, switch between compact and floating variants, make the menu anchor on yourself or on the world coordinate, and close it, respectively. Note you can only perform the switch variant and lock & unlock operation in manual mode.
Depending on menus and their target objects, the manipulation offsets of object menus can be either "one to one" or "one to all". This is also set by the application developers, so you might need to refer them for the detailed settings. For "one to one", the same object menu can have different offsets on different instances of a target object. For "one to all", the object menu has the same offsets on every instance of a target object.

The system provides some advanced options which you can find in the advanced option panel by clicking on the "Advanced Options" button on the menu control panel. It is a scrollable panel so you might need to scroll to get all functionalities.

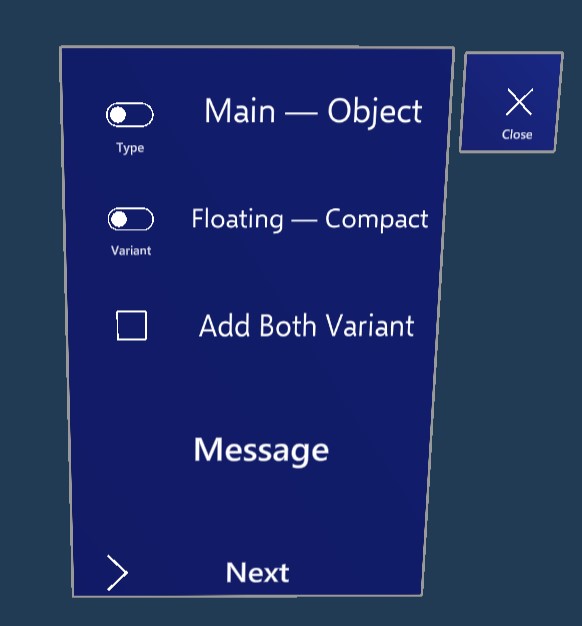
You might be able to add some objects in the application as runtime menus. The exact settings depend on the developers. With this functionality, you can add selectable objects to the system and let them behave like menus. To use this system, you should first set properties on a configure panel and then select objects accordingly. The message shown on the panel will guide you through the process. Depending on applications, this functionality might be disabled by the developers.

This system also allows you to save the offsets generated after manipulation and load them on the next start so that you don't need to adjust menus every time to make them suitable for you. To use this functionality, you just need to click on the Save Offsets button on the advanced option panel to save them and click on the Load Offsets button to load them on the next start. Note that the retrieve buffers will not be saved, so you need to click on the Reset Offsets button to delete the offsets. Note that only the "one to all" and main menu offsets can be saved.
-
User Manual
-
Code Documentation