-
Notifications
You must be signed in to change notification settings - Fork 10
iOS integration with PayU's Checkout UI
Non-Seamless integration helps you to use PayU's pre-built UI screens for collecting payment information from the user. It is the fastest and easiest way of integration.
-
- Download the zip file from here: https://github.com/payu-intrepos/iOS-SDK-Sample-App
- Extract the contents of the zip file, and navigate to Swift_SampleApp/SwiftSampleApp

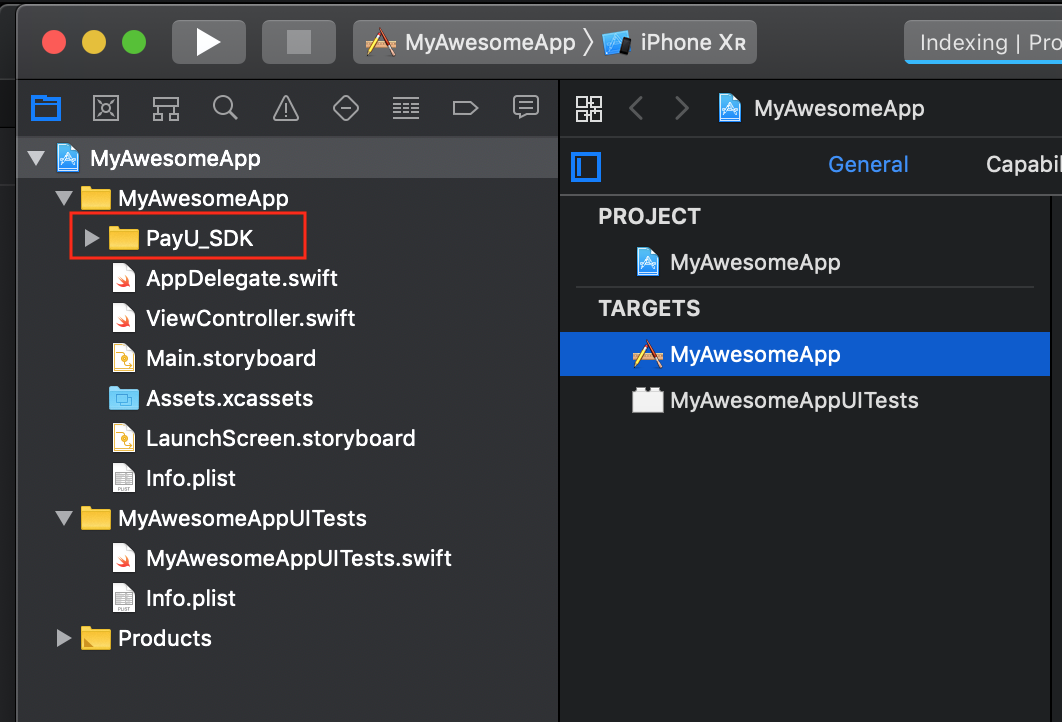
- Drag and drop the PayU_SDK folder into your project. Make sure to check copy items if needed flag

-
Copy the import statements of the bridging header file of sample app to your bridging header file.
#import "PayU_iOS_CoreSDK.h"
#import "PUUIPaymentOptionVC.h"
#import "PUUIConstants.h"
#import "PUSAHelperClass.h"
-
-
Create Payment Params:
PayUModelPaymentParamsmodel object is provided by the SDK which you should use to provide data related to your transaction.
let paymentParams = PayUModelPaymentParams() paymentParams.key = merchantKey.text paymentParams.transactionID = transactionId.text paymentParams.amount = amount.text paymentParams.firstName = "John" paymentParams.email = email.text paymentParams.phoneNumber = "9999900000" paymentParams.environment = environment.text paymentParams.udf1 = "" paymentParams.udf2 = "" paymentParams.udf3 = "" paymentParams.udf4 = "" paymentParams.udf5 = "" paymentParams.userCredentials = userCredential.text paymentParams.surl = "https://payu.herokuapp.com/ios_success" paymentParams.furl = "https://payu.herokuapp.com/ios_failure" paymentParams.productInfo = "iPhoneXS" //Add information about the production for which transaction is being initiated-
Create payment hashes: This is the most critical part of the integration. Most of the PayU APIs need a hash for authentication purpose. You need to send a SHA512 of the payment parameters that we created in the first step. You calculate the hash on your server using the secret key (salt) provided to you by PayU.
Below is the sample format of post data to be sent to your server for calculating hashes
key=0MQaQP&[email protected]&amount=1&firstname=John&txnid=FjKI5W&user_credentials=0MQaQP:vipin.aggarwal&udf1=&udf2=&udf3=&udf4=&udf5=&productinfo=iPhoneXSNote: For a minimum integration using PayU SDK, you need a payment hash and a hash for fetching available payment options. Hashes are strings that you need to set in a model object of type
PayUModelHashes.Detailed changes required at server end can be found here. For sample implementation at app side, please refergenerateHashFromServermethod from the sample app.-
Assign hashes in model: Once you have received the hashes, assign relevant hashes to
PayUmodelHashesobject like below:
let payUHashes = PayUModelHashes()
payUHashes.paymentHash = JsonResponseFromYourServer["payment_hash"]
payUHashes.paymentRelatedDetailsHash = JsonResponseFromYourServer["payment_related_details_for_mobile_sdk_hash"]
Once you have created and filled an object
payUHashesof typePayUmodelHashes, assign it in payment parameters.paymentParams.hashes = hashes-
Fetch available payment options and present Checkout UI: To populate checkout with payment options, you need to know the currently available payment options for the user. You get these options from API
getPayUPaymentRelatedDetailForMobileSDK. Use 'PayUWebServiceResponse' class to fetch available payment options.
weak var weakSelf = self let webserviceResposne = PayUWebServiceResponse() webserviceResposne.getPayUPaymentRelatedDetail(forMobileSDK: paymentParams) { (paymentRelatedDetails, errorMessage, extraParam) in if let wself = weakSelf { if let error = errorMessage { print("Error occured in fetching payment related details: \(error)") return } else { // Show PayU's checkout UI let checkoutStoryBoard = UIStoryboard.init(name: wself.checkoutStoryboardID, bundle: nil) let checkoutInitialVC = checkoutStoryBoard.instantiateViewController(withIdentifier: VC_IDENTIFIER_PAYMENT_OPTION) as! PUUIPaymentOptionVC checkoutInitialVC.paymentParam = wself.paymentParams if let spCount = wself.surepayCount.text { checkoutInitialVC.surePayCount = Int(spCount)! } checkoutInitialVC.paymentRelatedDetail = paymentRelatedDetails wself.navigationController?.pushViewController(checkoutInitialVC, animated: true) } } } -
Create Payment Params:
-
-
Subscribe to payment completion notification: You need to subscribe to payment completion notifications to know about success/failure status of the transactions. Write following method in your view controller and call it in
viewDidLoadmethod.
override func viewDidLoad() { super.viewDidLoad() addPaymentResponseNotification() ... //Your additional code } func addPaymentResponseNotification() { NotificationCenter.default.addObserver( self, selector: #selector(self.responseReceived), name: NSNotification.Name(rawValue: kPUUINotiPaymentResponse), object: nil) }- Receive and manage payment response:
@objc func responseReceived(notification: NSNotification) { let notificationObj = notification.object as? Dictionary<String, AnyObject> if let dict = notificationObj { if let merchantResponse = dict["merchantResponse"] { print("Merchant Response :\n \(merchantResponse)") } if let payuResponse = dict["payUResponse"] { print("PayU Response :\n \(payuResponse)") } } else { print("Response not received") } } -
Subscribe to payment completion notification: You need to subscribe to payment completion notifications to know about success/failure status of the transactions. Write following method in your view controller and call it in
- SDKs Overview
- Server Side
- Client Side
- Android SDK Integration
- Android Custom Browser
- Android Samsung Pay SDK integration
- Android PhonePe Intent SDK integration
- Android Google Pay™ SDK Integration
- Android PayU CheckoutPro SDK Integration
- IOS PayU CheckoutPro SDK Integration
- iOS integration with PayU Checkout UI
- iOS SDK integration
- iOS Custom Browser
- Mobile Releases
- FAQs
- Common Issues