-
Notifications
You must be signed in to change notification settings - Fork 4
Using Civi Widget Creation Interface
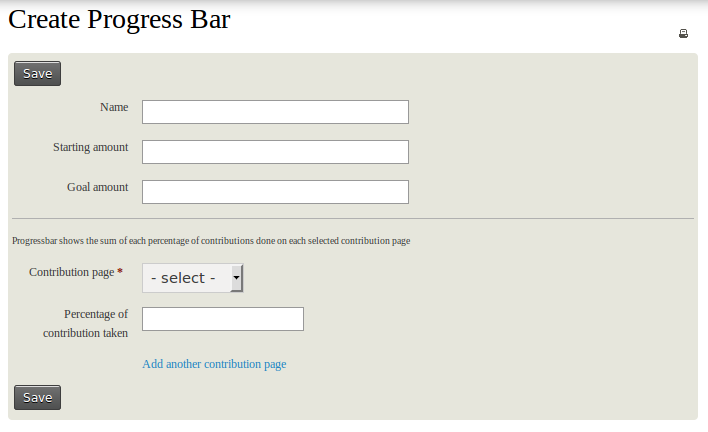
Click 'New Progress Bar' menu item from 'Widgets and Progress Bars' main menu.
 Give Name of progress bar, Starting Amount, Goal Amount.
Progress bar takes live data from the contributions done against contribution pages. Select one contribution page from the Contribution page select box and give the percentage amount you want to take from the contributions that happens on that contribution page. By clicking 'Add another contribution page' link you add more contribution pages.
Click save button.
Click 'Manage Progress Bar' menu item.
 It will show a list of already existing progress bars. Links are provided to Edit or Delete progress bars. If a progress bar is linked to a widget then system will not allow you to delete it. So in that case, please delete the widget and then delete progress bar.
Click 'New Widget' menu item.
Give a Title and click 'Save and Preview'. You can see your first widget in the preview section of form. Now a whole set of properties are there that you can customize. Most of the fields are self explanatory like colors etc.

WCI does not have crop or resize feature. So provide image URLs of appropriate size for Logo image and Image properties.

 A drop down select box is there to show all contribution pages you already created in CiviCRM. If you select one that will be displayed in the widget. There is a text box to give title for this contribution button. If no text is given there default text 'Donate' will appear on top of the button.
User can select a progress bar that are available in the select box. Radio buttons are provided to choose its caption type. It can be either actual amount (Amount radio) or percentage (Percentage radio).
It shows Newsletter groups that you created in CiviCRM. If a group is selected then a email text box will appear in widget where the end user can enter their mail id. The message on top of the text box can be configured in 'Newsletter text'. (See widget settings for more information.)
It specifies the width of the widget.
Using Widget options user can hide Title, Border line or progress bar caption.
Here user can add more styles for existing classes.

Here user can restructure the widget completely. They can add new css classes. To enable this feature check the check box 'Override'. Then Custom template text box will be enabled. There user can modify the template or create new template. They can use only existing variables. The template code should be based on smarty v2.
On clicking 'Save' button, widget properties will be saved into database and page will be forwarded to widget listing page.
This page will show all widgets created in the system. Links are provided to Edit or Delete existing widget.

User can create embed code for a widget by clicking 'New Embed Code' menu. There user has to select a widget for the embed code and name for the embed code. By clicking 'Save and Preview' button they can see a preview of the widget and code to embed. On clicking 'Save' button page will be forwarded to listing page and where links are provided to edit or delete embed code.


To use Newsletter subscription feature first create a Profile in CiviCRM and set the visibility as public. Then in that profile add field of type 'contact' as 'email'. Add one more field 'contact' as 'group'. Use 'Public Pages' for 'Visibility'. Note the profile id. In the 'Default profile' provide that id. This will be passed as hidden variable when end user clicks subscribe button.
For better performance a caching system also integrated with WCI. Static widget will be cached permanent until user deletes the widget. Dynamic widgets, widgets with progress bars, will be cached a time specified in the 'Widget cache timeout' text box.
