-
Notifications
You must be signed in to change notification settings - Fork 325
Tutorial
This tutorial will help you deploy Github-profile-summary-cards with ease. If you have any issues regarding the gifs, you can find high res video verions Here.
-
Navigate to your profile's Settings -> Developer setting -> Personal access tokens -> Generate new token
-
Name your token (I'd recommend naming it something after
profile-summary-cards-token) and ticking these boxes:
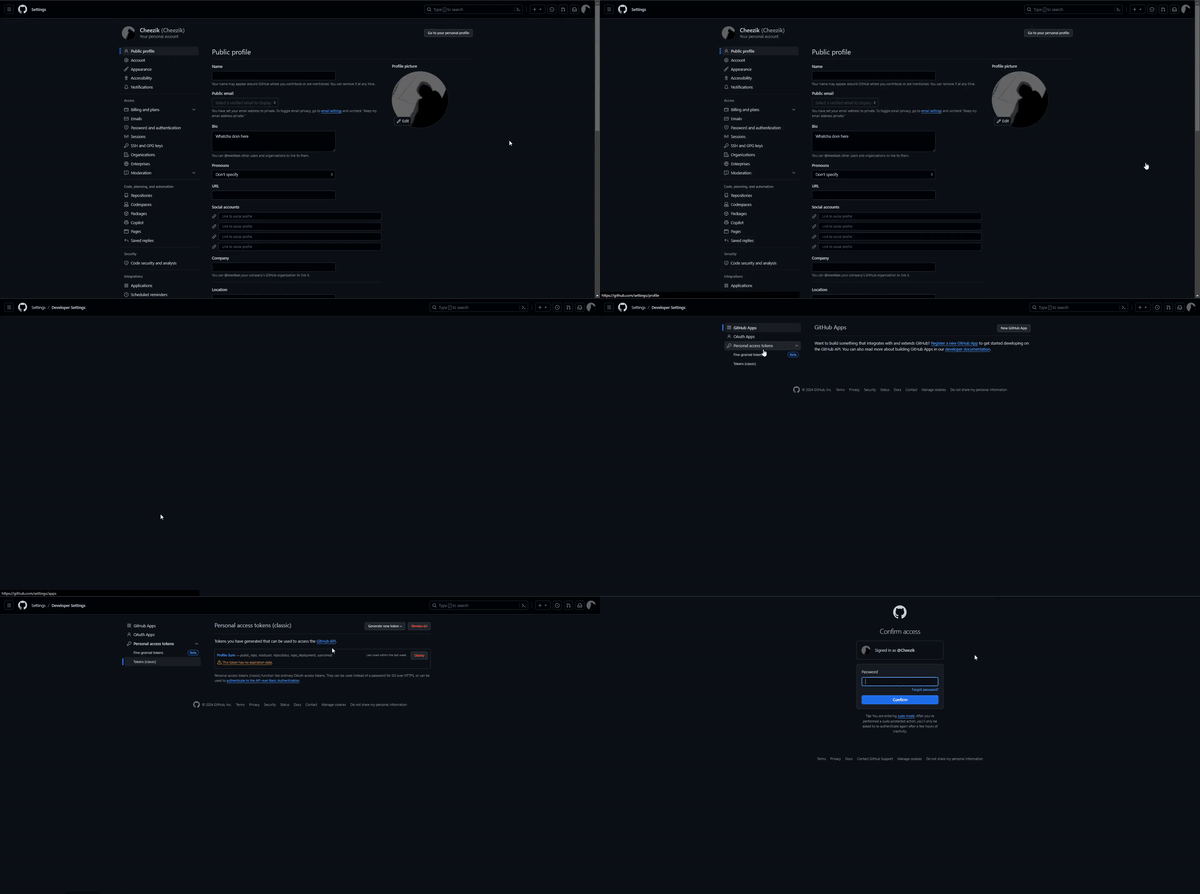
Make sure these boxes are checked! not shown in the gif
Repo
 -  repo:status
 -  repo_deployment
 -  public_repo

User
 -  read:user
 -  user:email
- And copy your token (and don't lose it! You'd have to generate a new token)
- If you want to add to an already EXISTING repository. Click here
- (E.g. If you already have a README that shows up on your profile)
- If you want to create a brand NEW repository. Click here
To Create a new repo from a template:
- Go to Template link
- Click on the "Use this template" button in the top right corner
- Select "Create a new template"
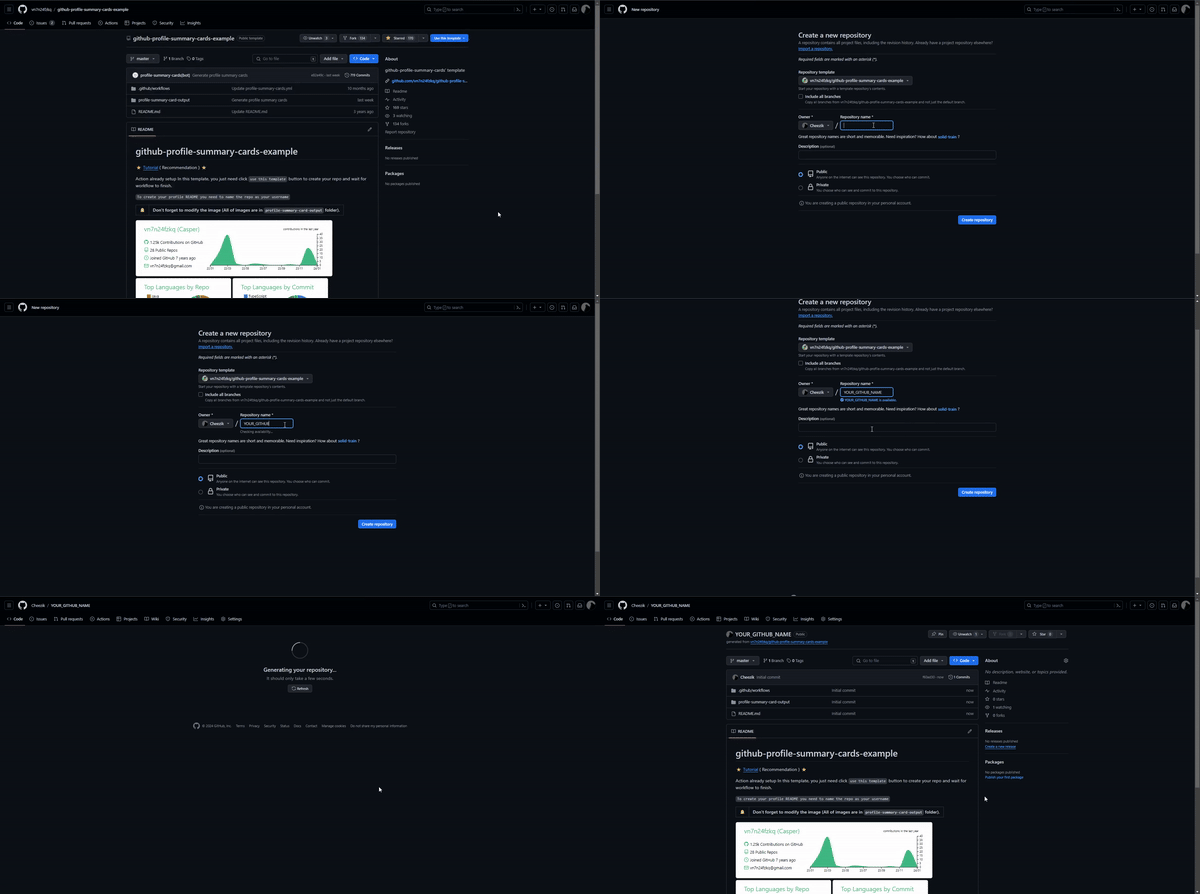
- Name the repo as your username
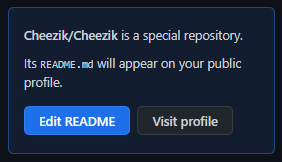
(E.g.FunnyUsername/FunnyUsername, this popup should appear if you've done it correctly)
-
Add a README.md file [if you dont have that file already]
-
Rename your repo to your username (E.g.
FunnyUsername/FunnyUsername) [if you havent already]

Now we will add a workflow to automatically update the summary cards.
- Navigate to the repo's Actions -> New workflow -> Set up workflow yourself
- Name your new workflow (I'd recommend naming it something after
profile-summary-cards)
- Make sure you put
.ymlat the end!
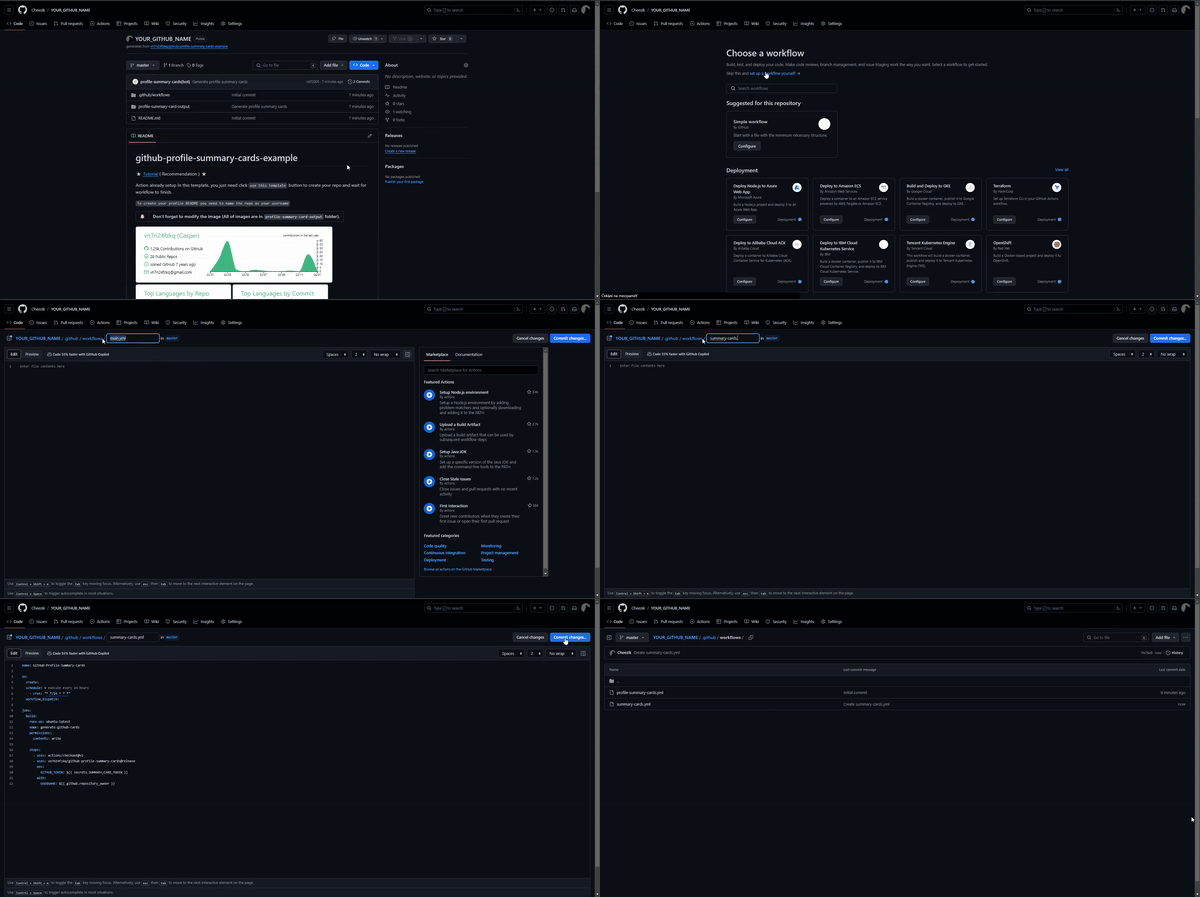
- Commit changes!
Code snippet:
name: GitHub-Profile-Summary-Cards

on:
  create:
  schedule: # execute every 24 hours
    - cron: "* */24 * * *"
  workflow_dispatch:

jobs:
build:
  runs-on: ubuntu-latest
  name: generate-github-cards
  permissions:
    contents: write

  steps:
    - uses: actions/checkout@v2
    - uses: vn7n24fzkq/github-profile-summary-cards@release
      env:
        GITHUB_TOKEN: ${{ secrets.[YOUR_SECRET_TOKEN_NAME] }}
      with:
        USERNAME: ${{ github.repository_owner }}
Please note that the workflow in it's current configuration will run every 24h (it will update every 24h) if you want to change it here is a
cron's job definition
# |  .------------- hour (0 - 23)
# |  |  .---------- day of month (1 - 31)
# |  |  |  .------- month (1 - 12) OR jan,feb,mar,apr ...
# |  |  |  |  .---- day of week (0 - 6) (Sunday=0 or 7) OR
# |  |  |  |  |     sun,mon,tue,wed,thu,fri,sat
# |  |  |  |  |
# *  *  *  *  *
So let's say you want it to run every 15 hours:
- cron: "* */15 * * *"
Or for example you want it to run every friday at 12:35pm:
- cron: "35 12 * * fri"
-
Navigate to repo's Settings -> Secrets and variables -> Actions -> Repository secrets -> New repository secret
-
Name your secret (again, I'd suggest naming your secret as
summary_card_tokenor similar) -
Past in your Personal access token.
- in case you've lost it. Please go back to Generate token and get a new one.
- Copy that New secret's name!
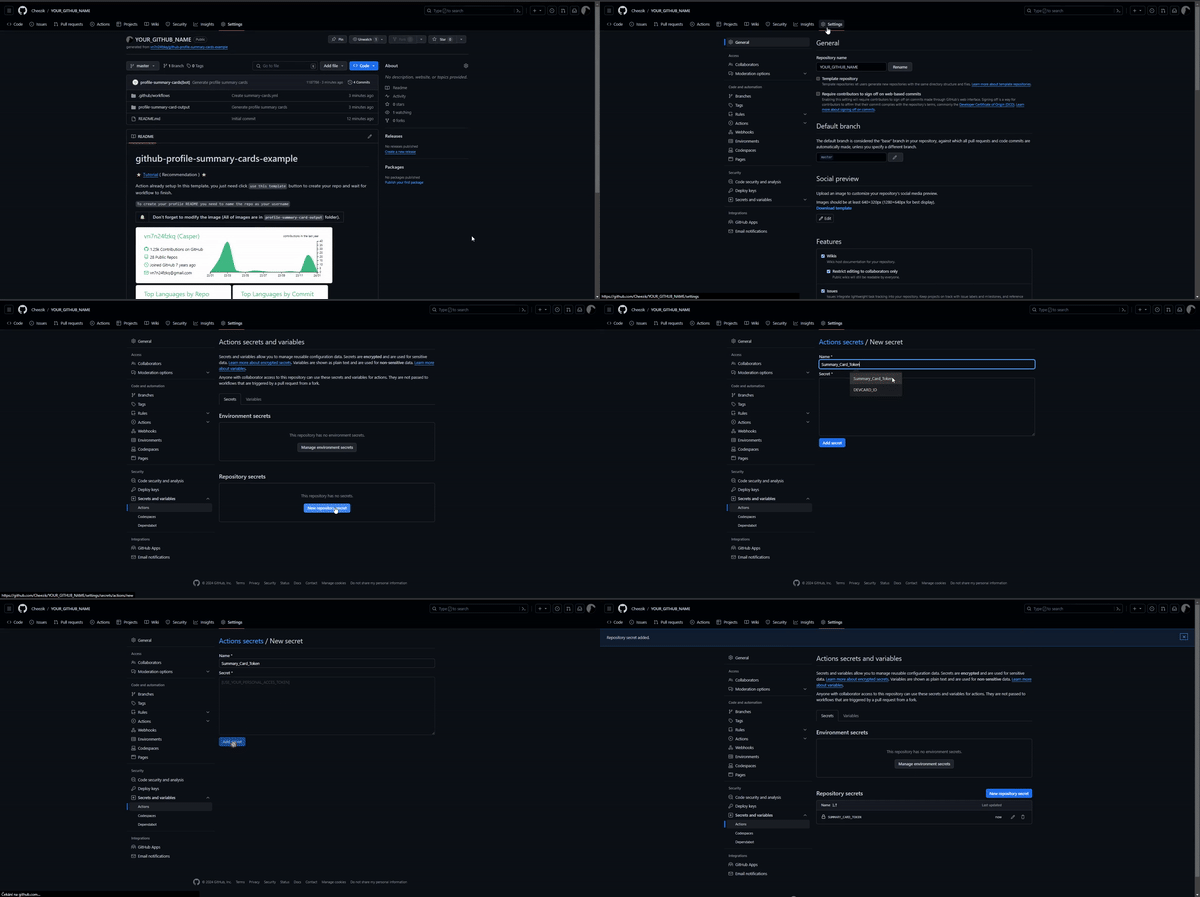
Now that we have obtained the Secret, we can move on the last step before deployment 🎉
-
Navigate back to Code -> .github -> workflows ->
profile-summary-cards.yml(or customized name you gave to the .yml file) -
Hit the pencil icon on the right side of your screen
-
Edit the
[YOUR_SECRET_TOKEN_NAME]inside theGITHUB_TOKEN: ${{ secrets.[YOUR_SECRET_TOKEN_NAME] }}with the Secret
- (Result should look something like this:
GITHUB_TOKEN: ${{ secrets.SUMMARY_CARD_TOKEN }})
- Commit changes
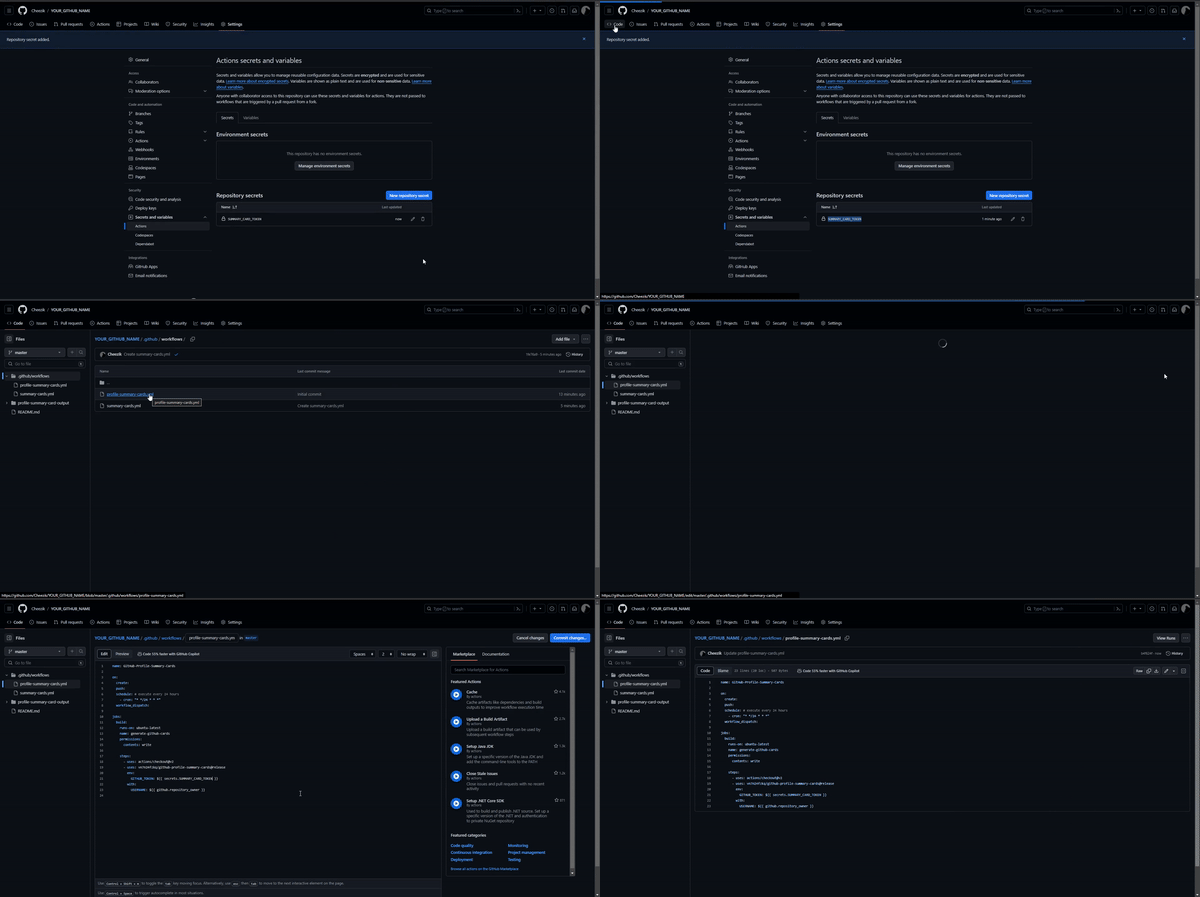
- Navigate to Actions -> on the left side
profile-summary-cards-> hit the buttonRun workflow-> Run workflow
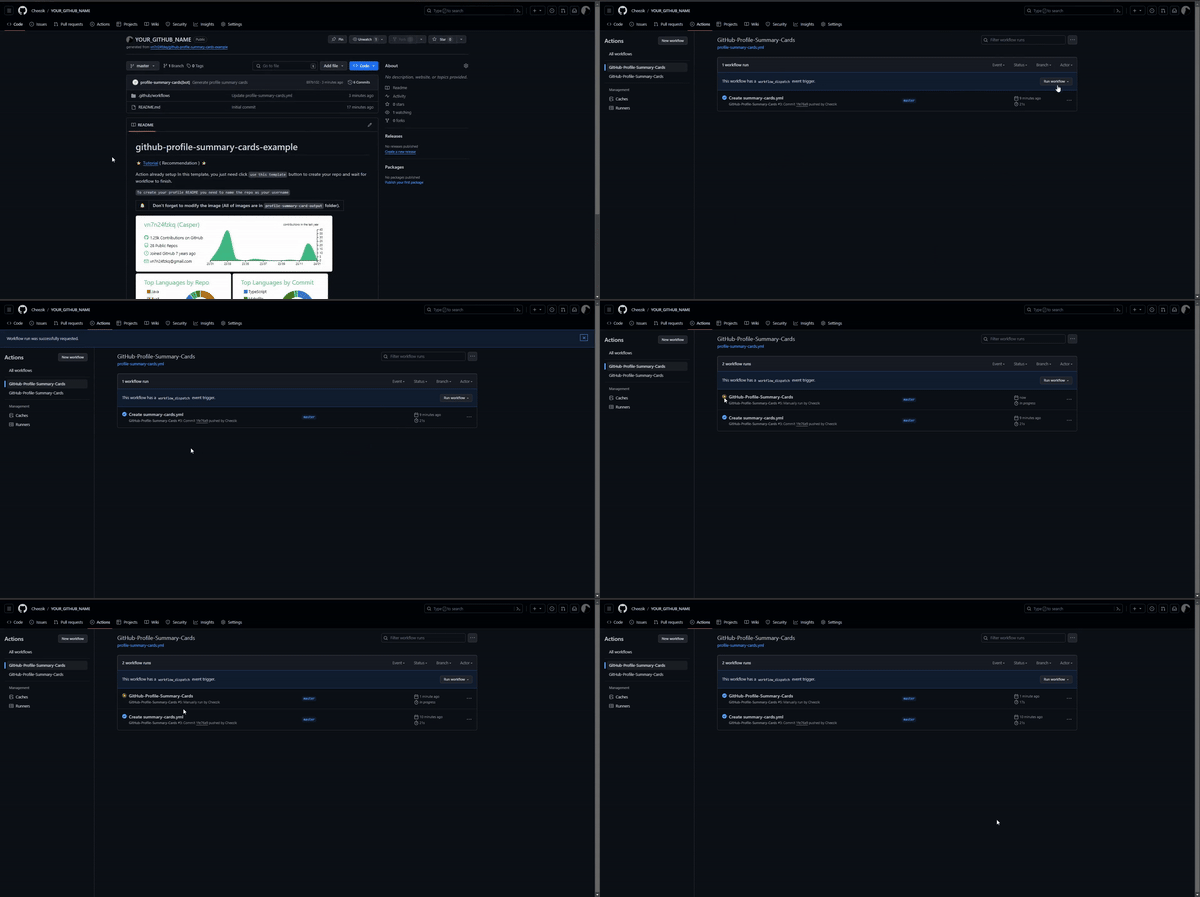
-
Wait till the workflow run appears (if not, please refresh the site)
- its normal that the loading indicator "gets stuck" at a certain point, just refresh the page.
-
If the loading indicators turn blue with a check inside, congratulations!
- if it for some reason wont, you've probably messed up somewhere (or this tutorial got outdated!) I recommend going from the beginning again OR making a new repo and renaming it after you've successfully managed to deploy this app.
You did it! now we are ready to choose the theme we want our cards to be in
-
Navigate to Code -> profile-summary-card-output -> Select a prefered theme -> README.md
- You can get really creative with the layout you want your cards to be in, but for simplicity sake, I will pick a whole bundle
-
Copy the desired markdown section.
-
Navigate to Code -> Hit on pencil button on the right side of your README.md file
-
Paste in the copied content and hit Commit changes!
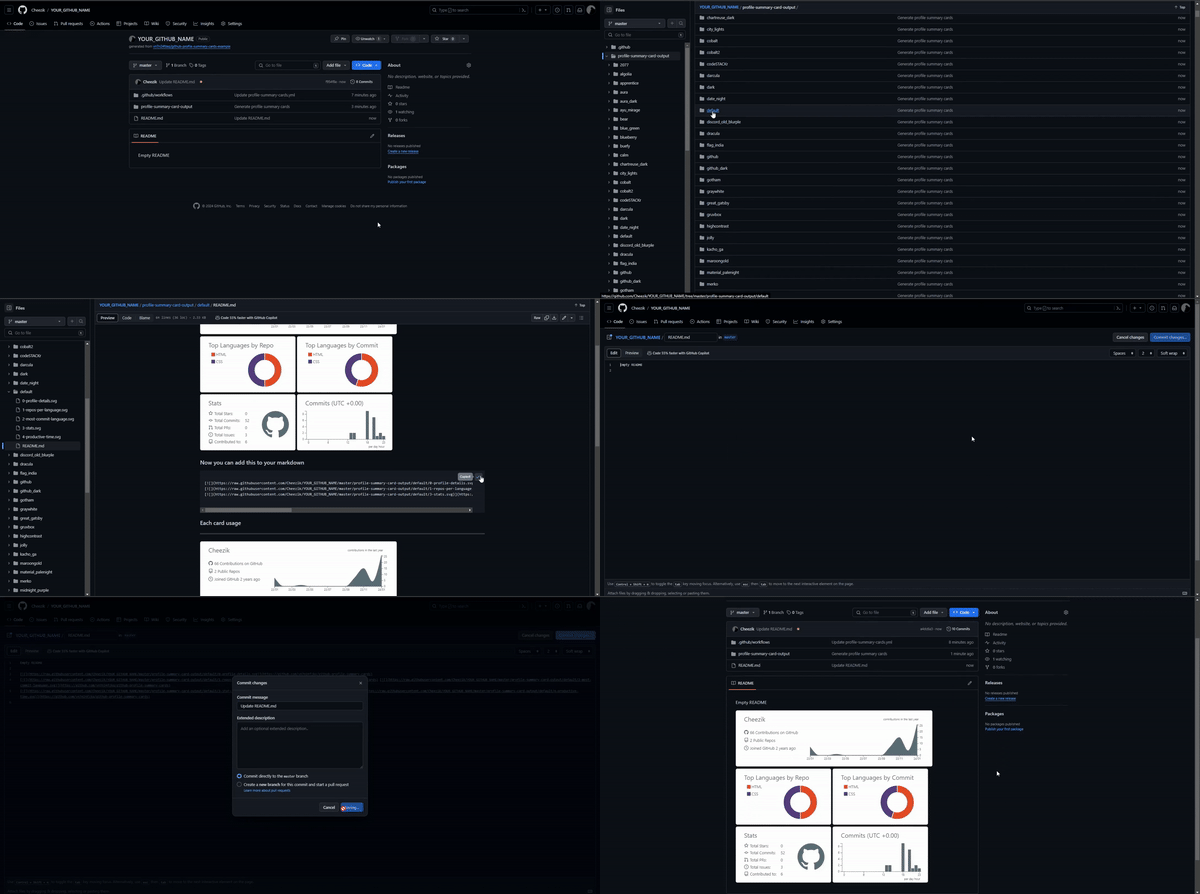
Now if everything went right. The cards should appear on your profile!
Don't be afraid to experiment with themes! There are many that might suit you better.
That's it is guys. Thank you for going through this tutorial. I hope you found it somewhat helpful.
if you find any typos or erros please open an issue so I can get on them asap.
Have a pleasant rest of your day ^^