Note
This plugin is a work in progress.
Bring AR to Situm Wayfinding.
By following this guide, you'll be able to integrate Situm AR plugin into your own application. Situm AR plugin is composed by:
- Flutter Code: available in this repo.
- AR binaries: available upon request through [email protected]. You'll need them to compile. We have 2 AR binaries:
- Android. We'll deliver a folder called unityExport
- iOS. We'll deliver a UnityFramework.xcframework.
Additionally, we've created an example app in case you want to take a look at a full application using both Situm SDK and Situm AR app.
First of all, you'll need a Situm account and a venue configured with Situm positioning & maps. To do this, follow this guide.
First, you'll need to setup Situm SDK Flutter plugin following the instructions contained on the following link.
Then, you may install situm_flutter_ar plugin:
flutter pub add situm_flutter_ar
-
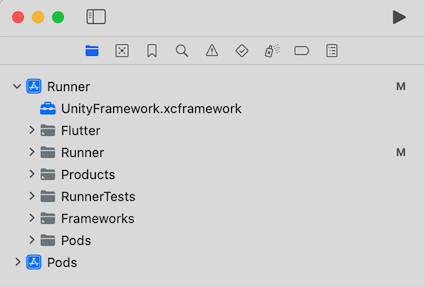
Import the UnityFramework.xcframework into your Runner project in XCode.

-
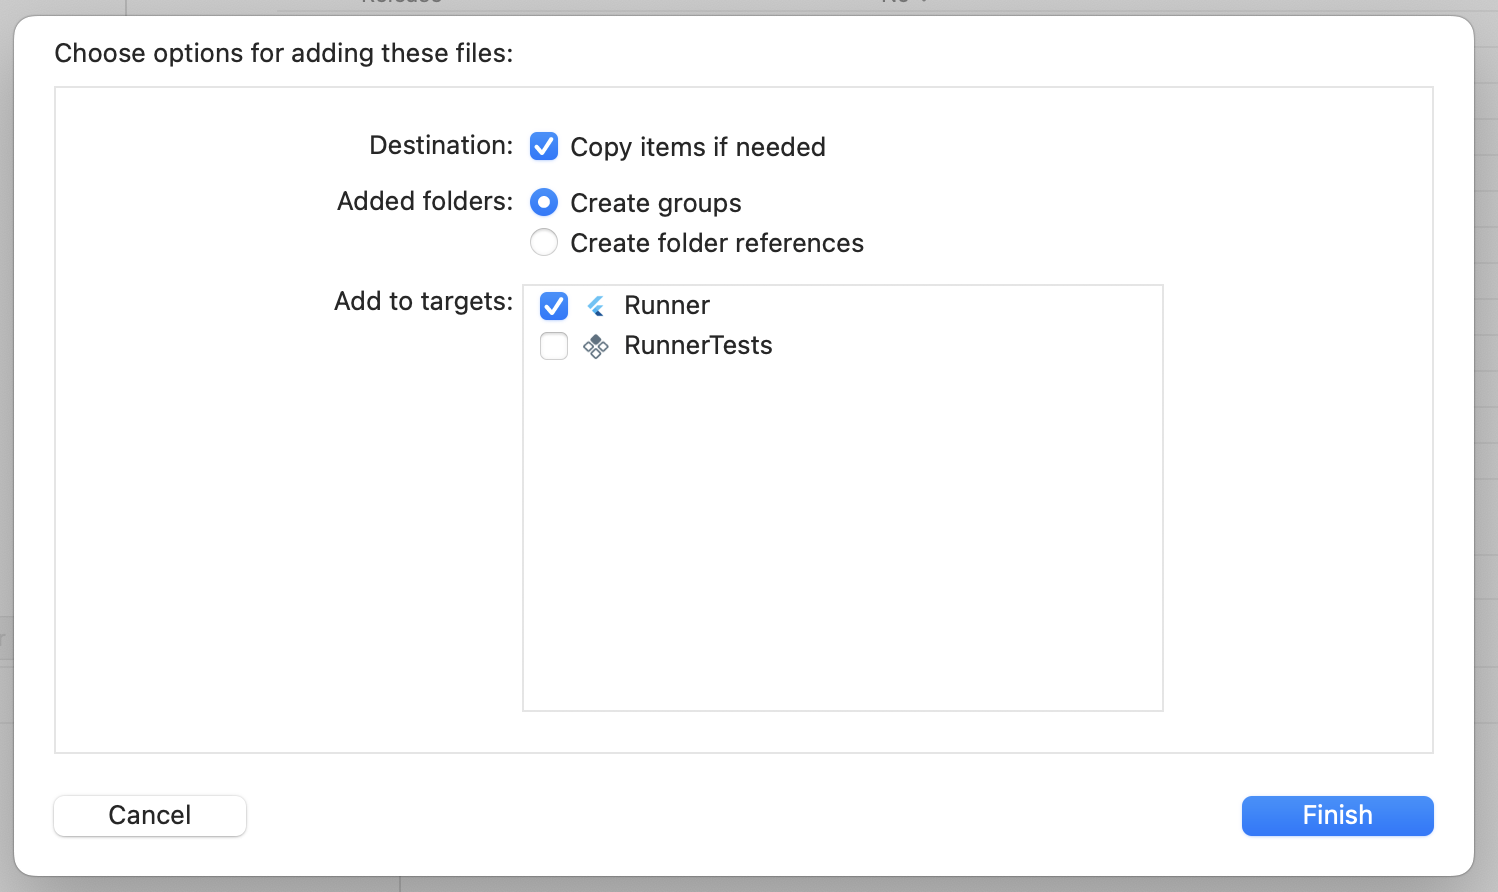
During the impoort, make sure you select the following options:
-
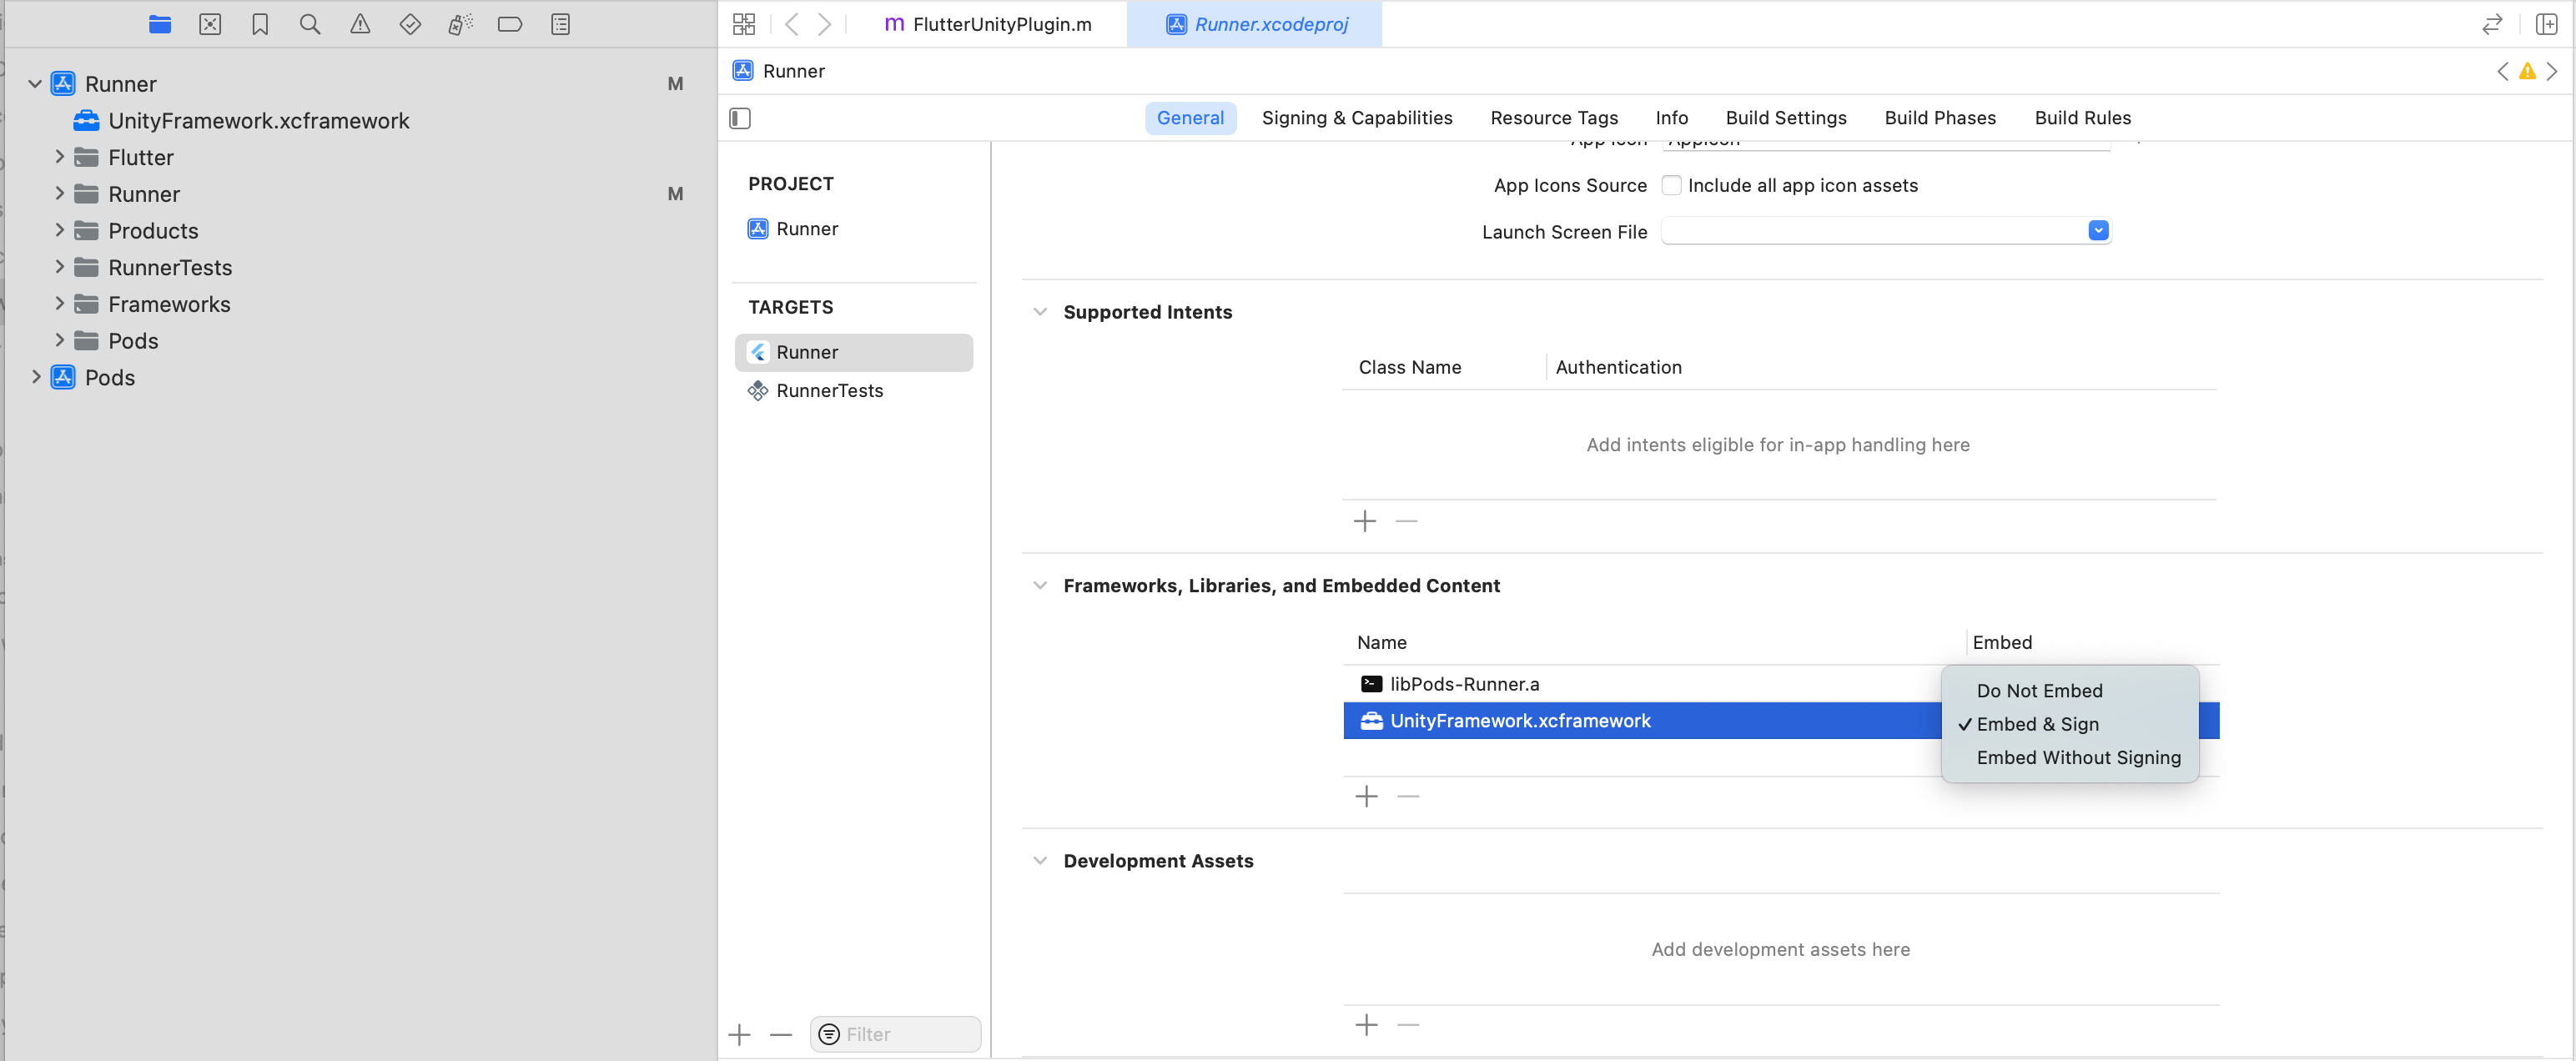
In the main Target of your app, under General > "Frameworks, Libraries and Embedded Content", select "Embed & Sign" for the UnityFramework.xcframework.

-
In your
Info.plistfile, add theUIViewControllerBasedStatusBarAppearancekey with a value offalseto prevent UnityFramework from modifying the visibility of the system's status bar:<key>UIViewControllerBasedStatusBarAppearance</key> <false/> -
Under
<your_flutter_project>/ios, run:pod install
After this, you may compile & run your application:
flutter run
- Copy the AR binaries (unityExport folder in Android) into the android folder of your Flutter project.
- Add the following snippet to the end of the
<your_flutter_project>/android/settings.gradlefile (surely you have similar includes in there!):include ':unityExport' include ':unityExport:xrmanifest.androidlib' - Complete your
<your_flutter_project>/android/build.gradleusing the following indications://... allprojects { repositories { // You may already have these three ones: google() mavenCentral() maven { url "https://repo.situm.es/artifactory/libs-release-local" } // Add this: flatDir { dirs "${project(':unityExport').projectDir}/libs" } } - Add the following permission to the
<your_flutter_project>/android/app/src/main/AndroidManifest.xmlfile:<uses-permission android:name="android.permission.WAKE_LOCK"/> - Add this line to your
gradle.propertiesfile:unityStreamingAssets=.unity3d, google-services-desktop.json, google-services.json, GoogleService-Info.plist
After this, you may compile your application:
flutter run
We assume that you already have an application that uses Situm SDK. You may build one by following our Quickstart Guide for Flutter.
The example app of this repository contains a complete example on how to integrate the AR plugin. Nonetheless the main steps are described below.
First of all, you'll need to wrap your MapView widget inside the ARWidget. This way, the user will be presented with the MapView, and upon clicking on an "AR button" (only visible on dynamic navigation), the ARWidget will appear on the screen.
  @override
  Widget build(BuildContext context) {
    return Scaffold(
      body: ARWidget(
        buildingIdentifier: buildingIdentifier,
        onCreated: onUnityViewCreated,
        onPopulated: onUnityViewPopulated,
        onDisposed: onUnityViewDisposed,
        mapView: MapView(
          key: const Key("situm_map"),
          configuration: MapViewConfiguration(
            // Your Situm credentials.
            // Copy config.dart.example if you haven't already.
            situmApiKey: situmApiKey,
            // Set your building identifier:
            buildingIdentifier: buildingIdentifier,
            viewerDomain: "https://map-viewer.situm.com",
            apiDomain: "https://dashboard.situm.com",
            remoteIdentifier: remoteIdentifier,
            persistUnderlyingWidget: true,
          ),
          onLoad: onMapViewLoad,
        ),
      ),
    );
  }
Then, you'll also need to forward certain events from the Situm SDK to the AR Plugin:
@override
  void initState() {
    super.initState();
    //Init Situm SDK
    var sdk = SitumSdk();
    sdk.init(null, situmApiKey);

    // Location:
    sdk.onLocationUpdate((location) {
      //...
      arController.setLocation(location);
    });

    // Navigation:
    sdk.onNavigationCancellation(() {
      //...
      arController.setNavigationCancelled();
    });

    sdk.onNavigationDestinationReached(() {
      //...
      arController.setNavigationDestinationReached();
    });

    sdk.onNavigationOutOfRoute(() {
      //...
      arController.setNavigationOutOfRoute();
    });

    sdk.onNavigationProgress((progress) {
      //...
      arController.setNavigationProgress(progress);
    });

    sdk.onNavigationStart((route) {
      //...
      arController.setNavigationStart(route);
    });

    //...

    startPositioning();
  }
Also, you'll need to make sure that the AR Plugin can interact with the MapView:
 void onMapViewLoad(MapViewController controller) {

    //...

    arController.onMapViewLoad(controller);
    controller.onPoiSelected((poiSelectedResult) {
      arController.setSelectedPoi(poiSelectedResult.poi);
    });
  }
Finally, you'll need to ask for the Camera permissions (additionally to the ones needed by Situm Flutter SDK). Here's an example on how we do it.
Please refer to CHANGELOG.md for a list of notable changes for each version of the plugin.
You can also see the tags on this repository.
You will need to sign a Contributor License Agreement (CLA) before making a submission. Learn more here.
This project is licensed under the MIT - see the LICENSE file for further details.
More info is available at our Developers Page.
For any question or bug report, please send an email to [email protected]


