UDEMY COURSE WITH DISCOUNTED - Step by Step Development of this repository -> https://www.udemy.com/course/microservices-architecture-and-implementation-on-dotnet/?couponCode=APRIL2021
See the overall picture of implementations on microservices with .net tools on real-world e-commerce microservices project;
There is a couple of microservices which implemented e-commerce modules over Catalog, Basket, Discount and Ordering microservices with NoSQL (MongoDB, Redis) and Relational databases (PostgreSQL, Sql Server) with communicating over RabbitMQ Event Driven Communication and using Ocelot API Gateway.
We have implemented below features over the run-aspnetcore-microservices repository.
- ASP.NET Core Web API application
- REST API principles, CRUD operations
- MongoDB database connection and containerization
- Repository Pattern Implementation
- Swagger Open API implementation
- ASP.NET Web API application
- REST API principles, CRUD operations
- Redis database connection and containerization
- Consume Discount Grpc Service for inter-service sync communication to calculate product final price
- Publish BasketCheckout Queue with using MassTransit and RabbitMQ
- ASP.NET Grpc Server application
- Build a Highly Performant inter-service gRPC Communication with Basket Microservice
- Exposing Grpc Services with creating Protobuf messages
- Using Dapper for micro-orm implementation to simplify data access and ensure high performance
- PostgreSQL database connection and containerization
- Sync inter-service gRPC Communication
- Async Microservices Communication with RabbitMQ Message-Broker Service
- Using RabbitMQ Publish/Subscribe Topic Exchange Model
- Using MassTransit for abstraction over RabbitMQ Message-Broker system
- Publishing BasketCheckout event queue from Basket microservices and Subscribing this event from Ordering microservices
- Create RabbitMQ EventBus.Messages library and add references Microservices
- Implementing DDD, CQRS, and Clean Architecture with using Best Practices
- Developing CQRS with using MediatR, FluentValidation and AutoMapper packages
- Consuming RabbitMQ BasketCheckout event queue with using MassTransit-RabbitMQ Configuration
- SqlServer database connection and containerization
- Using Entity Framework Core ORM and auto migrate to SqlServer when application startup
- Implement API Gateways with Ocelot
- Sample microservices/containers to reroute through the API Gateways
- Run multiple different API Gateway/BFF container types
- The Gateway aggregation pattern in Shopping.Aggregator
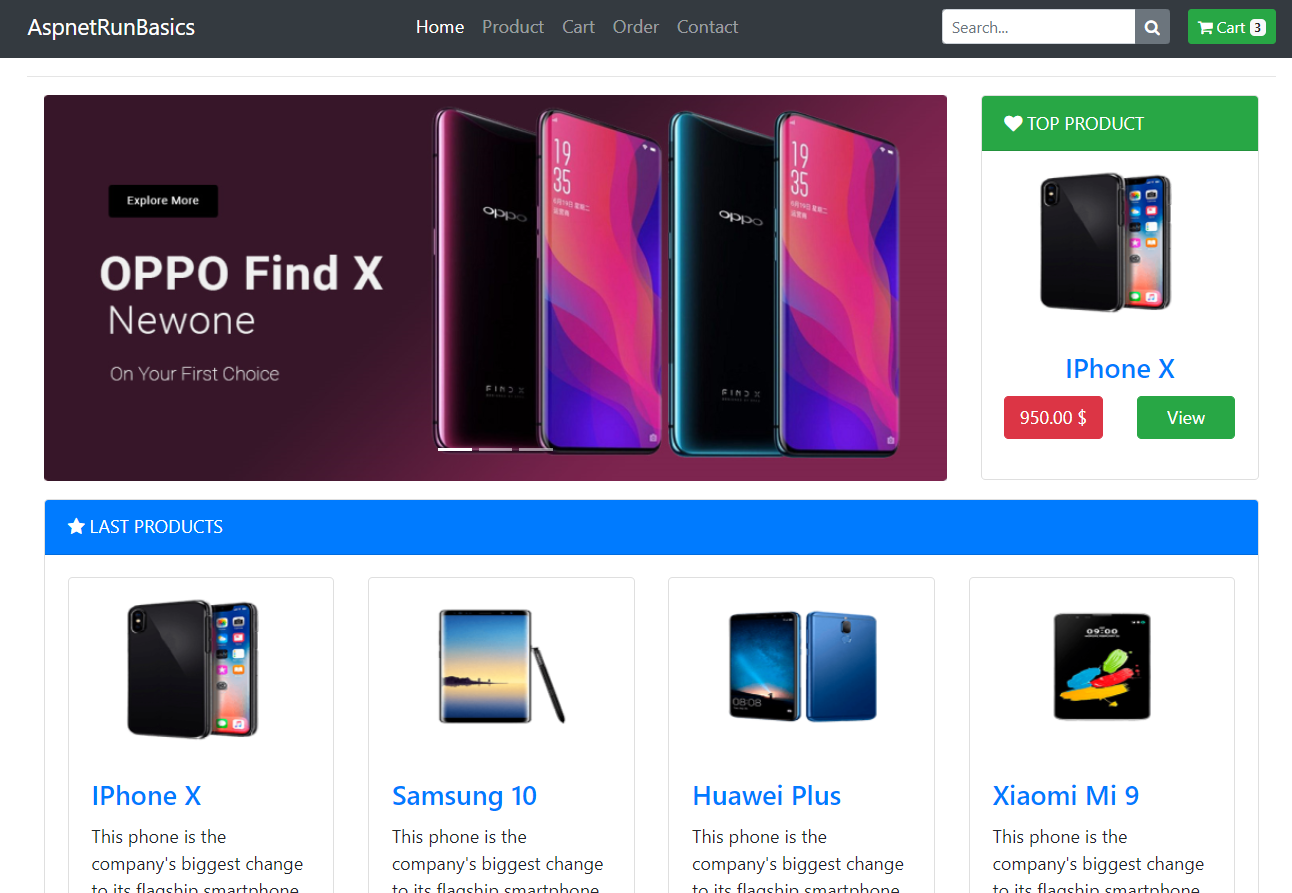
- ASP.NET Core Web Application with Bootstrap 4 and Razor template
- Call Ocelot APIs with HttpClientFactory and Polly
- Implementing Centralized Distributed Logging with Elastic Stack (ELK); Elasticsearch, Logstash, Kibana and SeriLog for Microservices
- Use the HealthChecks feature in back-end ASP.NET microservices
- Using Watchdog in separate service that can watch health and load across services, and report health about the microservices by querying with the HealthChecks
- Making Microservices more resilient Use IHttpClientFactory to implement resilient HTTP requests
- Implement Retry and Circuit Breaker patterns with exponential backoff with IHttpClientFactory and Polly policies
- Use Portainer for Container lightweight management UI which allows you to easily manage your different Docker environments
- pgAdmin PostgreSQL Tools feature rich Open Source administration and development platform for PostgreSQL
- Containerization of microservices
- Containerization of databases
- Override Environment variables
You will need the following tools:
Follow these steps to get your development environment set up: (Before Run Start the Docker Desktop)
- Clone the repository
- Once Docker for Windows is installed, go to the Settings > Advanced option, from the Docker icon in the system tray, to configure the minimum amount of memory and CPU like so:
- Memory: 4 GB
- CPU: 2
- At the root directory which include docker-compose.yml files, run below command:
docker-compose -f docker-compose.yml -f docker-compose.override.yml up -d-
Wait for docker compose all microservices. That’s it! (some microservices need extra time to work so please wait if not worked in first shut)
-
You can launch microservices as below urls:
-
Catalog API -> http://host.docker.internal:8000/swagger/index.html
-
Basket API -> http://host.docker.internal:8001/swagger/index.html
-
Discount API -> http://host.docker.internal:8002/swagger/index.html
-
Ordering API -> http://host.docker.internal:8004/swagger/index.html
-
Shopping.Aggregator -> http://host.docker.internal:8005/swagger/index.html
-
API Gateway -> http://host.docker.internal:8010/Catalog
-
Rabbit Management Dashboard -> http://host.docker.internal:15672 -- guest/guest
-
Portainer -> http://host.docker.internal:9000 -- admin/admin1234
-
pgAdmin PostgreSQL -> http://host.docker.internal:5050 -- [email protected]/admin1234
-
Elasticsearch -> http://host.docker.internal:9200
-
Kibana -> http://host.docker.internal:5601
-
Web Status -> http://host.docker.internal:8007
-
Web UI -> http://host.docker.internal:8006
- Launch http://host.docker.internal:8007 in your browser to view the Web Status. Make sure that every microservices are healthy.
- Launch http://host.docker.internal:8006 in your browser to view the Web UI. You can use Web project in order to call microservices over API Gateway. When you checkout the basket you can follow queue record on RabbitMQ dashboard.
Note: If you are running this application in macOS then use
docker.for.mac.localhostas DNS name in.envfile and the above URLs instead ofhost.docker.internal.
- Mehmet Ozkaya - Initial work - mehmetozkaya
See also the list of contributors who participated in this project. Check also gihtub page of repository.


