-
Notifications
You must be signed in to change notification settings - Fork 0
Level Setup Tutorial
These instructions are for VSDK Unreal. For VSDK Unity documentation, see the VSDK Unity wiki.
After you’ve installed VSDK and created or migrated your project, you’re ready to set up a new level. This tutorial shows you how to create a simple map and character, and set up navigation and teleportation.
-
Create a map.
Click File > New Level.
Select the Default option to create a new level with default lighting and a flat plane. -
Manually create the VR Character.
VR Characters can also be created automatically by configuring the spawn point.Delete the default spawn point in the level.
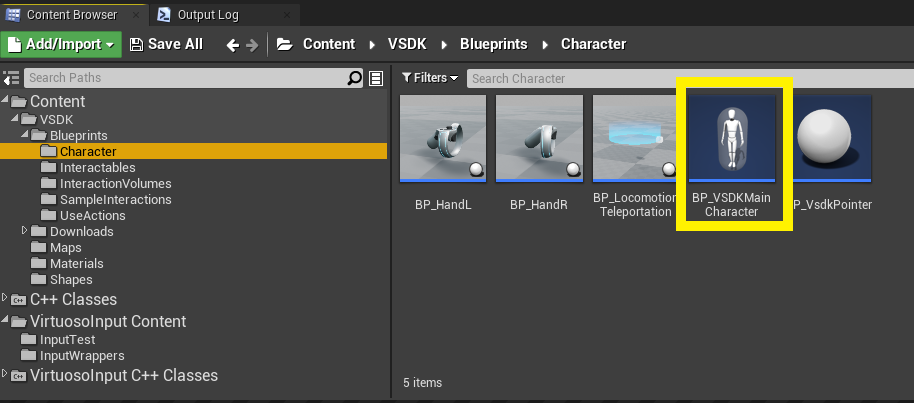
Navigate to Content/VSDK/Blueprints/Character.
Drag the BP_VSDKMainCharacter blueprint into the scene.

-
Include the VSDK input wrapper.
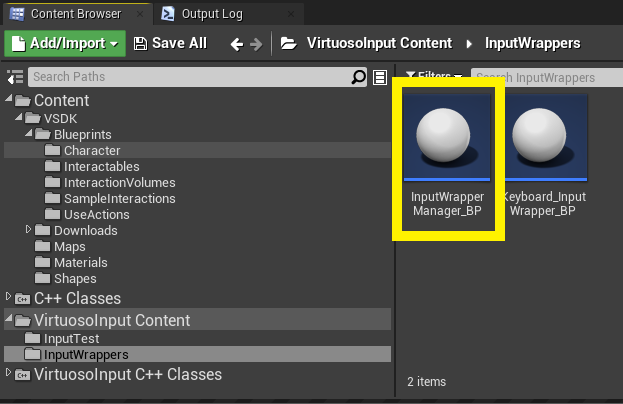
VSDK’s input wrapper plugin maps device inputs to VSDK inputs, which is useful when working with hand-tracking devices that don’t support their own input axes.Navigate to VirtuosoInput Content/InputWrappers.
Drag InputWrapperManager_BP into the scene.

-
Add a navigation volume to the scene.
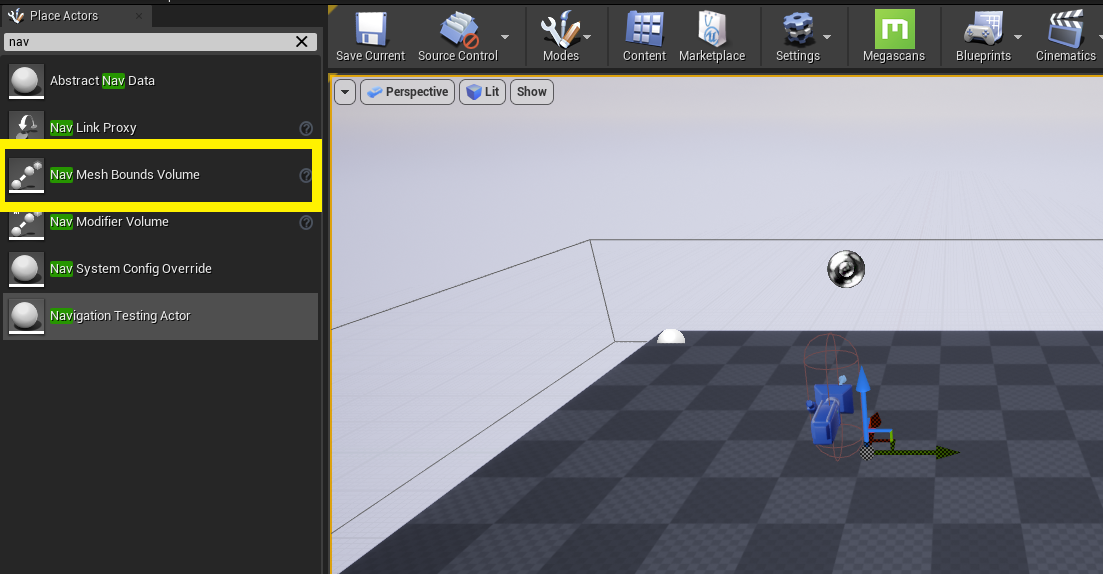
Open the Place Actors tab.
Select Nav Mesh Bounds Volume and drag it into the scene.

-
Set up the bounds of where the user can teleport.
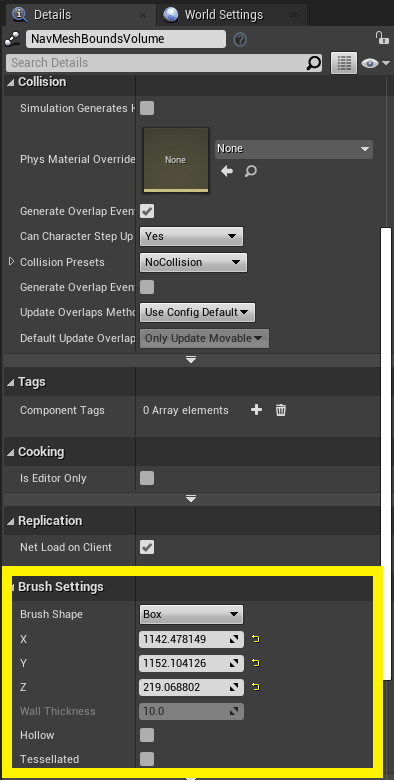
Open the Details tab.
In the Brush Settings section, scale the X and Y dimensions of the navigation mesh to cover the map.

-
Build the navigation path data for the level.
Open the Build menu.
Click Build Paths under the Navigation subheading.
(To view the resulting Nav Mesh, hit 'P' to toggle the Navigation view in the Unreal Engine editor.) -
Test your new level.
Open the Play menu.
Click VR Preview.
Use the left joystick or trackpad of your VR device to aim, and use a left trigger click to teleport.