-
Notifications
You must be signed in to change notification settings - Fork 29
iOS create empty project
This article aims to help you extract the ARApp2 functions which you can later use to start a whole new project with or adopt those functions to your existing project.
First off, create a single view project on Xcode and download example codes from the ARToolKit iOS package. Next import all required frameworks into your new project by looking at what the example code has imported.
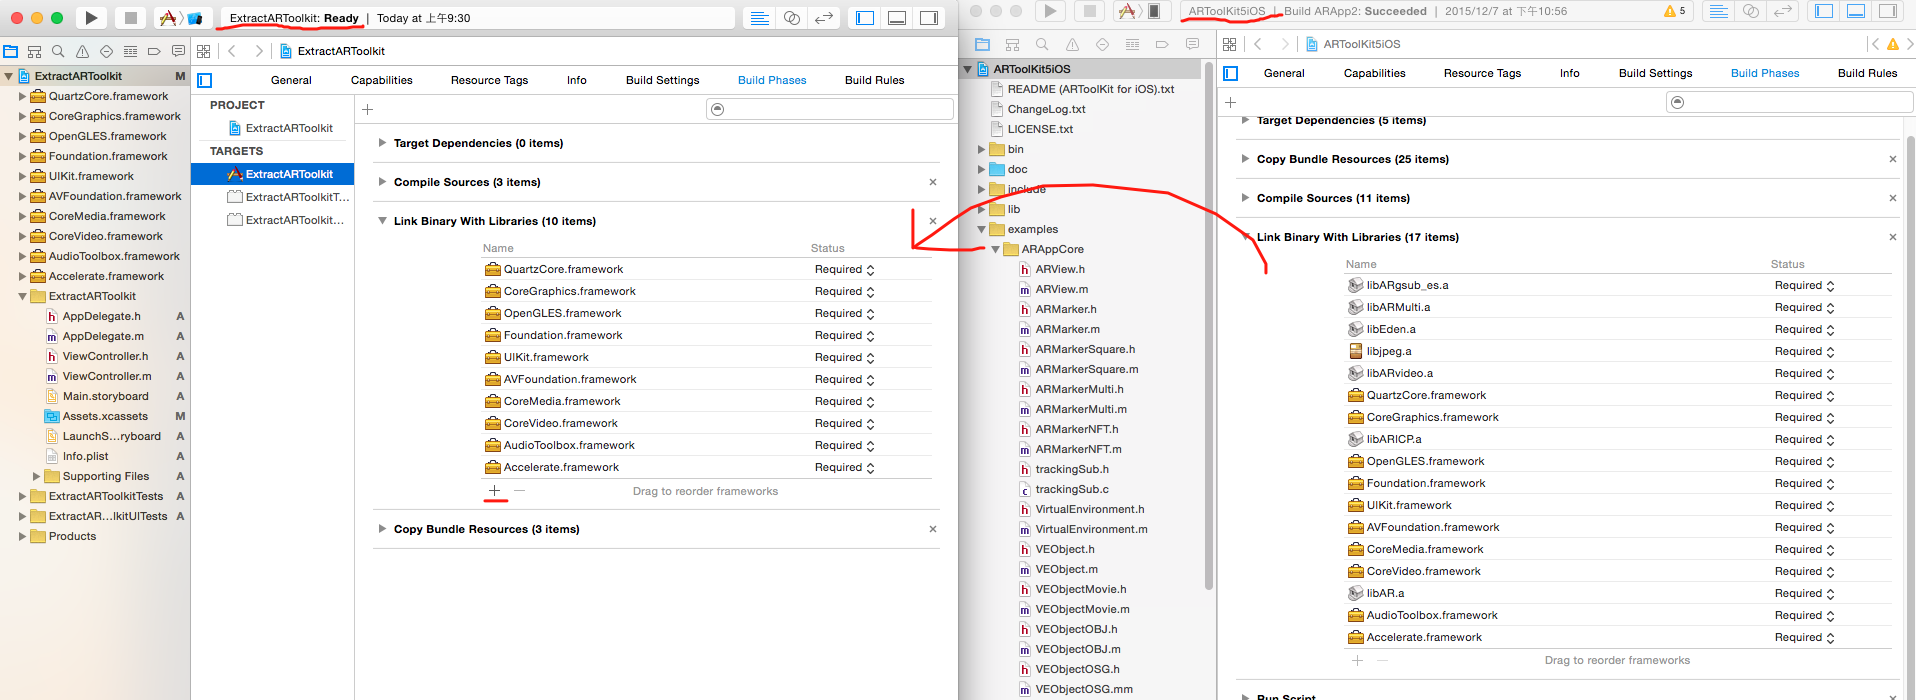
Next let's import all necessary files into your project (Add files to "ProjectName"). You will need to import:
- ARAppCore
- include
- lib
- bin
folders into your project. We don’t have to move ARApp2 viewController yet. Once you’re done with it, you should get a hierarchy like the following. (You can put things in order as you wish, you don’t have to use the same hierarchy) Remember to select copy items if needed and create groups, because you will want files you’ve selected to be copied to your new project. creating a folder reference will put the files to copy bundle resources in build phase, which is not what we want. Also deselect add to target for not to compile what we’ve added. We will fix what to be compiled in compiled sources in Build Phase later. Import libraries used by example code (ARApp2 target) in your new project (In build phases). You can find them in lib folder. **You should have added 11 frameworks and 7 static libraries by now. **
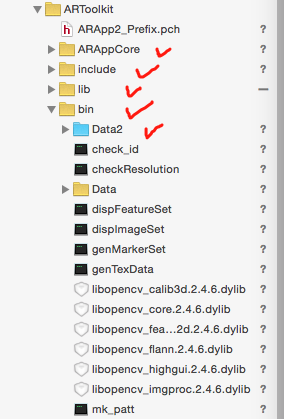
(Don't worry about the Data2 folder right now, we come to that later)
Our next step is to change Build Settings to what the example code’s build setting look like. The following are the items that need to be changed:
-
Build Options
- enable bitcode -> NO
-
Apple LLVM - Code Generation
- no common blocks -> NO
-
Apple LLVM - Language
- C language dialect - compiler default
- precompile prefix header - YES
- prefix header - put in the absolute path of ARApp2_Prefix.pch (It is handy to use terminal.app to get file type. Find this file in /examples/ARApp2/ARApp2_Prefix.pch and add it like you did above.)
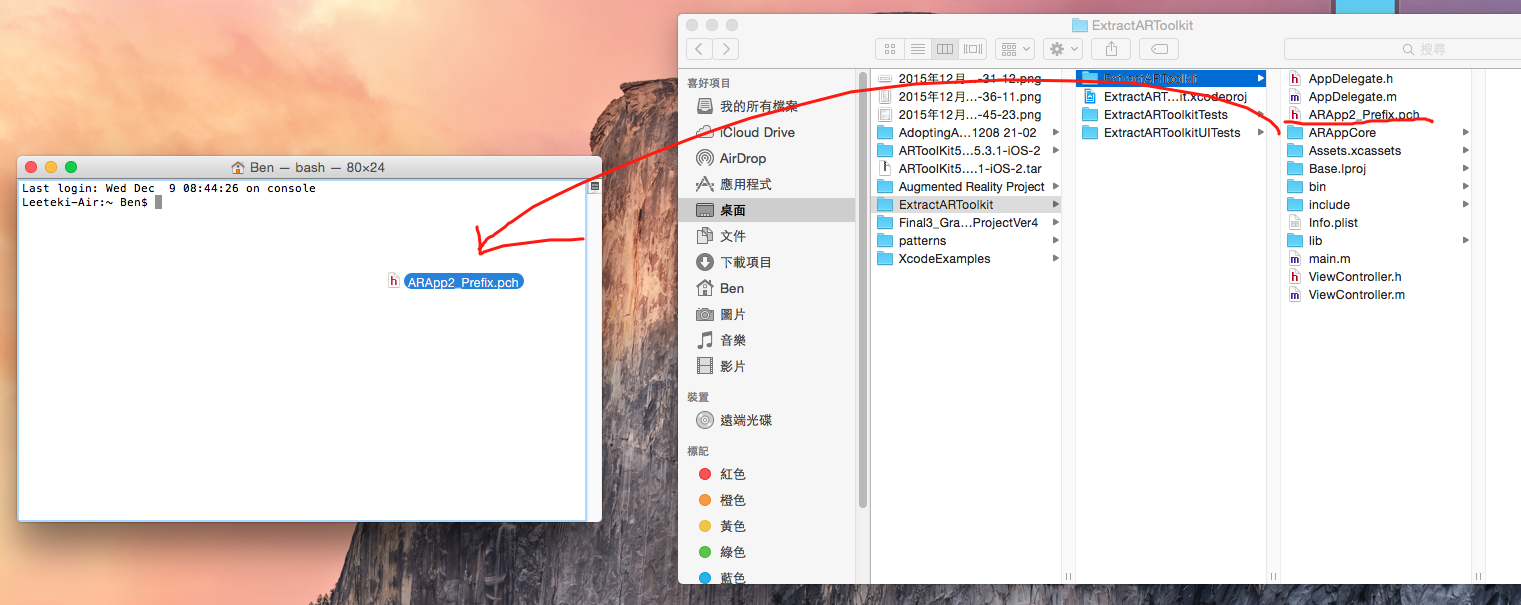
- Apple LLVM - Language - C++
- C++ language dialect -> C++11 [-std=c++11]
- Apple LLVM Language Modules
- enable modules (C and Objective-C) -> NO
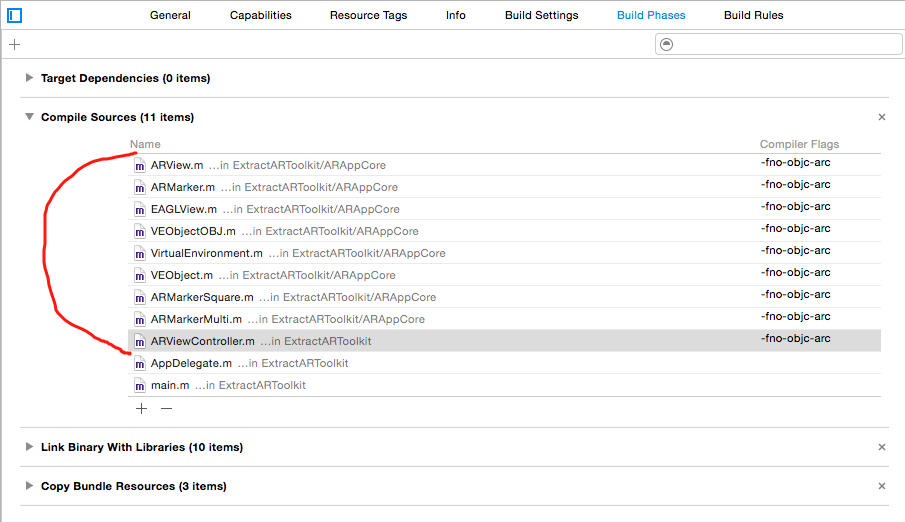
After we’re done with build settings, we will fix what should be compiled. Go to build phases/Compile Sources and add in files as example code did. Add in all the checked in files.
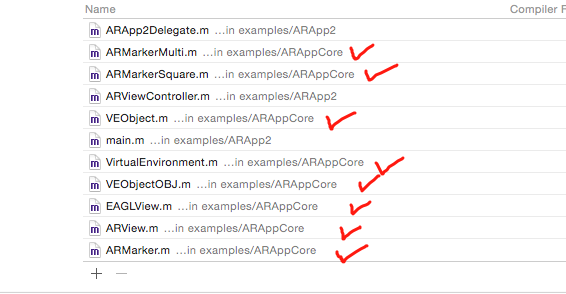
Next we will start to work on the viewController. First we need to rename ViewController to ARViewController as there are several delegate and protocols (I assume) using the name ARViewController. It would be rather hassling to use other names instead of ARViewController. Because you’ve changed the name of ViewController, you will need to update this information to storyboard.

Now we copy everything from /examples/ARApp2/ARViewController.m to your own ARViewController.m. And repeat what you did above for ARViewController.h. Don’t panic if you see many errors popping out because the paths of headers and libs aren’t properly set yet. Hit build to see what errors come out. In most cases it would be .h files not found. Go to Build Settings -> Search Paths -> Header Search Paths and put in the path for “include” folder. Re-reference ARAppCore, lib, include and bin like below (if needed). See trouble shootings below if the errors are not solved.
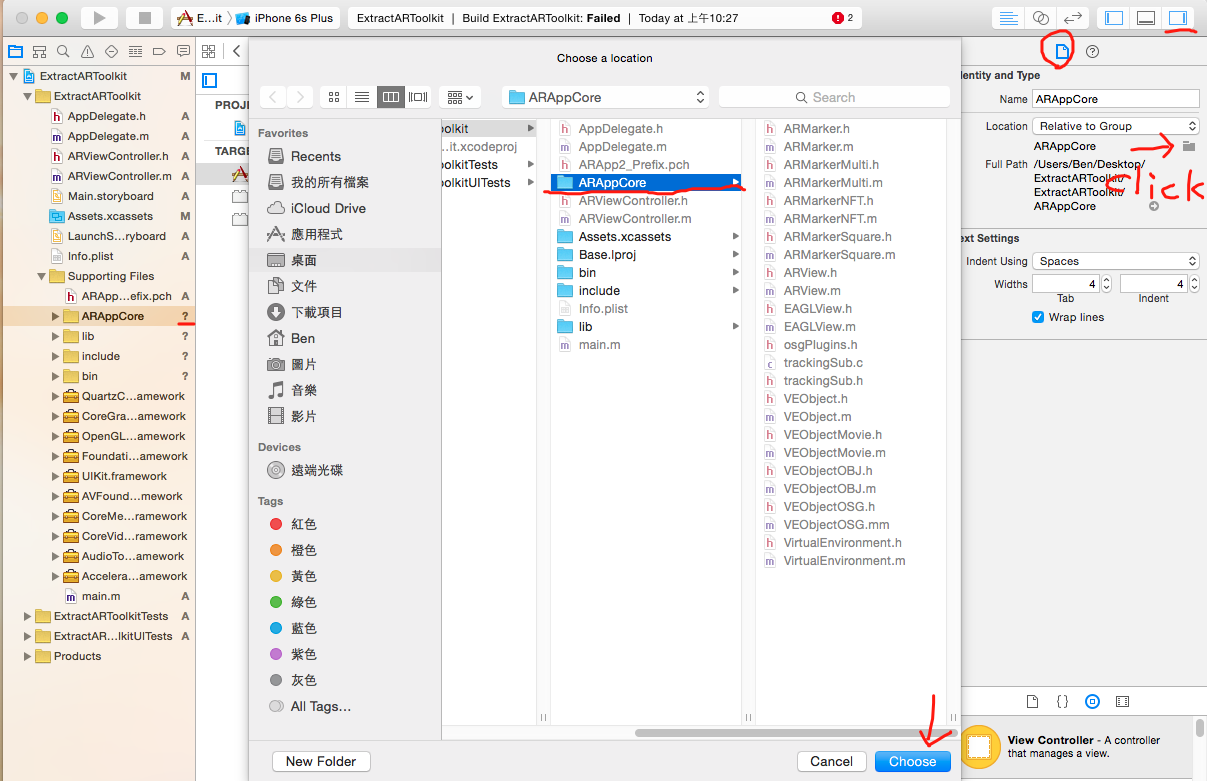
Remember to do product clean before building. If attempt to build again this time, you will run into errors related to ARC structure that we use. What we’re going to do here is to separate ARToolkit classes with the rest of our classes: ARToolkit classes will not adopt ARC and other classes will. Put in flag: -fno-objc-arc to tell the compiler not to use ARC in those classes.
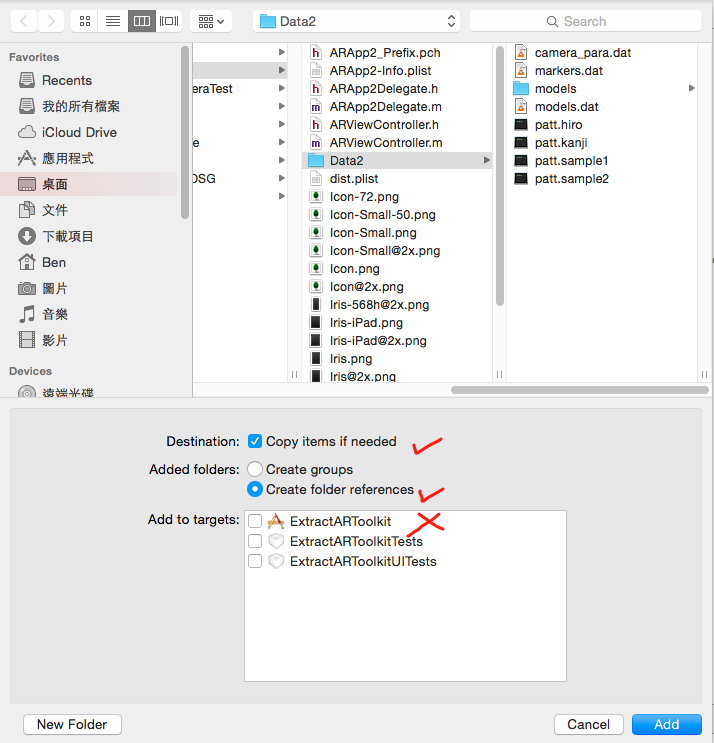
If everything went right for you, you should see compile successfully and a black screen on your iPhone. To fix that, there is one more thing that you need to do. If you look at Debug area, you’ll see NSLog of errors loading camera parameters. What we need to do here is to add another folder named Data2 into your project. (Find it in example code: /examples/ARApp2/Data2). Add Data2 folder to Copy Bundle Resources like below. It is important here to check Create folder reference instead of Create groups because you want to add the folder to copy bundle resources.
Everything done! You should see your new project work just as ARApp2 does.
- Cannot find ar.h
- Solution: Go to Build Settings -> Search Paths -> Header Search Paths and put in the path for “include” and “ios511” folder.
- Error loading pattern file Data2/patt.hiro.
- Solution: This NSLog comes from ARViewController.m. Make sure you have copied the right ARViewController.m and ARViewController.h files. (You should use what is in ARApp2 not ARApp)
- _jpeg_std_error (or similar relating to libjpeg
- Solution: Go to Build Phases -> Link Library With Libraries -> Add (+) and add the libjpeg.a located in lib/ios7