#AuthWiki
-
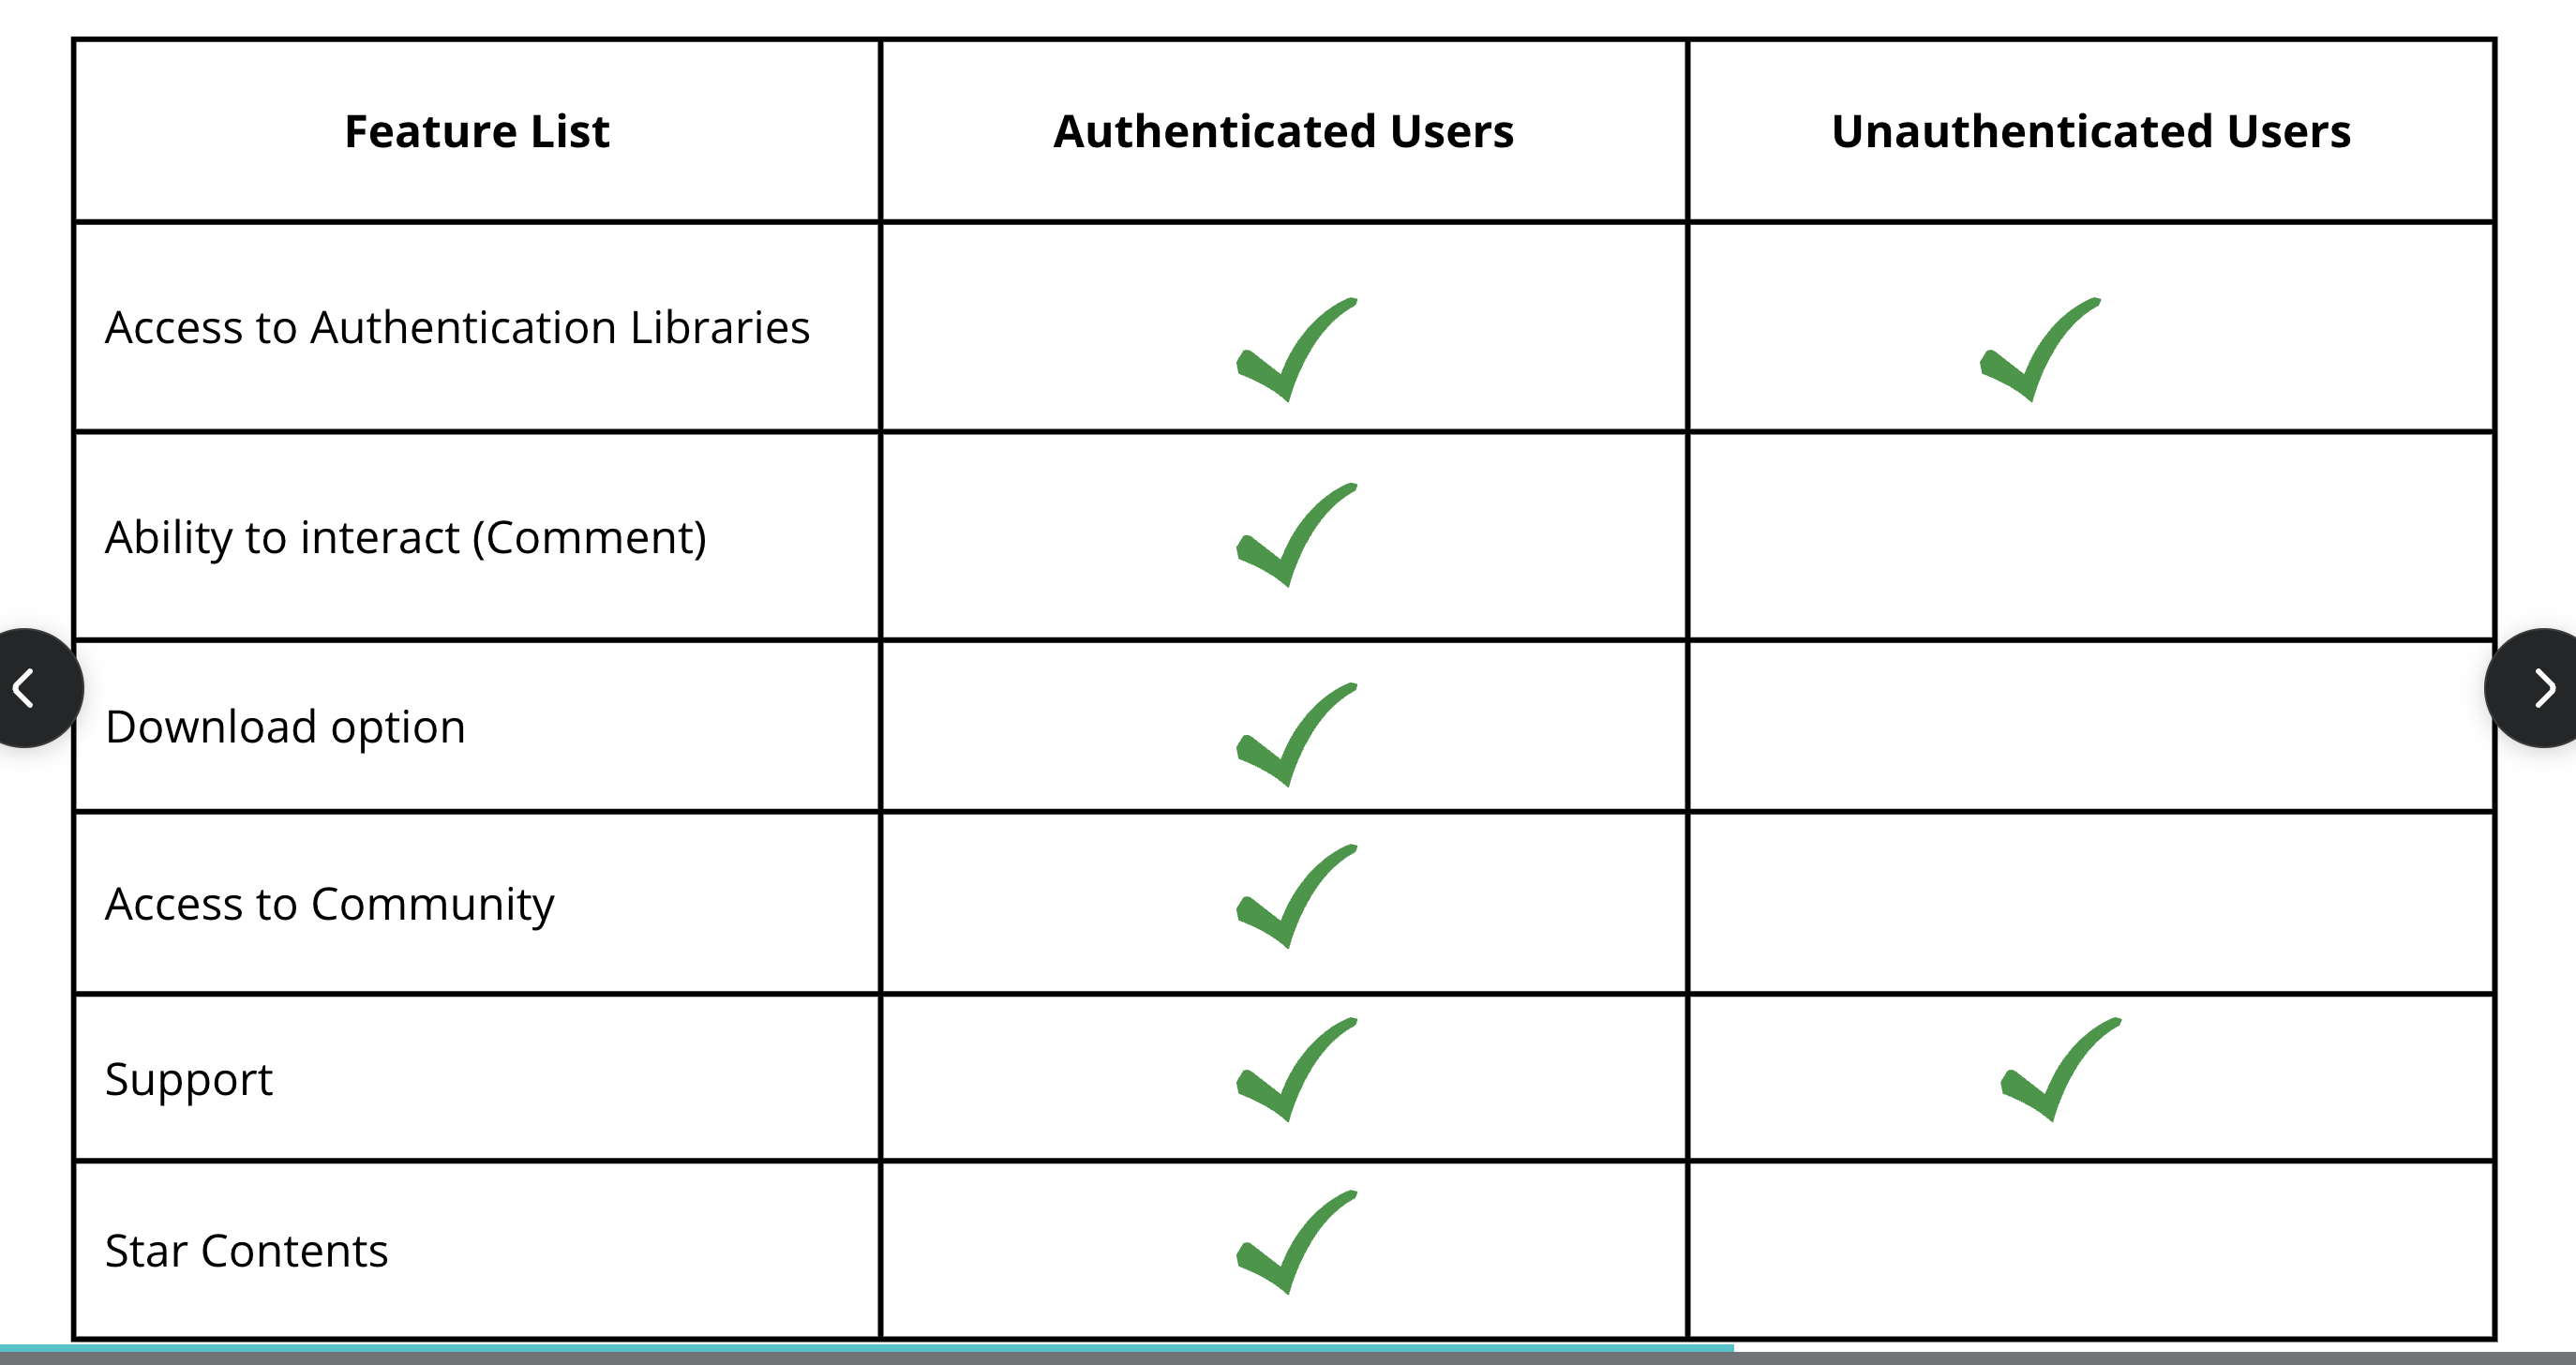
Unauthenticated user can view:
-
Authenticated user can:
- They have access to all the Unauthenticated user features.
- Download Authentication Library
- Can Comment and make reactions on Authentication Library
- Can Edit Profile and logout
- Can download Authentication Library
-
Visit the Repository to the Project on Github Website: https://github.com/zuri-training/AuthWiki_Team9
-
Fork the repository: Click the "Fork" button on the upper right corner of the Repo page.
-
Make a Local Clone: Clone the forked repository to your local machine (computer)
- Click on the "Code" button on the Repo page
- Copy the URL for the forked Repo "https://github.com/github_username/AuthWiki_Team9.git"
- Create a Folder on your Local machine / Computer for the project Workspace
- Open Command prompt / Terminal in the same folder location
- In your Terminal, type:
git clone https://github.com/github_username/AuthWiki_Team9.git
- Add a Remote to Upstream to your Repo:
- In your terminal, type:
git clone https://github.com/github_username/AuthWiki_Team9.git
- In your terminal, type:
- Pull from upstream to download all changes in the project using
git pull upstream main
-
Open the Project up in your code Editor
-
Complete your assigned task / Feature on your local machine.
-
When you are ready to add and push your feature / task to the Repo,
- Add your changes using:
git add file_name - Commit your changes to the branch with a message using
git commit -m "Commit message"
- Add your changes using:
- To make sure there are no conflict, Pull from upstream using
git pull upstream main - Push your branch changes to the Repo using
git push upstream main
- Once you push the changes to your repo, the
Compare & pull requestbutton will appear in GitHub page of your repo. - Click the button and make your request. Leave a comment in your request
- Click Create pull request to open a new pull request

