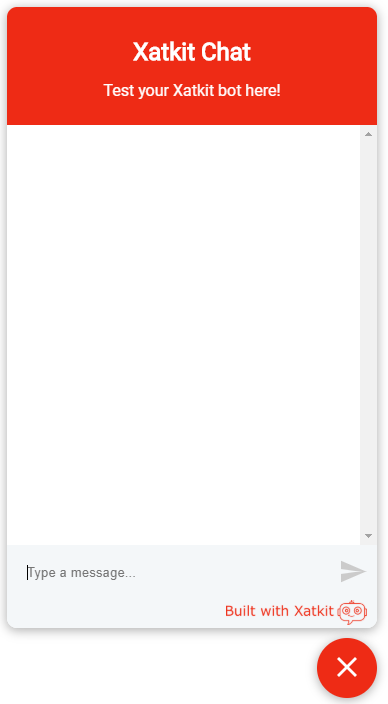
A React component to embed Xatkit chatbots in websites.
npm install --save xatkit-chat-widget
yarn add xatkit-chat-widget
import {renderXatkitWidget} from 'xatkit-chat-widget'
import 'xatkit-chat-widget/lib/xatkit.css';

renderXatkitWidget();
Your HTML page should include:
<div id="xatkit-chat"></div>import {renderXatkitWidget} from 'xatkit-chat-widget'
import 'xatkit-chat-widget/lib/xatkit.css';
renderXatkitWidget(args);You can compile the minified versions of the css and js files with
npm run build
Or donwload the compiled versions from
Then use these files in your own webpage to embed the widget there. Example (update the paths to the proper path based on your own configuration):
<html lang="en">
<head>
    <meta charset="UTF-8">
    <title>My title</title>
    <link href="./assets/xatkit.min.css" rel="stylesheet">
</head>
<body>
<div id="xatkit-chat"></div>
<!-- <div id="my-id"></div> -->

<script src="assets/xatkit.min.js"></script>
<script>
   xatkit.renderXatkitWidget();
  //xatkit.renderXatkitWidget(args);
</script>
</body>
</html>-
renderXatkitWidget:
- Renders the Xatkit chat widget using custom parameters.
- Parameters:
args: an object that holds the widget configuration. The structure of the object is the following:
{
   server,
   username,
   widget: {
      title,
      subtitle,
      startMinimized,
      placeHolders:{
         sender,
         buttons
      },
      images:{
         profileAvatar,
         launcherImage
      }
   },
   location:{
      hostname,
      url,
      origin
   },
   storage:{
      location,
      autoClear
   }
}
| Parameter | Type | Required | Description | Default Value |
|---|---|---|---|---|
server |
String | NO | The location of the Xatkit server to connect the component to (this URL must be the URL of the ReactPlatform socket.io endpoint) | "http://localhost:5001" (the default location of the ReactPlatform's socket.io server ) |
username |
String | NO | The name of the user currently conversing with the bot | 'username' |
elementId |
String | NO | The identifier of the DOM element to attach the component to. | 'xatkit-chat' (this means that you need to have a <div id="xatkit-chat"></div> element in your DOM) |
widget.title |
String | NO | The title of the bot's widget | 'Xatkit Chat' |
widget.subtitle |
String | NO | The subtitle of the bot's widget | 'Test your Xatkit bot here!' |
widget.startMinimized |
Boolean | NO | A flag telling whether the bot should start minimized | false |
widget.placeHolders.sender |
String | NO | The place holder text in the input field when no input is provided | "Type a message" |
widget.placeHolders.buttons |
String | NO | The place holder text in the input field when quick buttons are provided | 'Choose an option' |
widget.images.profileAvatar |
String | NO | The URL of the image to display next to bot messages | |
widget.images.launcherImage |
String | NO | The URL of the image to use in the launcher | |
location.hostname |
String | NO | Custom hostname of the web page loading the widget (e.g. example.com) | The result of location.hostname |
location.url |
String | NO | Custom URL of the web page loading the widget (e.g. http://example.com/my-chatbot?param=value) | The result of location.href |
location.origin |
String | NO | Custom origin (protocol, hostname, port number) of the web page loading the widget (e.g. http://example.com) | The result of location.origin |
storage.location |
String | NO | Storage location of the user session. The possible values are local for localStorage and session for |
sessionStorage |
storage.autoClear |
Boolean | NO | A flag telling wether to clear the session after reloading the page | false |
Notes:
- Widget adapted from react-chat-widget.
- Support for session saving and loading adapted from rasa-webchat.
Beyond the configuration properties above, you can directly modify the CSS to adapt any visual aspect of the widget (colors, font, position,...).
For advanced modifications, you should look at how we use SASS as a preprocessor to define the style of the widget. This help us rely on some handy features such as variables and mixin. The file variables.scss located at at /srs/scss contains the variables that we use across the widget to define the style. More precisely, this file contains the colors and the fonts we use in the widget.
$green-1: #35e65d;
$grey-0: #808080;
$grey-1: #cdd8ec;
$grey-2: #f4f7f9;
$grey-3: #b5b5b5;
$white: #fff;
$red: #ff0000;
$xatkit-color: #ee2a14;
$message-font-family: 'Roboto', 'Helvetica Neue', Helvetica, Arial, sans-serif;
$xatkit-light-color: #fbe9e7;

// Dark mode colors
$dark: #303030;
$light-dark: #424242;
$light-grey: #bdbdbd;
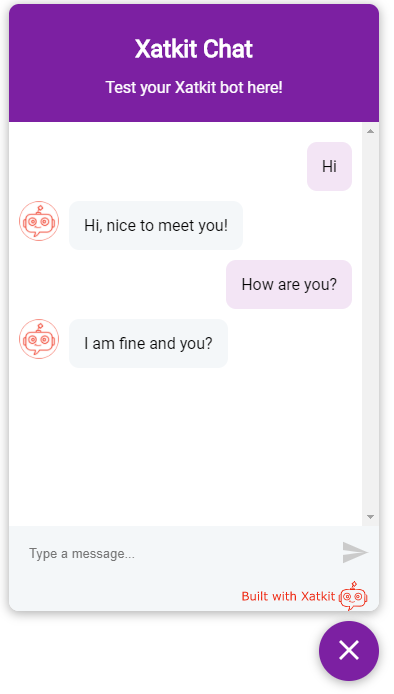
If we want our to be in purple, for instance, we can change the variables $xatkit-light-color and xatkit-color as follows.
$xatkit-color: #7B1FA2;
$xatkit-light-color: #F3E5F5;
And you'll get this cool new widget look
An easier solution for minor changes is to directly edit the xatkit.css file or create a custom css file and add !important to the properties you want to change.
We'll illustrate this with the background color only. You should look for all the places where the main color is used and then change it. Here is custom css file that you can add to your source to override the style to change the background to purple.
.xatkit-conversation-container .xatkit-header {
  background-color: #7B1FA2; !important;
}
.xatkit-full-screen .xatkit-close-button {
  background-color: #7B1FA2; !important;
}
.xatkit-conversation-container .xatkit-close-button {
  background-color: #7B1FA2; !important;
}
.xatkit-quick-list-button > .xatkit-quick-button {
  border: 2px solid #7B1FA2; !important;
}
.xatkit-quick-list-button > .xatkit-quick-button:active {
  background: #7B1FA2; !important;
}
.xatkit-quick-list-button > .xatkit-quick-button-selected {
  background: #7B1FA2; !important;
}
.xatkit-quick-list-button > .xatkit-quick-button-selected:hover {
  background: #7B1FA2; !important;}
.xatkit-widget-container > .xatkit-launcher {
  background-color: #7B1FA2; !important;
}
.xatkit-widget-container > .xatkit-launcher:hover {
  background-color: #7B1FA2; !important;}
.xatkit-widget-container > .xatkit-launcher:focus {
  background-color: #7B1FA2; !important;}
As a second example, see how you can render the xatkit widget on the bottom-left side
.xatkit-widget-container > .xatkit-launcher {
    align-self: unset !important;
}
.xatkit-widget-container {
    right: unset !important;
    margin: 0 0 20px 20px !important;
}


