-
Above all, please ensure there is already a machine(Linux preferred), where Docker, git and maven are already installed.
-
Get your own project runnable, with dockerfile inside. And the dockerfile covers two steps: maven build and jar encapsulation, an example can refer to: Dockerfile-Springboot-Maven-Example.
-
Make GitLab as your Code Repository.
-
Install GitLab Runner on your CI/CD machine, and the whole process will be performed in following way:

-
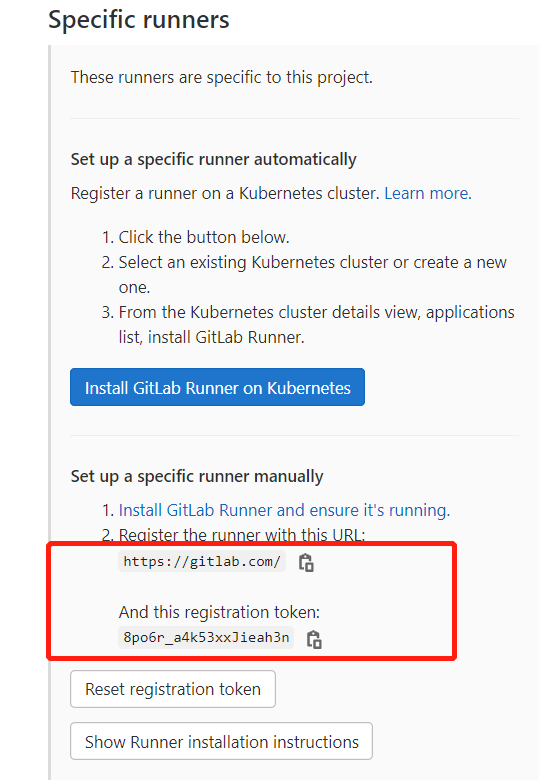
Get the Runner Token info from the access:
Project -> Setting -> CI/CD -> Runner -> Expand.
- Register the runner via the interactive commond.
sudo gitlab-runner register Two key points here: tags & executor:
Tags: Specify the purpose the current runner, corresponding to the tags for each stage defined in the .gitlab-ci.yml. The CICD job will be distributed to specific runner, only when there is a match.
Executor: Enable Docker commands for your CI/CD jobs. Shell executor is used for EC2 instance, while The Docker executor with the Docker image (Docker-in-Docker) is suitable in the context of Kubernate or other Docker orchestration tools.
Execute the command to start runner
    sudo gitlab-runner start ##start
    sudo gitlab-runner stop ##stop
    sudo gitlab-runner restart  ##restart
    sudo gitlab-runner --debug run ##debug
-
Write .gitlab-ci.yml to configure your CI/CD Job.
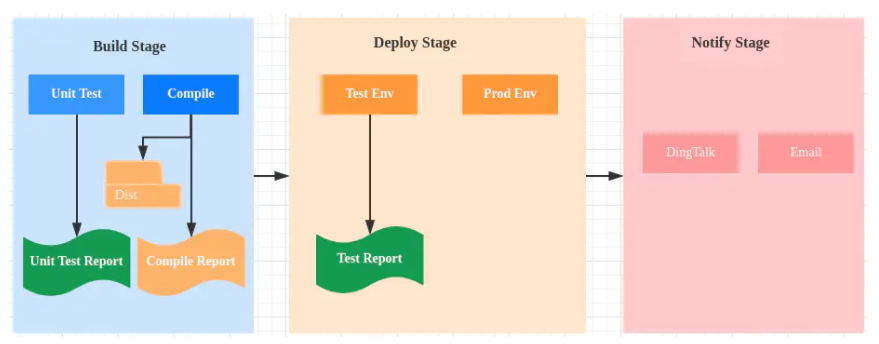
Ideal process of CICD should look like below:

Example of gitlab-ci.yml is provided here. Including two steps: Buid && Deploy.
Build: Make sure you already login your DockerHub account before Push.
Deploy: Remember to stop and remove the old version containers you want to deploy, them also remove their images.
-
Run the Pipeline and wait for the result.
After that, don't forget to check whether the application is running or not.

-
Best practice for Optimization
The first time to perform the CI/CD job will be slow since there is a need to pull the maven images and pull the maven dependency resources.
-
Have better use the local installed Docker & Maven instead of Docker & Maven images pulled from Docker, since the maven repo and images can be stored in fixed place, so that will be reused in next time.
-
If import any image in gitlab-ci.yml, some settings should be appended at the end of /etc/gitlab-runner/config.toml.
[runners.docker]
  ...
pull_policy = ["if-not-present"]
This config changes the docker pull policy, enable to reuse existing images. Can refer to the official statement as below:*
The always pull policy will ensure that the image is always pulled. When always is used, the Runner will try to pull the image even if a local copy is available. If the image is not found, then the build will fail.
-
Before deployment, you can delete all the old version images and their containers, but please exclude the latest one that generated just now. Otherwise, need to pull from dockerhub again. Detail showed in the code as below:
if [ "$(docker images -a | grep $IMAGE_PREFIX | grep -v $CI_COMMIT_SHORT_SHA)" ]Find more in: Dockerfile-Springboot-Maven-Example.
-
Optimize the docker images building process:
-
Import lightweight basic image, such as Alpine, of which lots of language or framework build on the top.
-
Make the core of image as small as possible, for example, use class file rather than java file.
-
Combine the continous RUN commands by "&&".
-
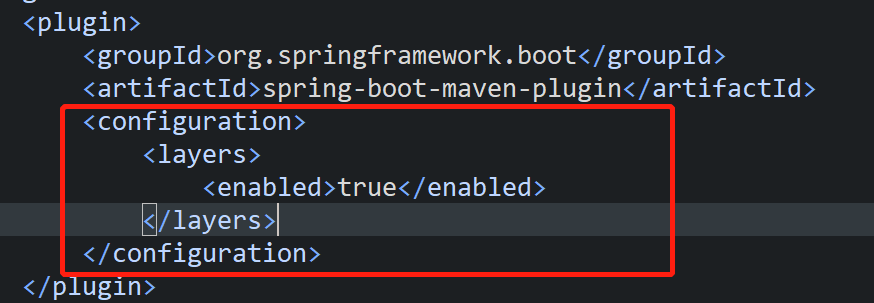
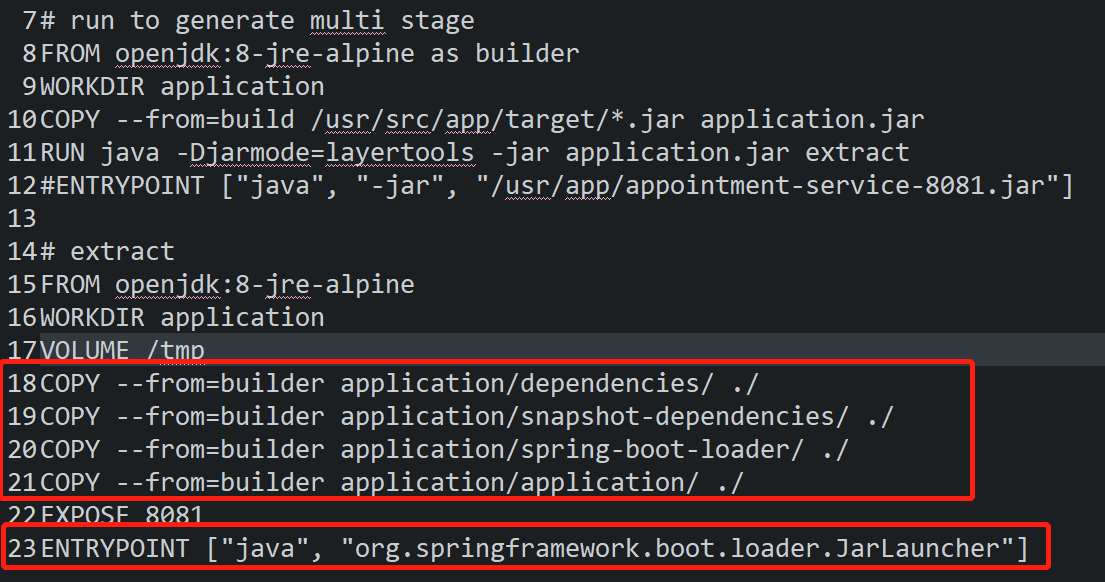
Apply multi-stages building strategy, make full use of cahce, since it can help save effor, if there are same interlayers from the begining, no matter in image build, pull, or push process. At the same time, you can also only extract the needed stuff from previous layer.
*SpringBoot multi layer build in docker tutorial is provided inside.In practice, you can should notice:
-
-
This is the end, cheers! More detail please refer to this rpeo!


