An image-to-text agent using NLP and Llama 3.2 11B Vision Model.
The agent as an expert English teacher will analyze the image file, extract keywords, group them semantically, and craft concise sentences demonstrating correct usage.
- Feed scanned textbook to the model:
=> Website
- Make sure to run Flask app on your terminal and turn off the ad blocker on your browser.
generated with DocToc
Automate the contract review process through the following steps:
-
Image Upload:
- Uploads an image (jpg/png) to the system.
- Encode the image by paragraph.
-
Retrieve Key Information:
- Employs Llama 3.2 11B Vision Model (running on Together AI)
- Use NLTK to process the prompt
- Extract paragraph, questions, and correct answers in string format from the encoded image in string.
-
AI-Powered Vocabulary List:
- Send the retrieved string data to the agent
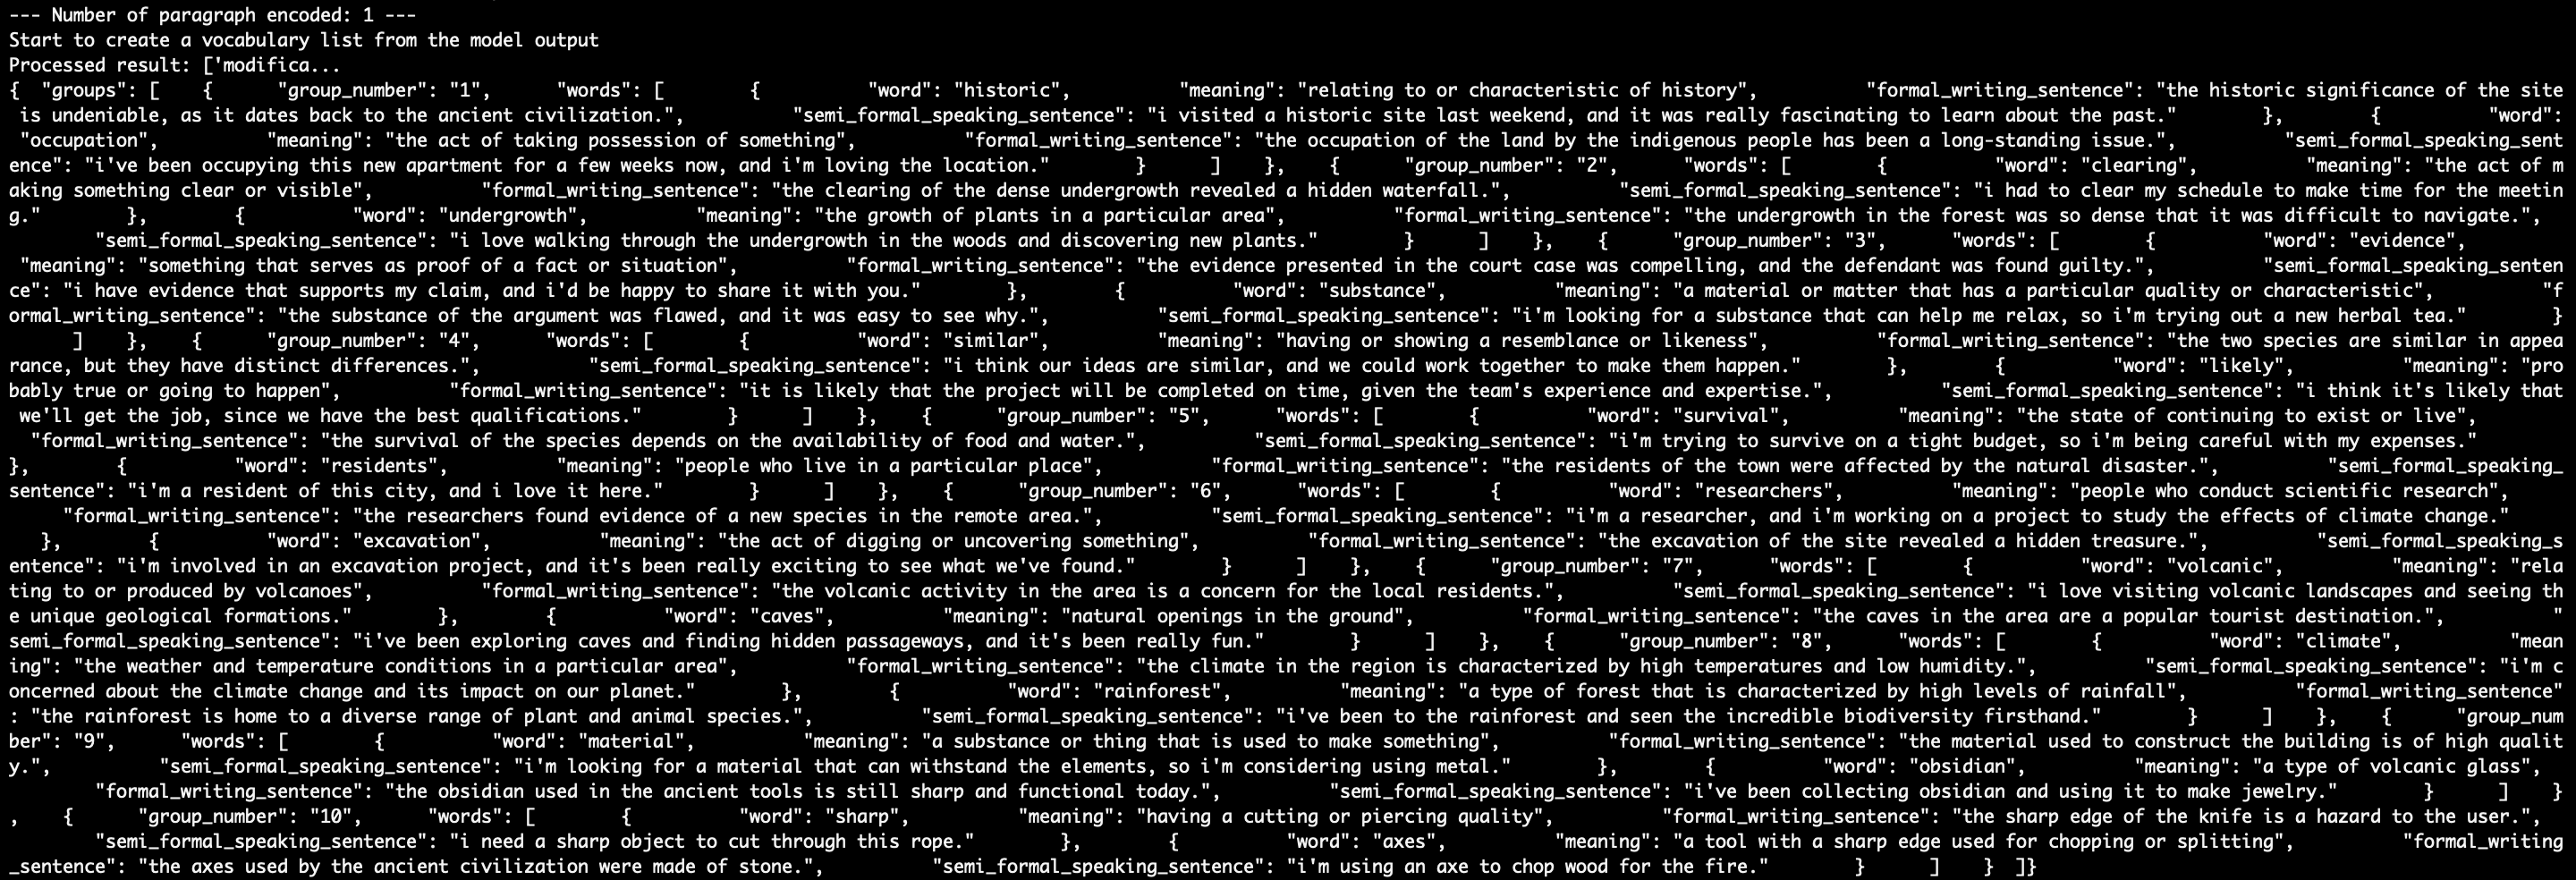
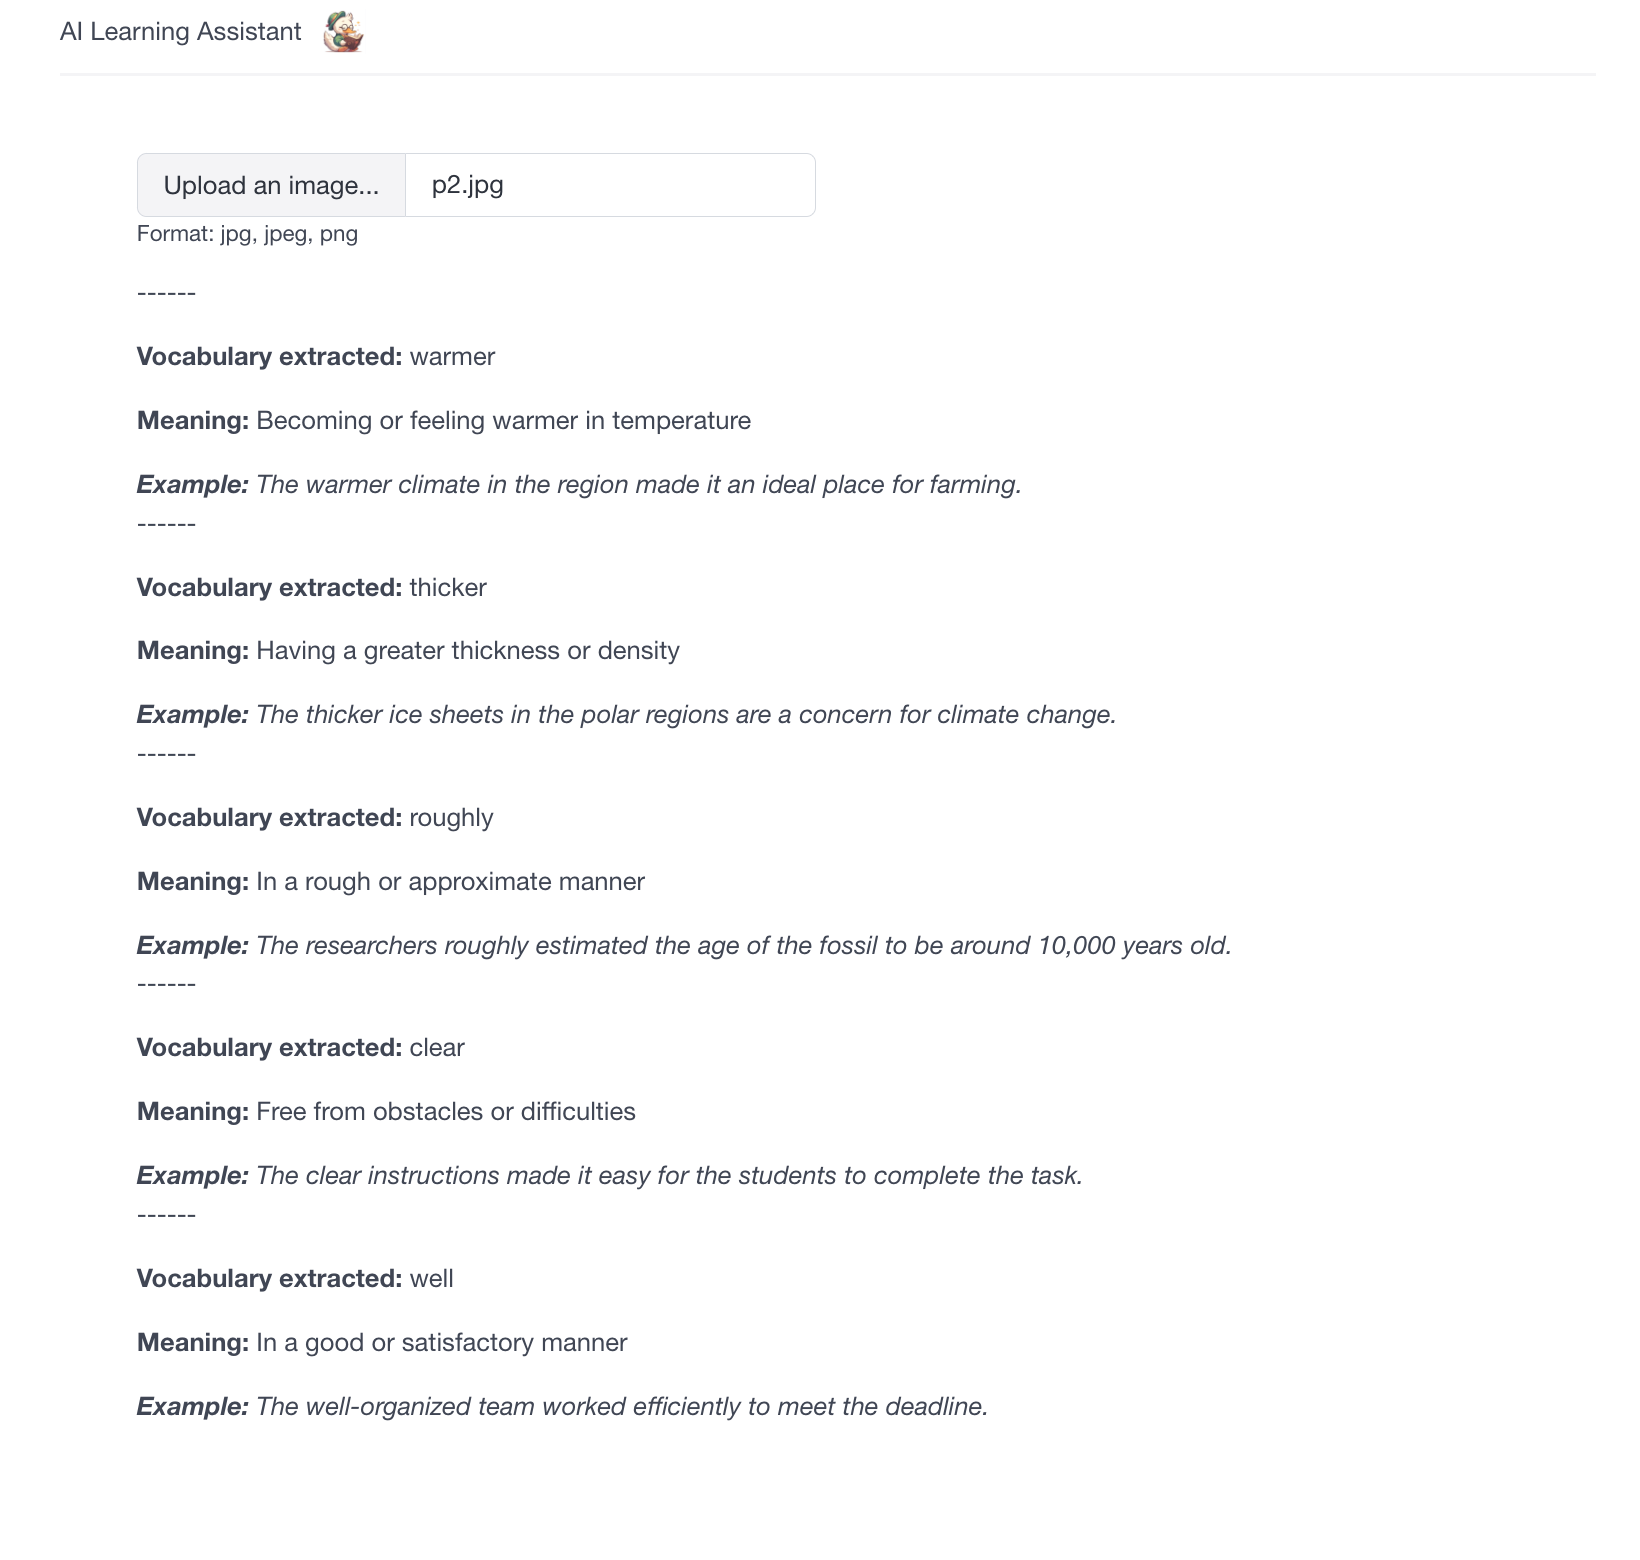
- Genearate vocabulary list with meaning and a sample sentence.
-
User Interaction:
- Present the vocabulary list for the user (This repository contains a simple React app as an user interface.)
[data-doc-management]
- Chroma DB: Vector database for storing and querying standard contract clauses
- SQLite: Database for storing application data
[ai-model-curation]
- Together AI: Hosting Llama 3.1 for text processing, clause segmentation, and response generation
- AIML API: Curation platform to access AI models and other tasks
[task-handling]
- NLDK: Natural language toolkit for building Python programs to work with human language data Doc
[deployment-framework]
-
Python: Primary programming language. We use ver 3.12
-
Flask: Web framework for the backend API
-
Flask Cors: A Flask extension for handling Cross Origin Resource Sharing (CORS), making cross-origin AJAX possible
-
pipenv: Python package manager
-
pre-commit: Managing and maintaining pre-commit hooks
-
React: Frontend framework
-
Vercel: User endpoint
.
├── __init__.py
├── app.py                  # Flask application
├── agents.py               # Define the  AI agents
├── Prompts/                # Store prompt and system context templates
│   ├── System.py
│   └── User.py
│   └── ...
├── db/                     # Database files
│   ├── chroma.sqlite3
│   └── ...
└── sample_textbook_images/ # Sample textbook images for the test
└── uploads/                # Uploaded image files
-
Install the
pipenvpackage manager:pip install pipenv -
Install dependencies:
pipenv shell pip install -r requirements.txt -v -
Set up environment variables: Create a
.envfile in the project root and add the following:TOGETHER_API_KEY=your_together_api_key
-
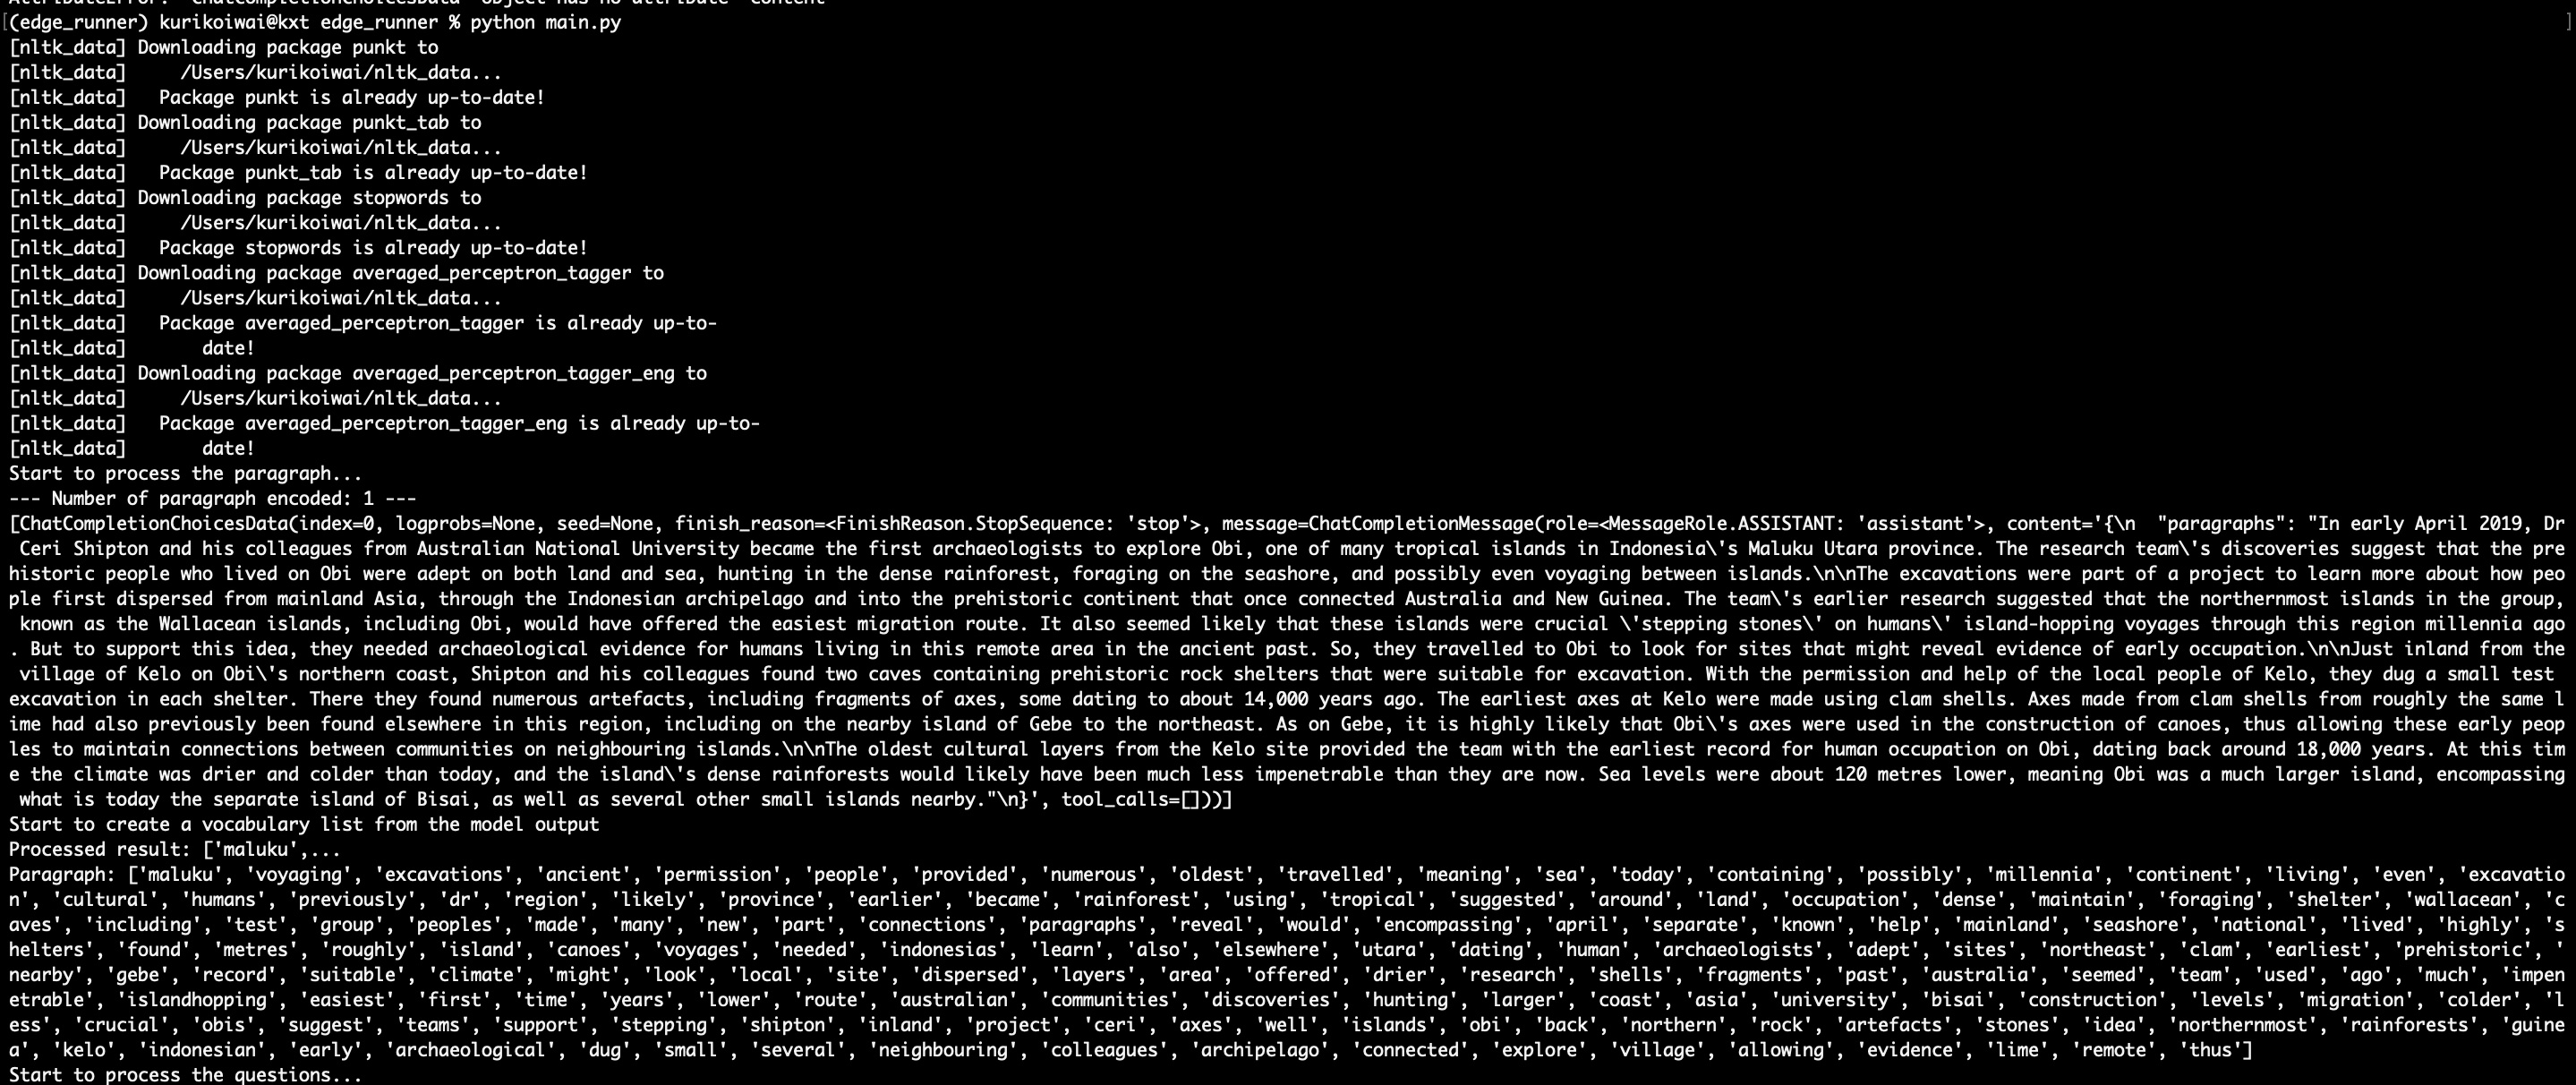
Test the AI assistant:
pipenv shell
python main.py
In the terminal, you can trace the process analyzing the sample textbook data.
-
Start the Flask backend:
python -m flask run --debugThe backend will be available at
http://localhost:5000. -
In a separate terminal, run the React frontend app:
cd frontend
npm start
The frontend will be available at
http://localhost:3000.Call the Flask API from the frontend app to see the result on user interface.
- Add a package:
pipenv install <package> - Remove a package:
pipenv uninstall <package> - Run a command in the virtual environment:
pipenv run <command>
-
After adding/removing the package, update
requirements.txtaccordingly or runpip freeze > requirements.txtto reflect the changes in dependencies. -
To reinstall all the dependencies, delete
PipfileandPipfile.lock, then run:pipenv shell pipenv install -r requirements.txt -v
-
Install pre-commit hooks:
pipenv run pre-commit install -
Run pre-commit checks manually:
pipenv run pre-commit run --all-files
Pre-commit hooks help maintain code quality by running checks for formatting, linting, and other issues before each commit.
*To skip pre-commit hooks
git commit --no-verify -m "your-commit-message"
To modify or add new AI agents, edit the agents.py file. Each agent is defined with a specific role, goal, and set of tools.
To modify or add templated prompts, edit/add files to the Prompts folder.
- This project employs
Chain of thought techniqueas well asRole based prompting.
The system uses Chroma DB to store and query the images uploaded. To update the knowledge base:
- Add new contract documents to the
uploads/directory. - Modify the
agents.pyfile to update the ingestion process if necessary. - Run the ingestion process to update the Chroma DB.
- Fork the repository
- Create your feature branch (
git checkout -b feature/your-amazing-feature) - Commit your changes (
git commit -m 'Add your-amazing-feature') - Push to the branch (
git push origin feature/your-amazing-feature) - Open a pull request
Common issues and solutions:
- API key errors: Ensure all API keys in the
.envfile are correct and up to date. - Database connection issues: Check if the Chroma DB is properly initialized and accessible.
- Memory errors: If processing large contracts, you may need to increase the available memory for the Python process.
- Issues related to the AI agents or RAG system: Check the
output.logfile for detailed error messages and stack traces.


