Example of Micro Frontends in GWT and DominoUI
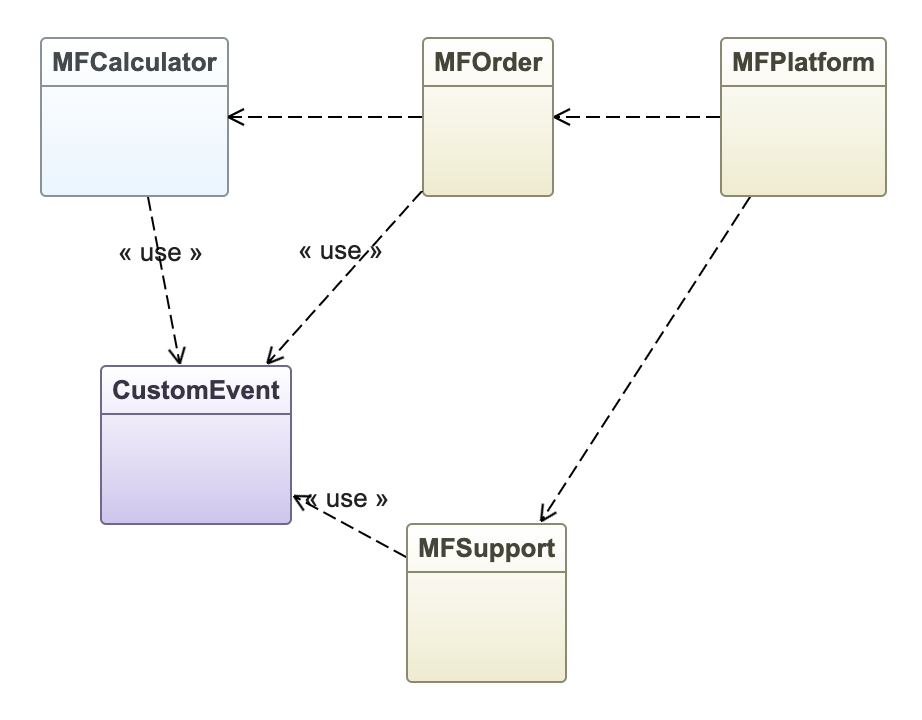
The structure of all the micro frontends looks like this UML class diagram below. All micro frontends exchange the messages through the CustomEvent.
Here are the microfrontends in detail:
- Calculator has no UI. It is a simple Calculator which exports JavaScript interface with JsInterop.
- Calculator dispatches a CustomEvent "calculatorCreatedEvent" to inform all the listeners when Calculator is already created.
- Microfrontends Order uses Calculator by embracing the exported JavaScript native interface (JsInterop native = true).
- Order view will be executed only when the "calculatorCreatedEvent" dispatched by the Calculator.
To run the microfrontends you need to start GWT devmode separately for each GWT Maven project. Each project will be started in different port number for Jetty and GWT CodeServer.
Go to each Maven project
- Calculator: microfrontends-calculator/microfrontends-calculator-client
- Order: microfrontends-order/microfrontends-order-client
- Support: microfrontends-support/microfrontends-support-client
- Platform: microfrontends-platform/microfrontends-platform-client
... and run each project with:
mvn gwt:generate-module gwt:devmode
You will have four GWT devmode instances started. After that just "Copy to Clipboard" the web app address into your web browser and run it just like shown on the screenshots above. To see all of them integrated in one UI you should take a look at the Microfrontends Platform.


