fwd-edu-breakout=github:climate-action-kits/pxt-fwd-edu/fwd-breakout
sonar=github:climate-action-kits/pxt-fwd-edu
datalogger=datalogger
fwdSensors.dial1.fwdOnDialTurned(fwdSensors.DialDirection.CCW, function (difference) {
    temperature += -1
})
fwdSensors.dial1.fwdOnDialTurned(fwdSensors.DialDirection.CW, function (difference) {
    temperature += 1
})
let temperature = 28
basic.forever(function () {
    basic.showNumber(temperature)
})
basic.forever(function () {
    if (temperature > 30) {
        fwdSensors.ledRing.fwdSetAllPixelsColour(0xffffff)
    } else {
        fwdSensors.ledRing.fwdSetAllPixelsColour(0xff0080)
    }
    basic.pause(100)
})
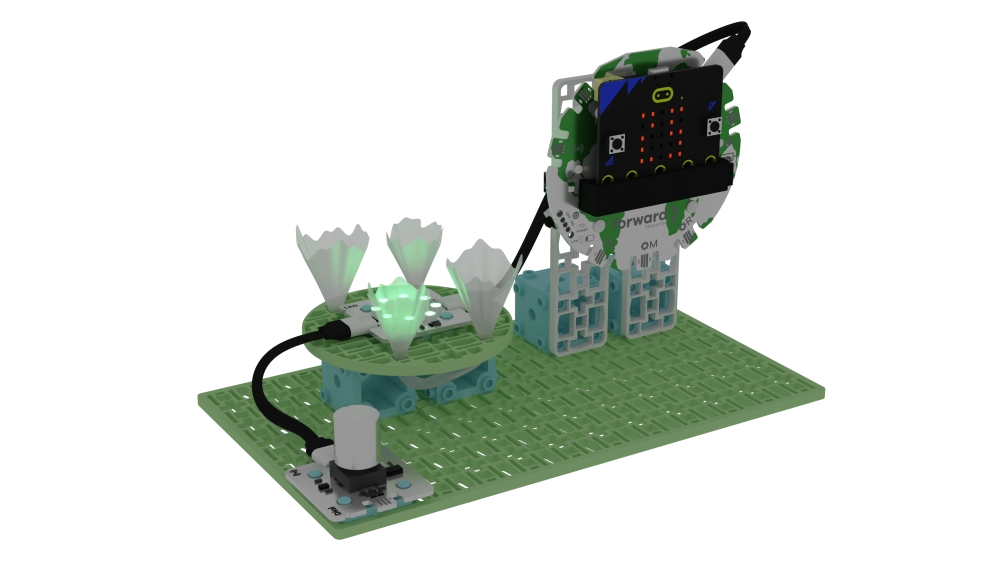
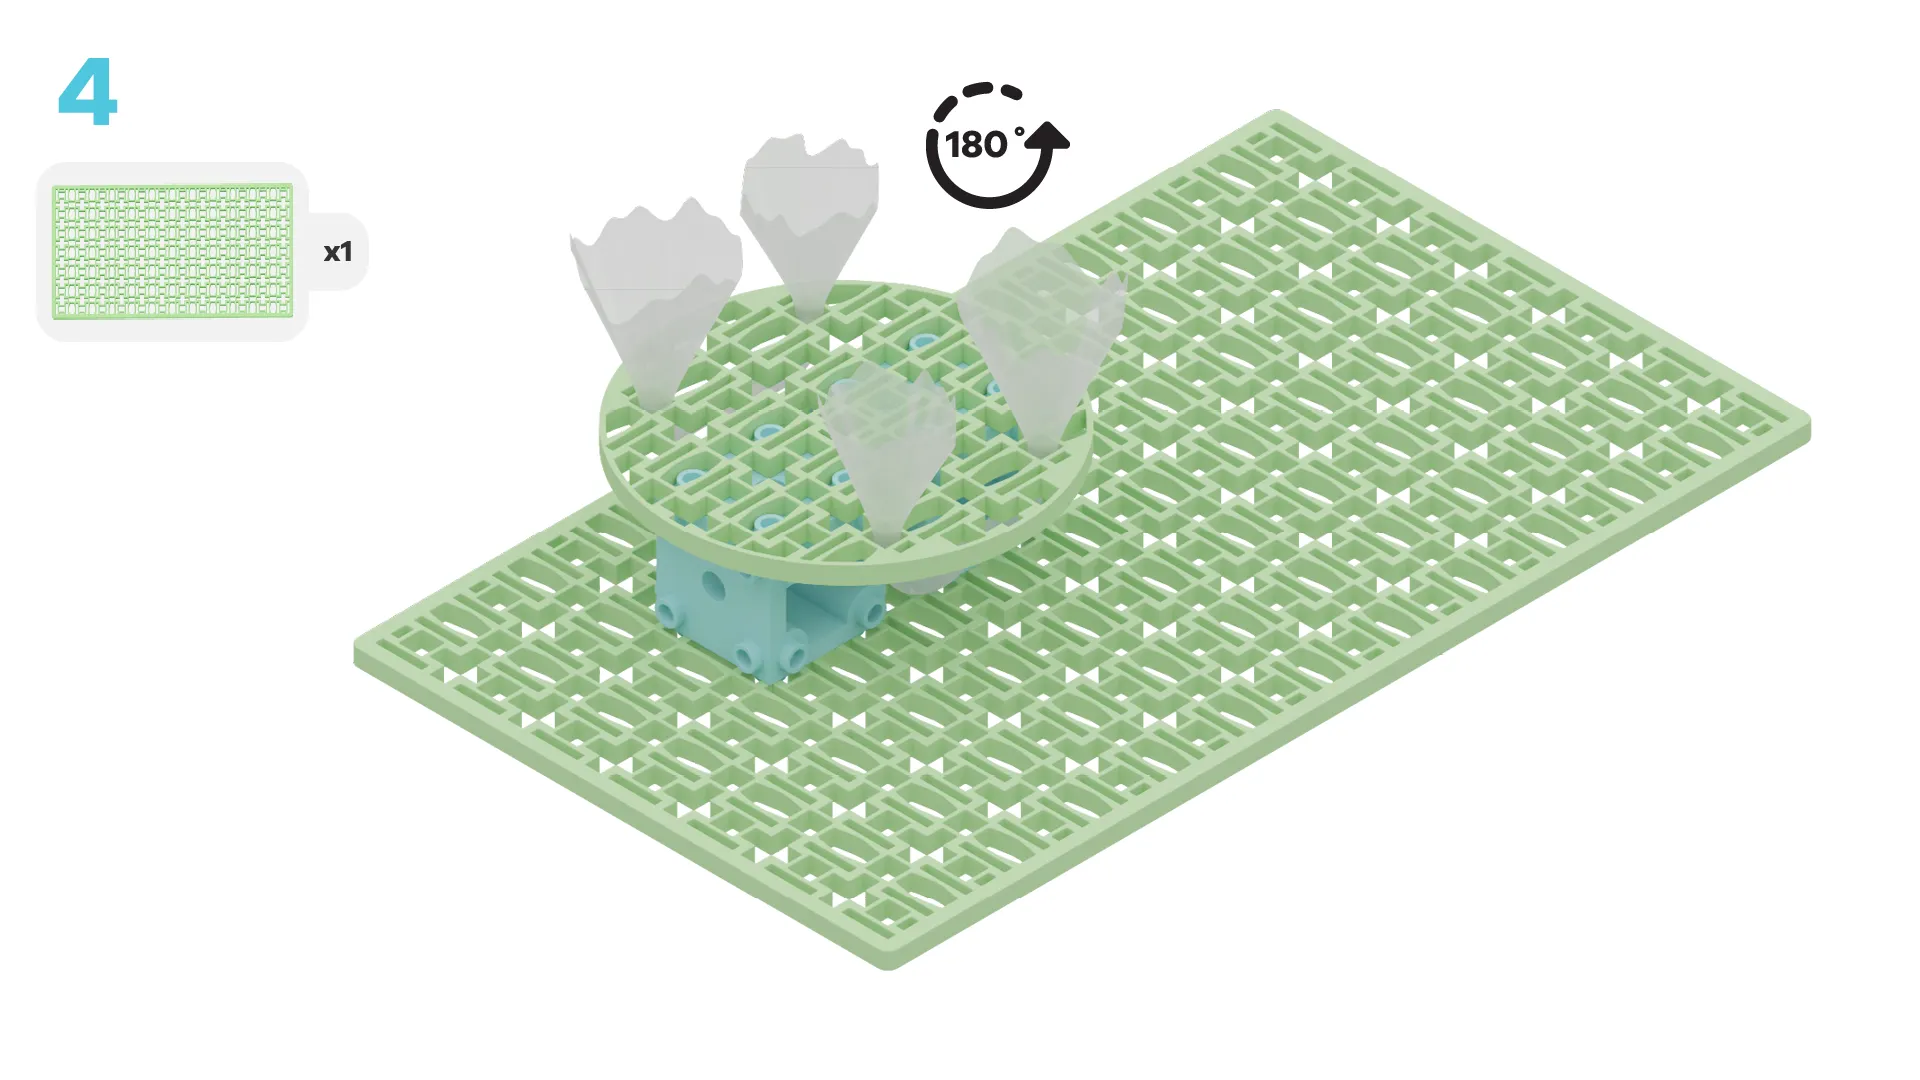
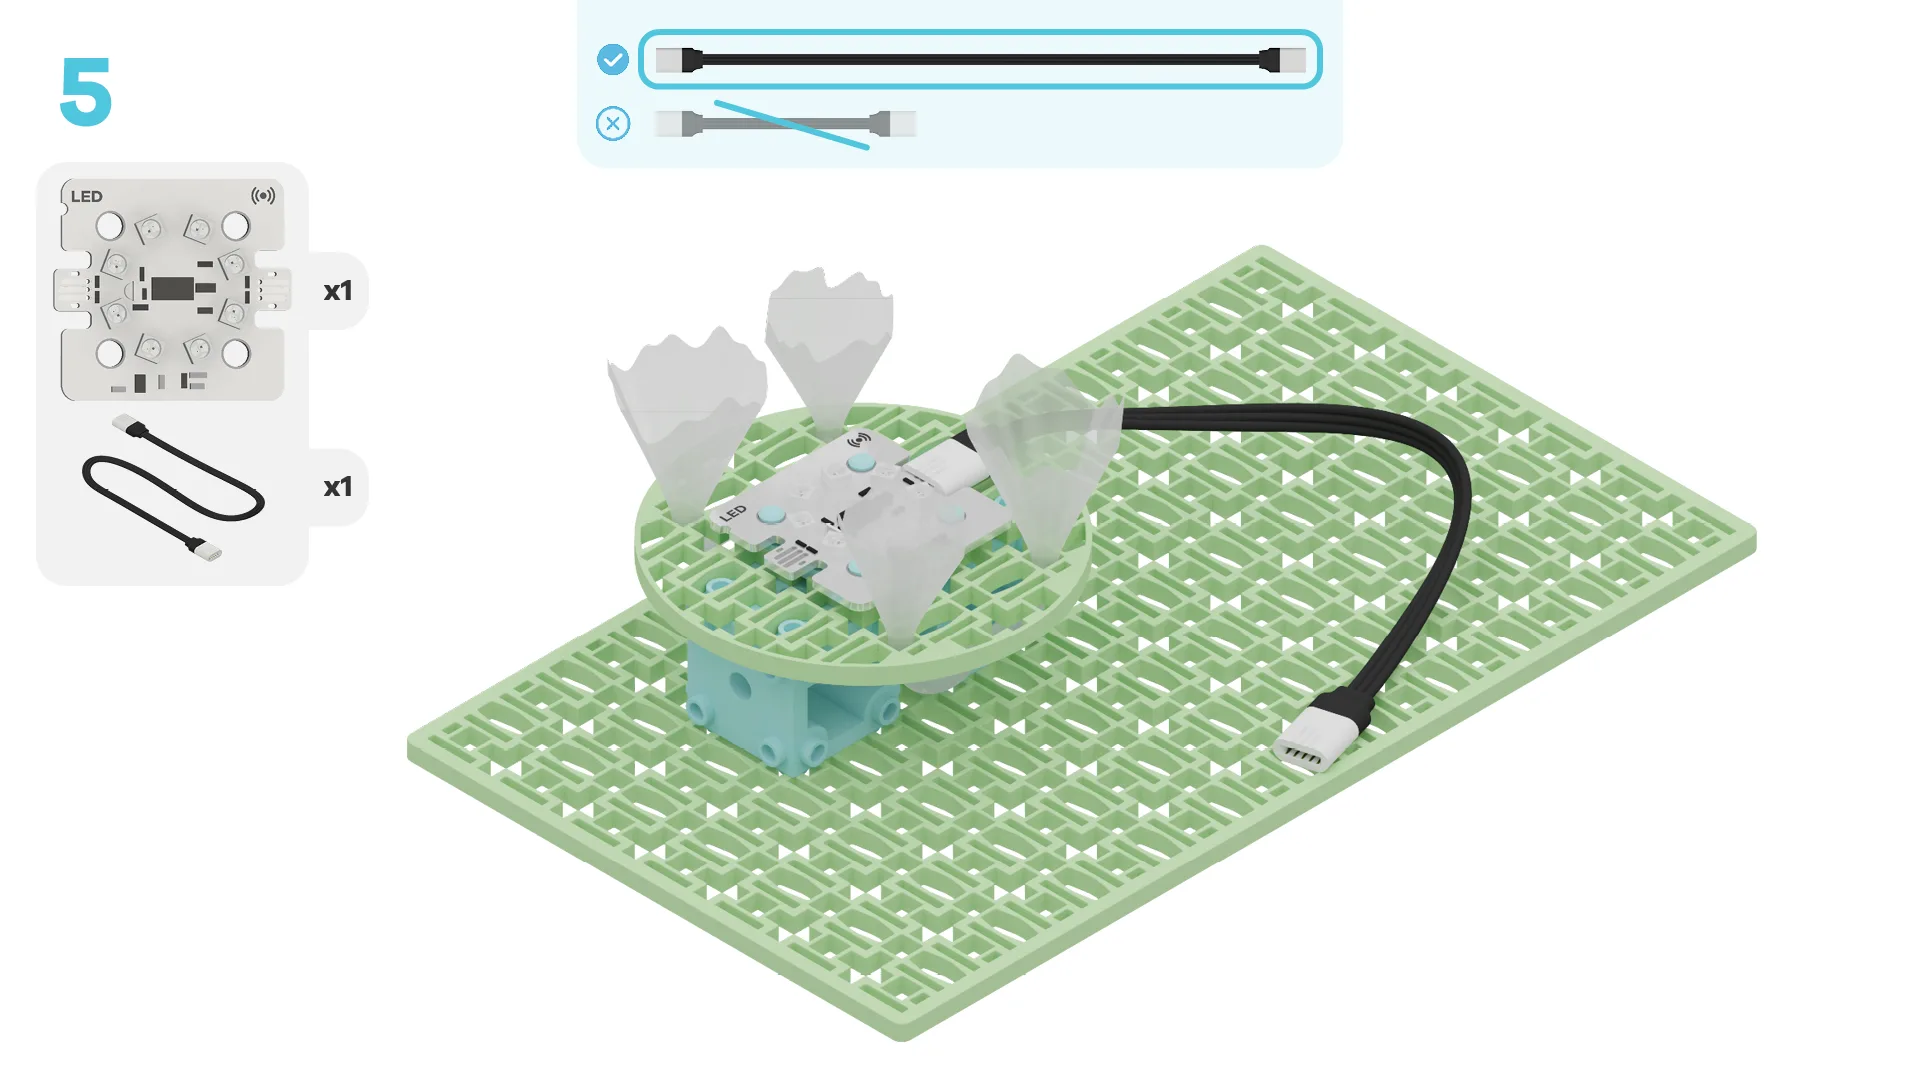
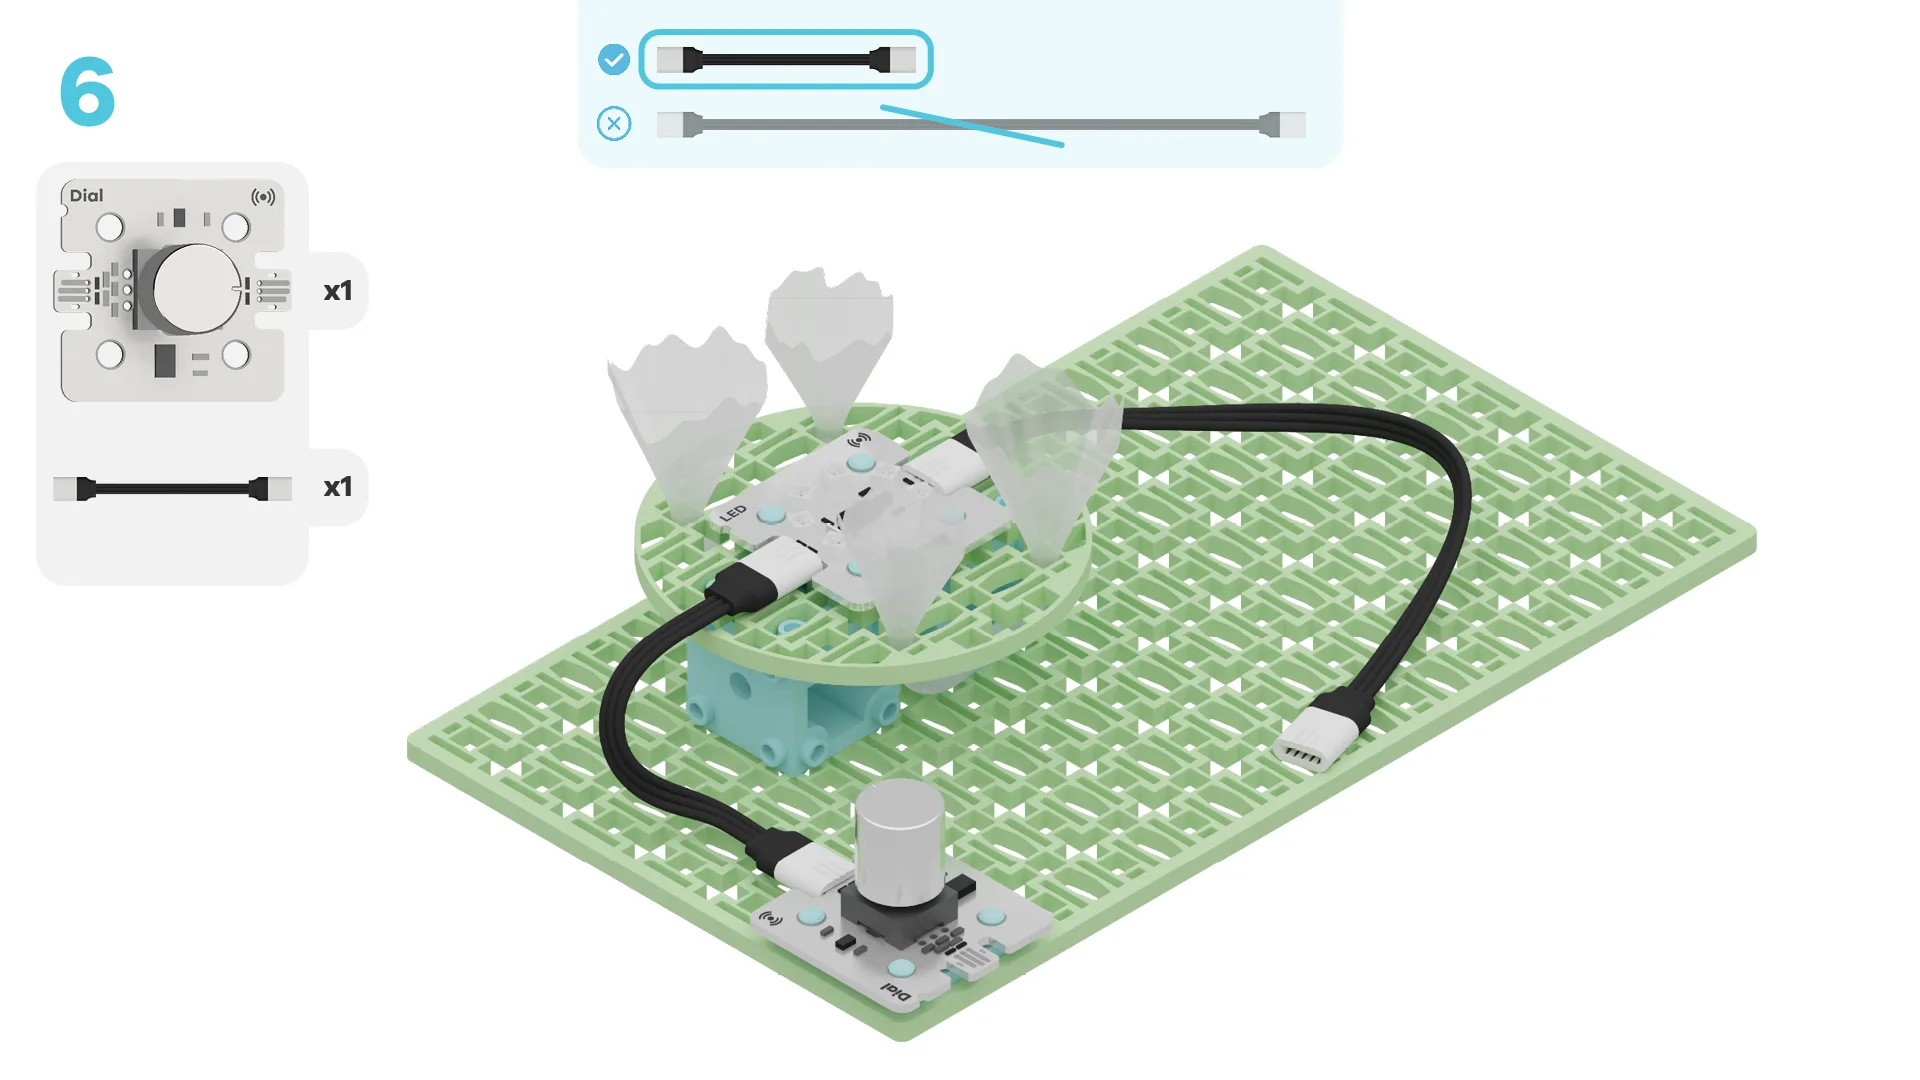
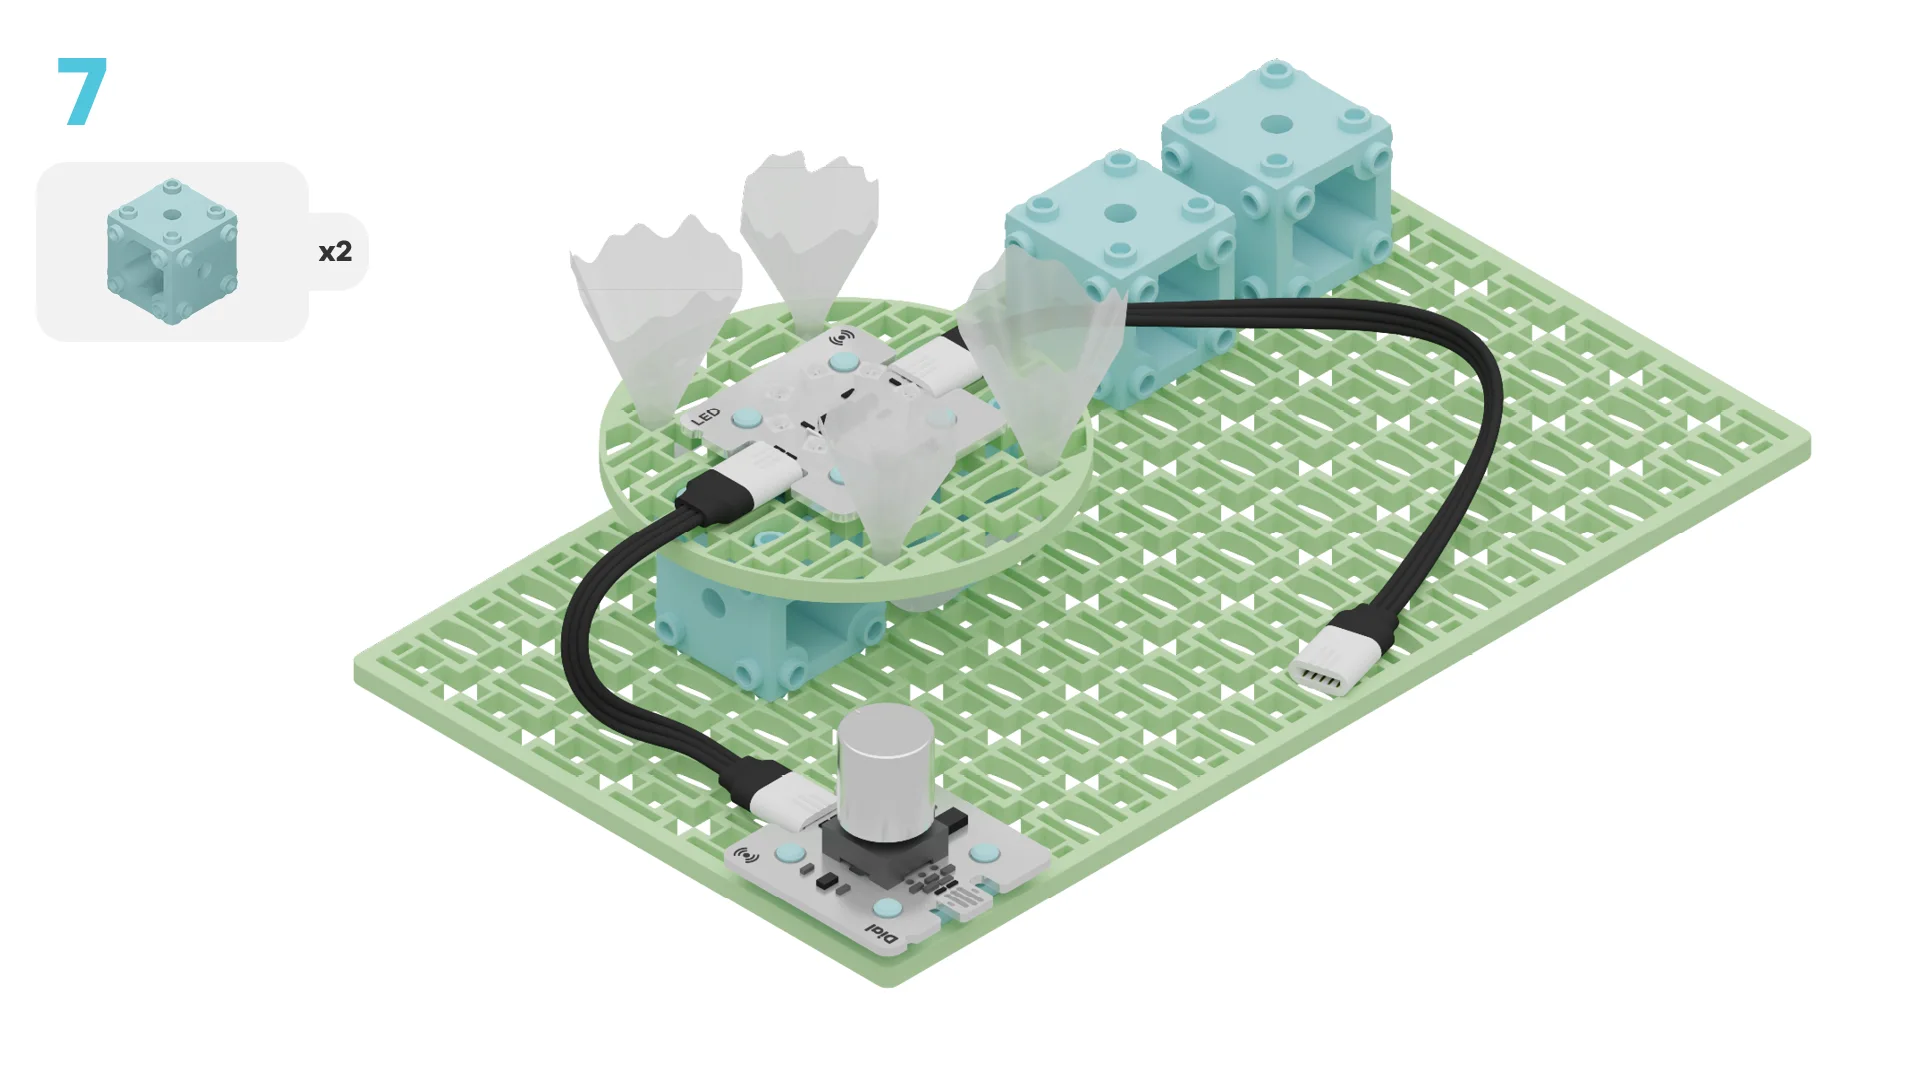
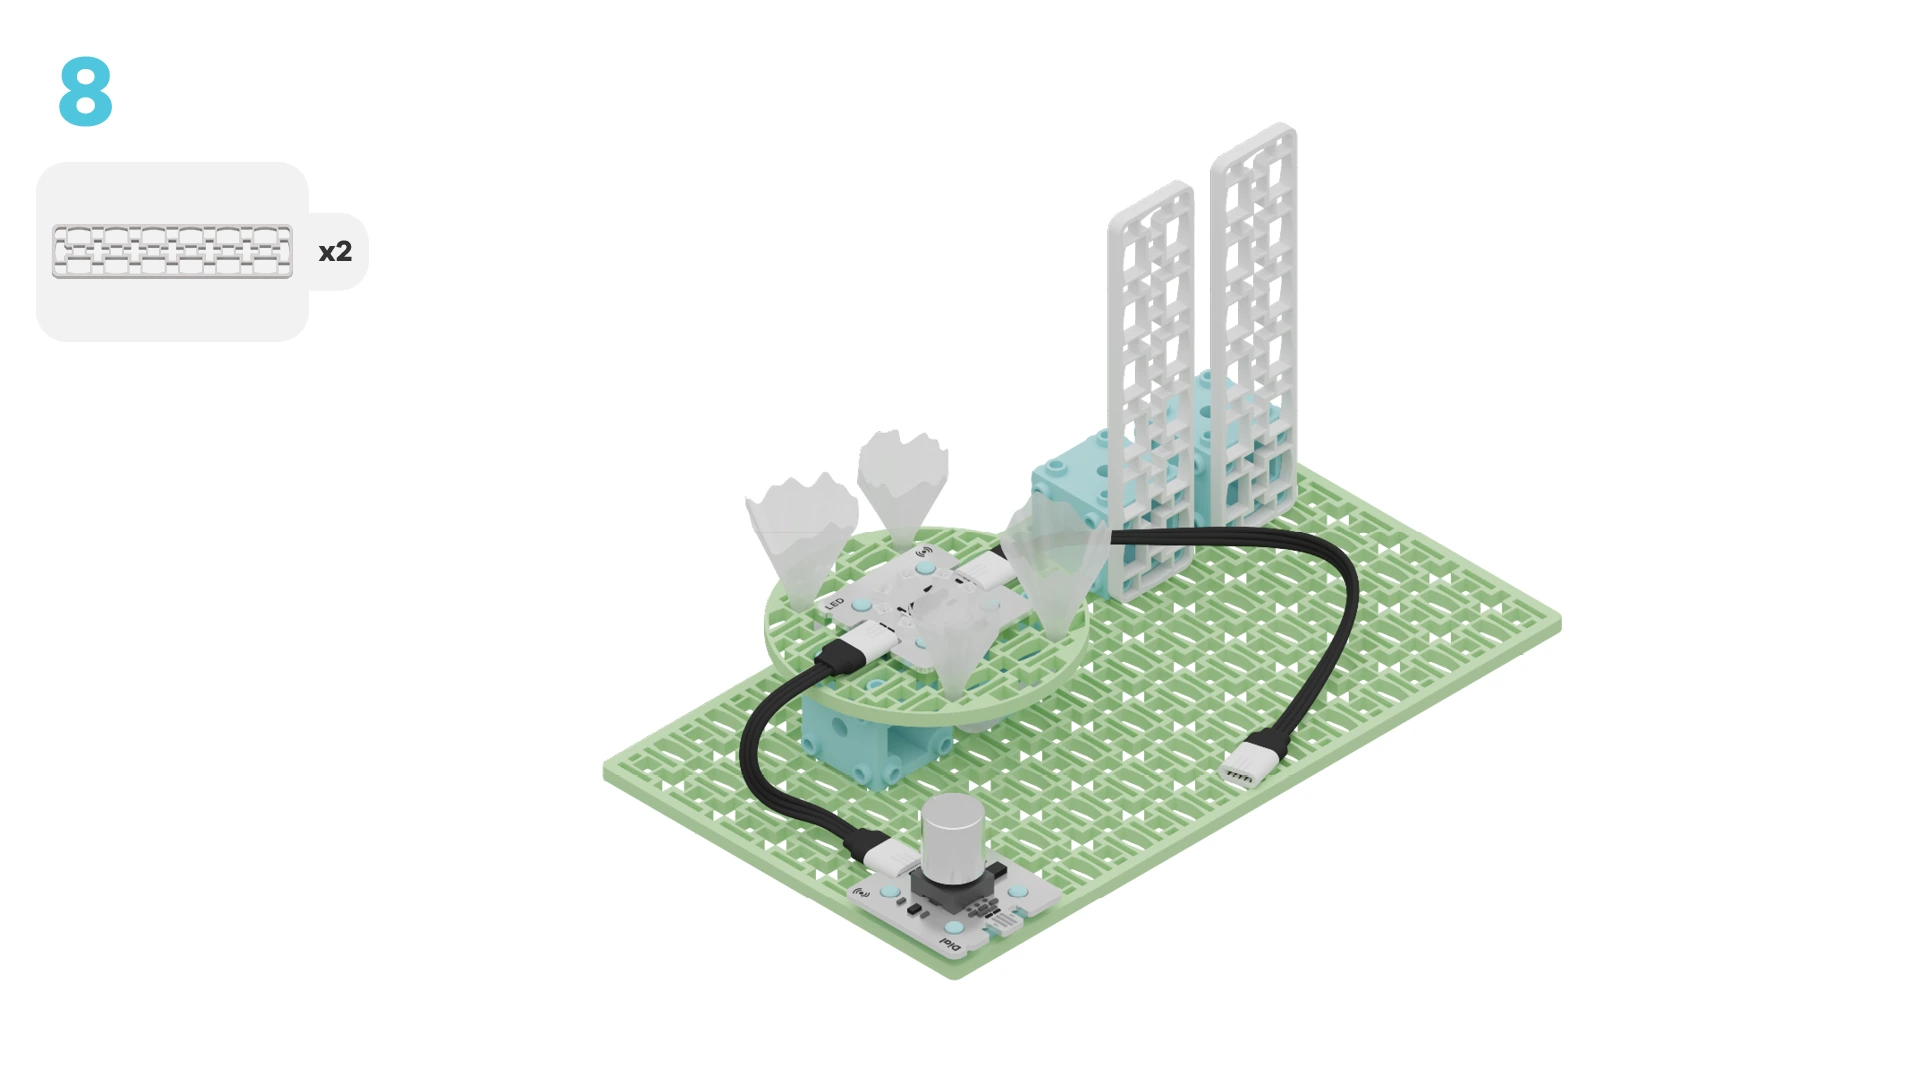
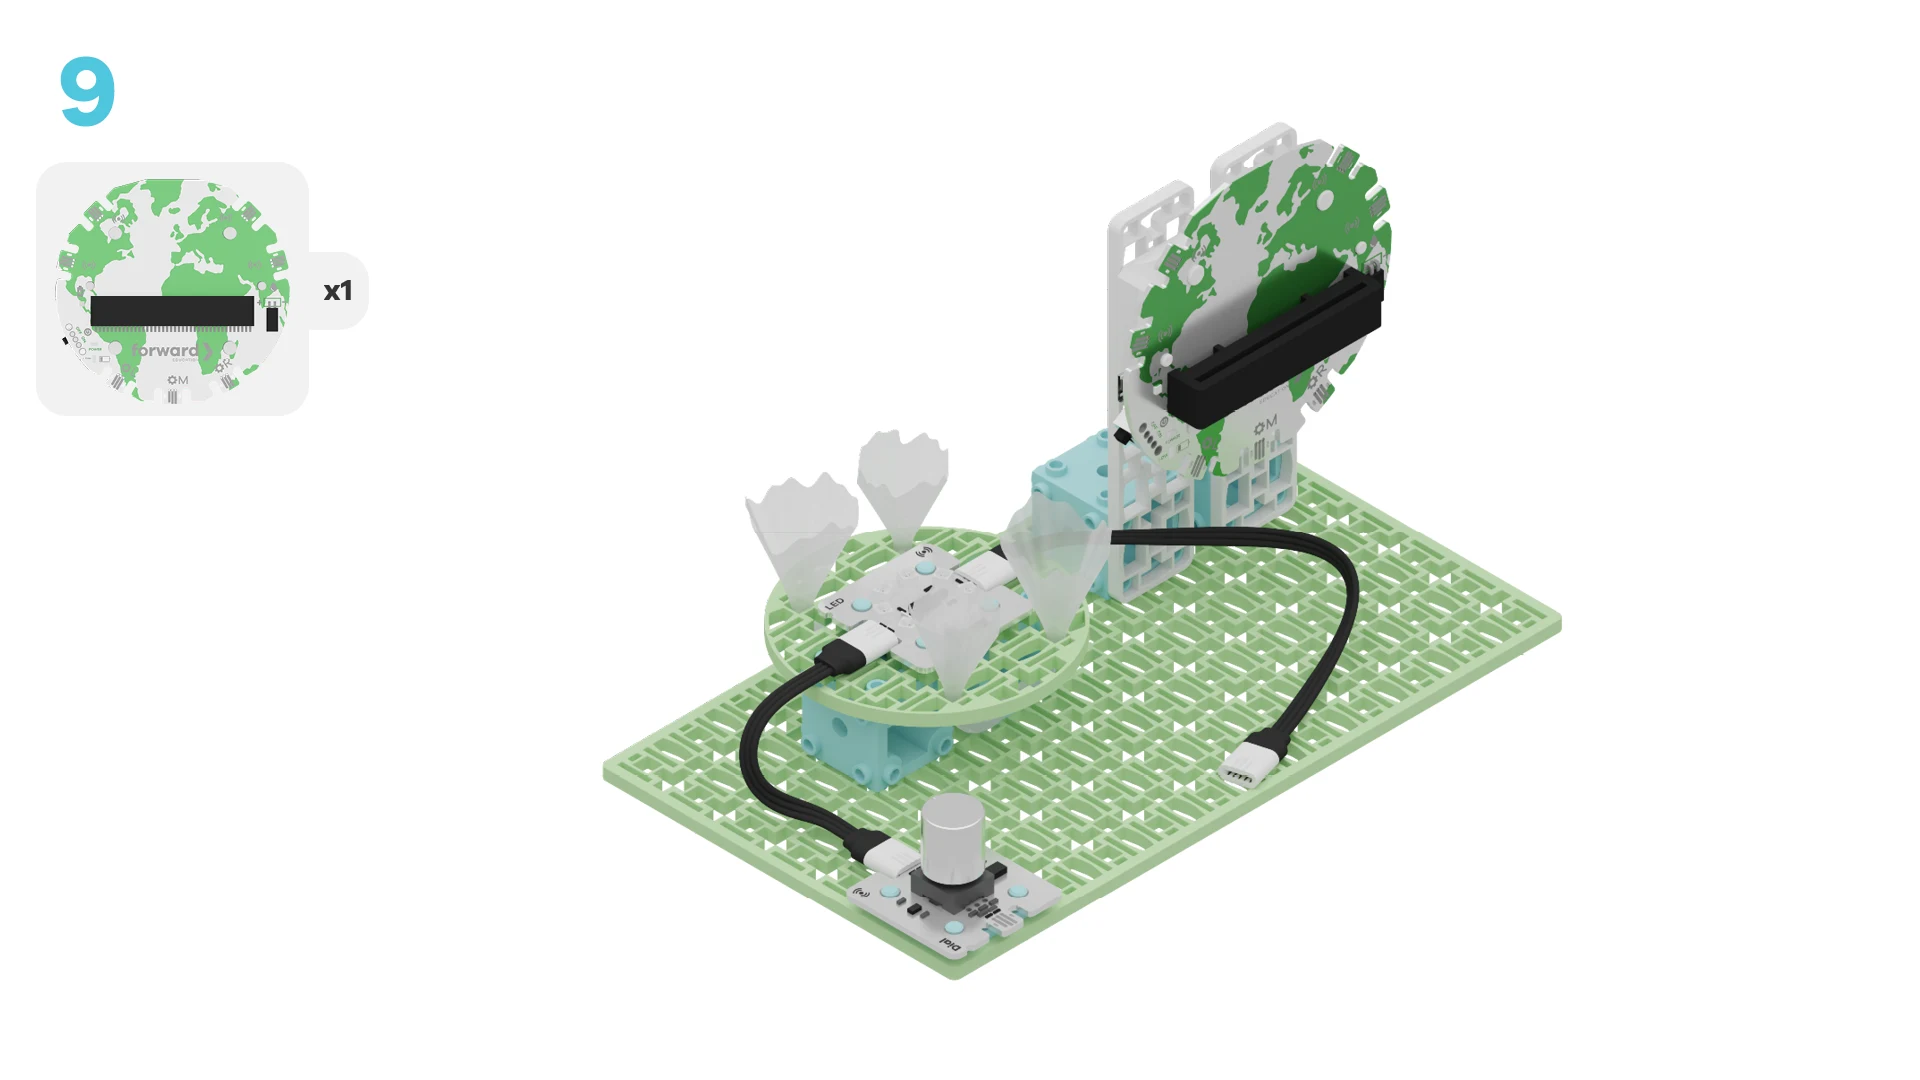
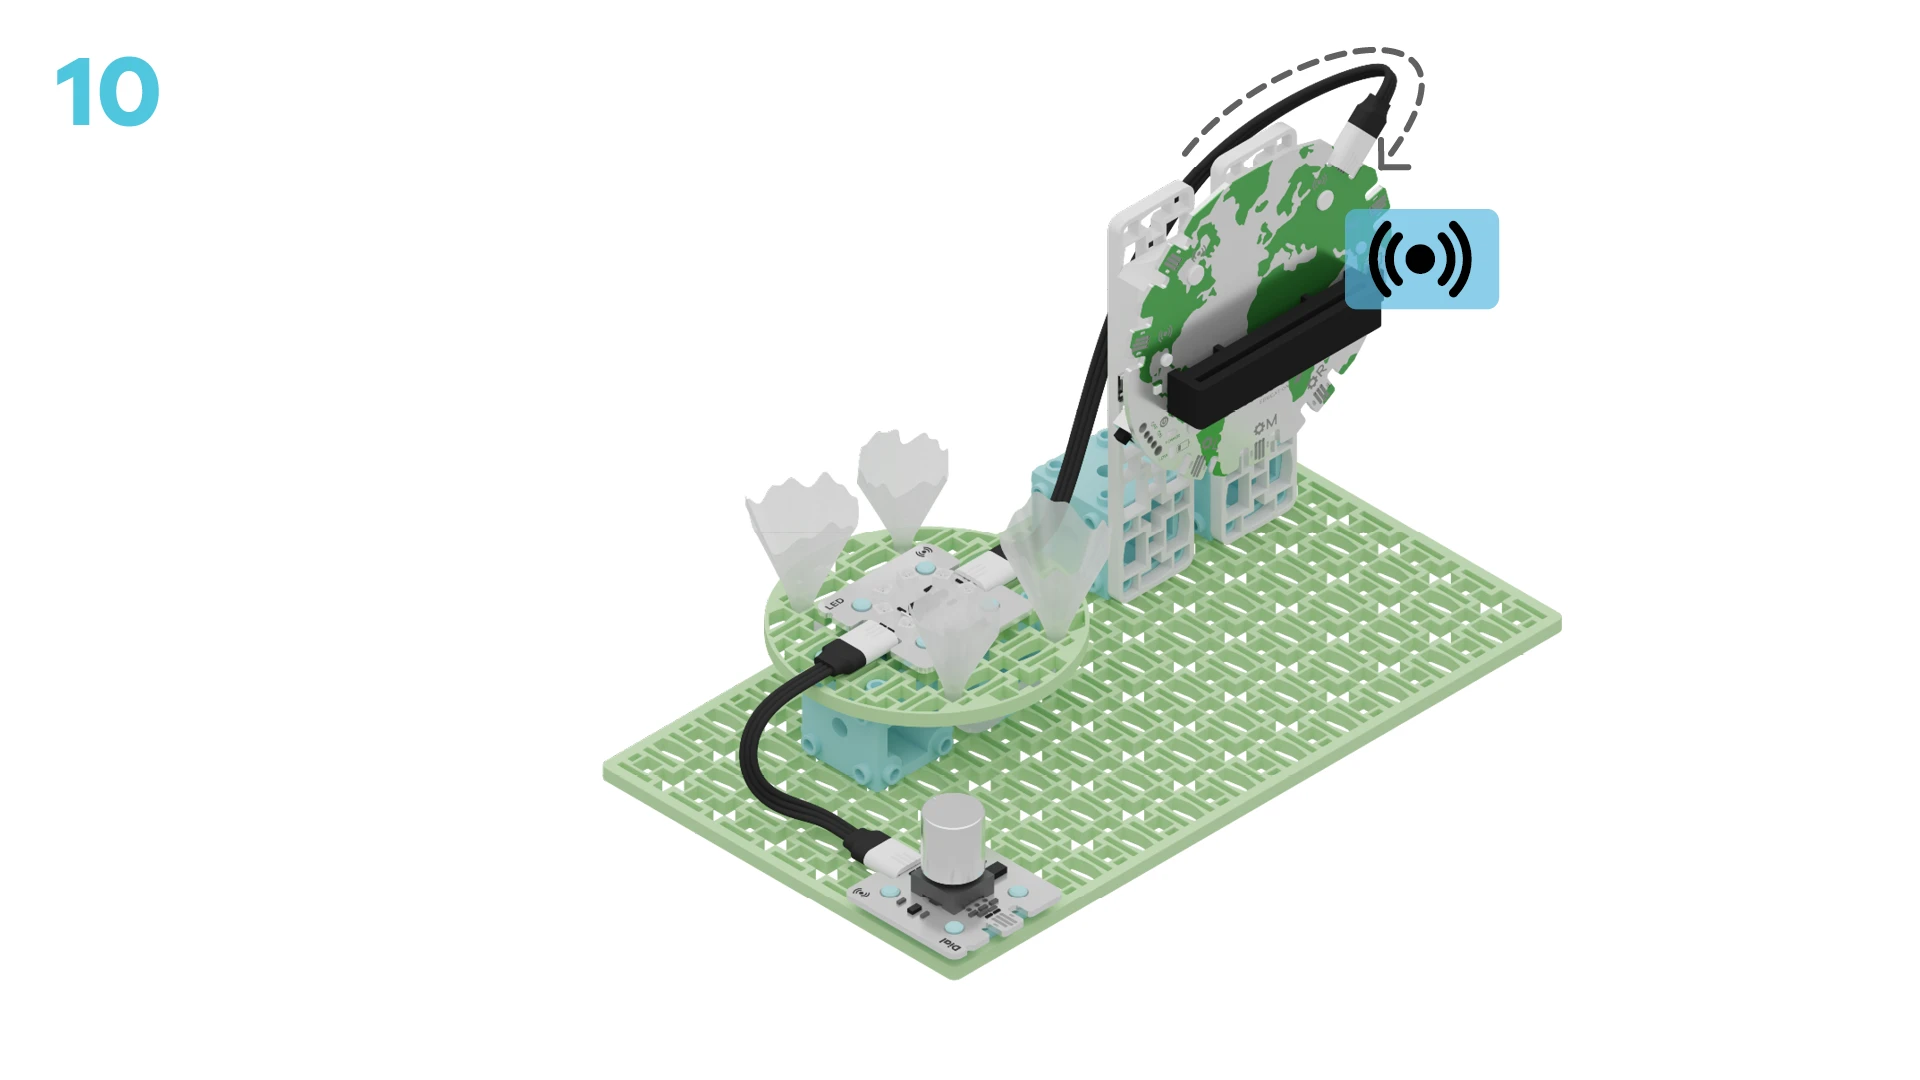
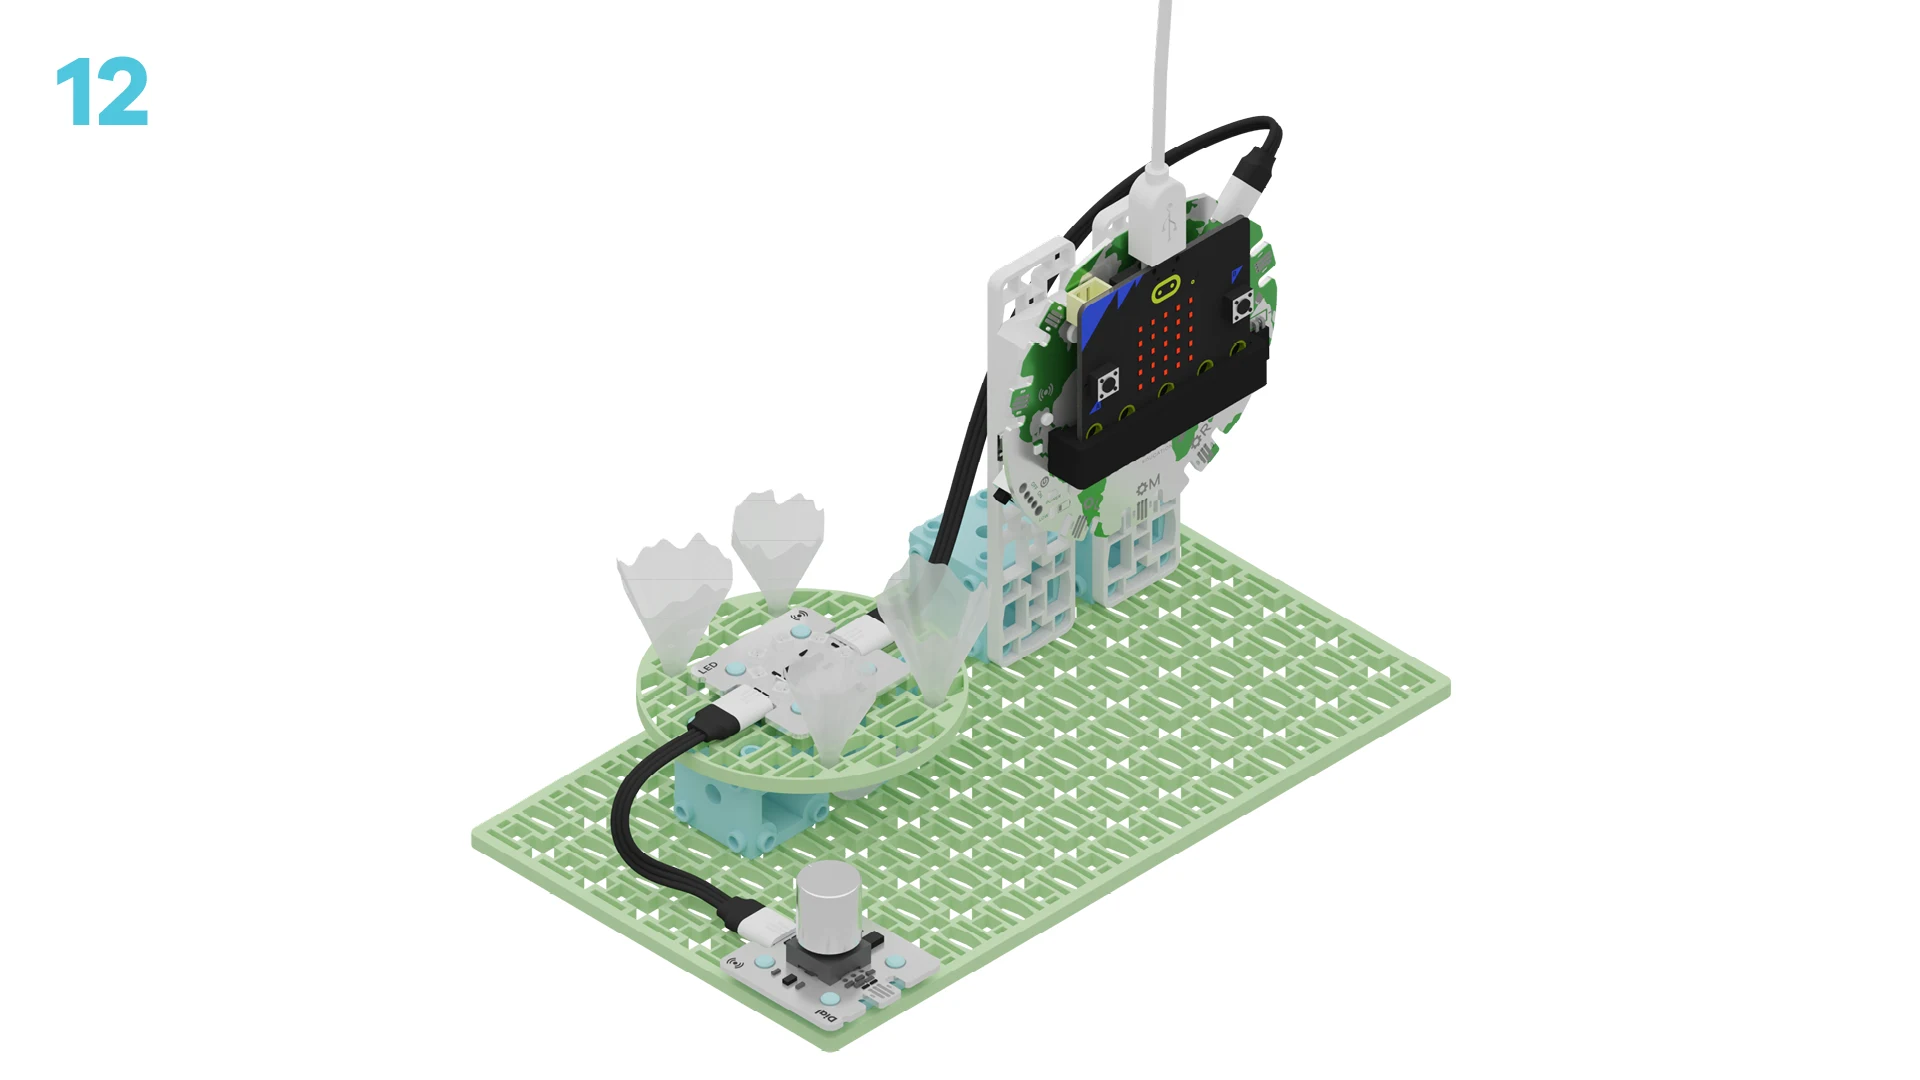
Let's build our coral reef model! We are going to do this in three parts:
- Build your model
- Add code to your model to bring it to life
- Use your model to simulate coral bleaching
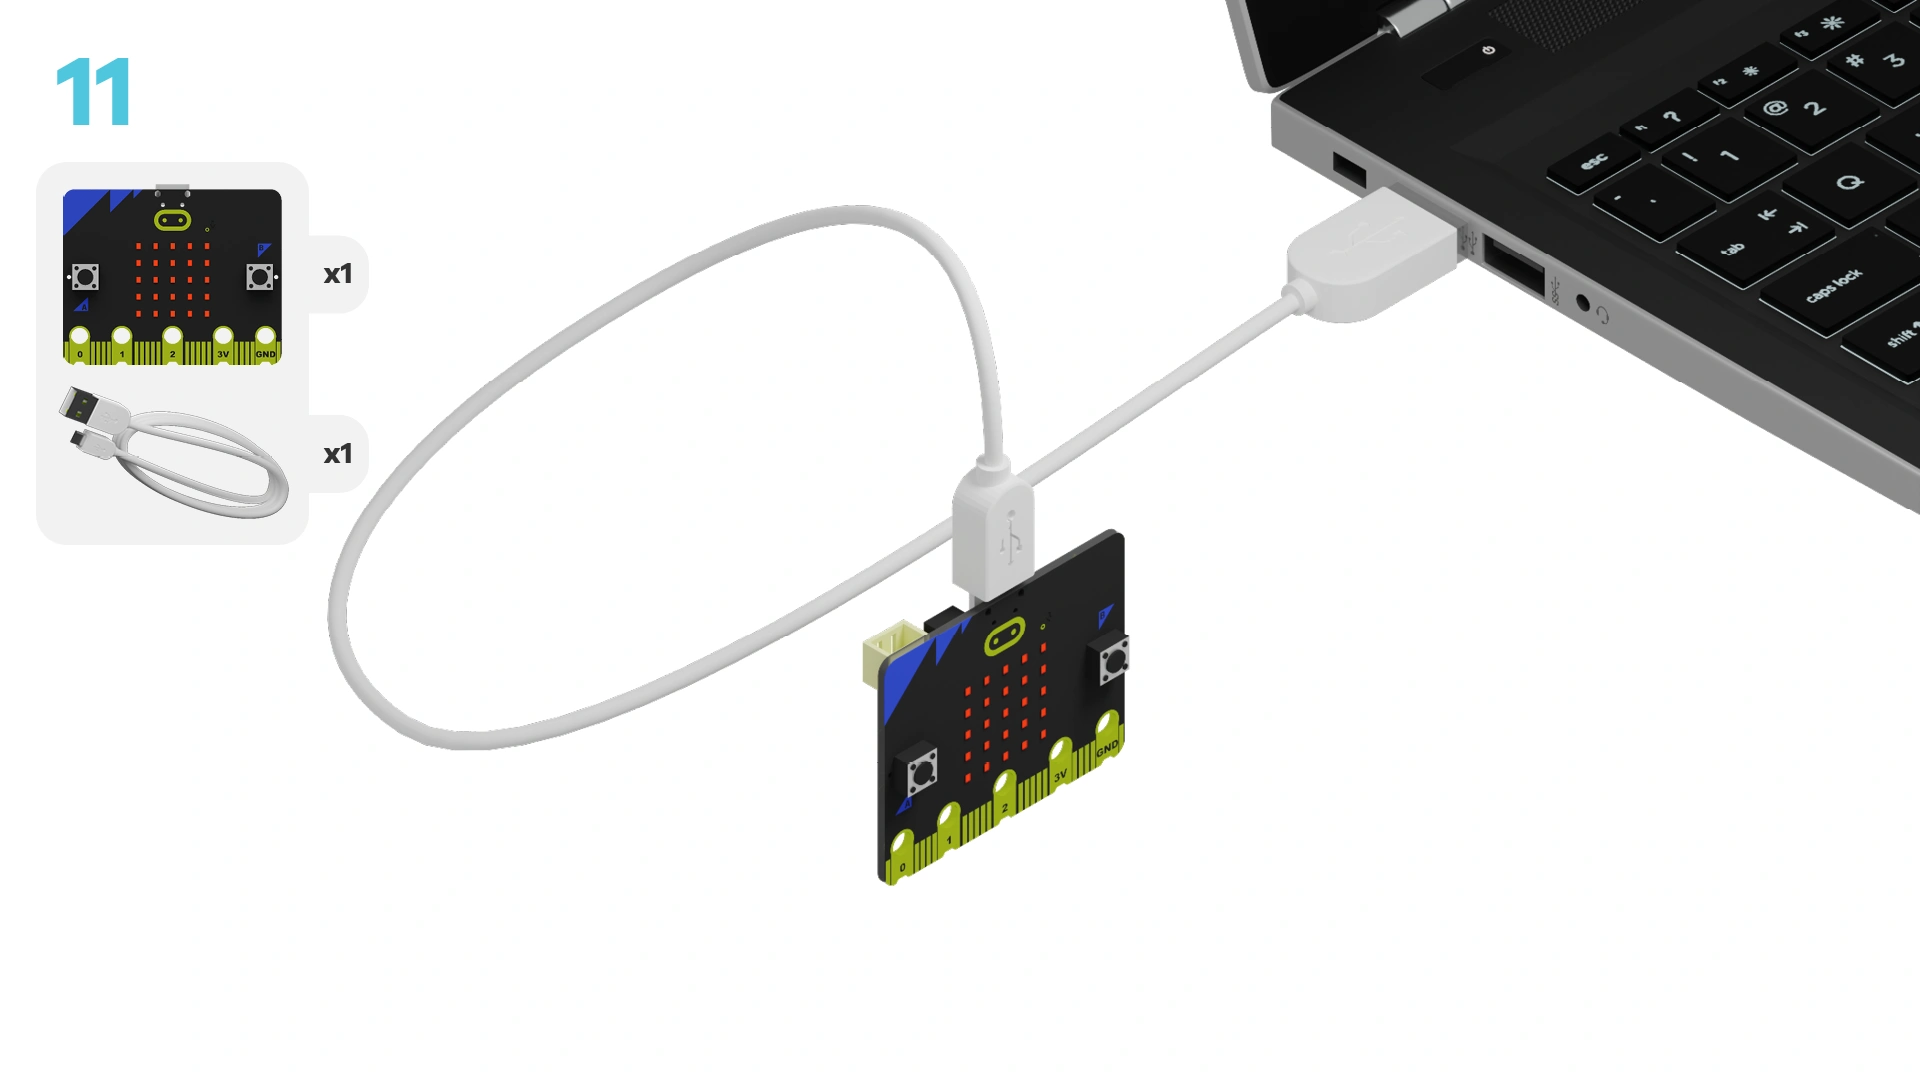
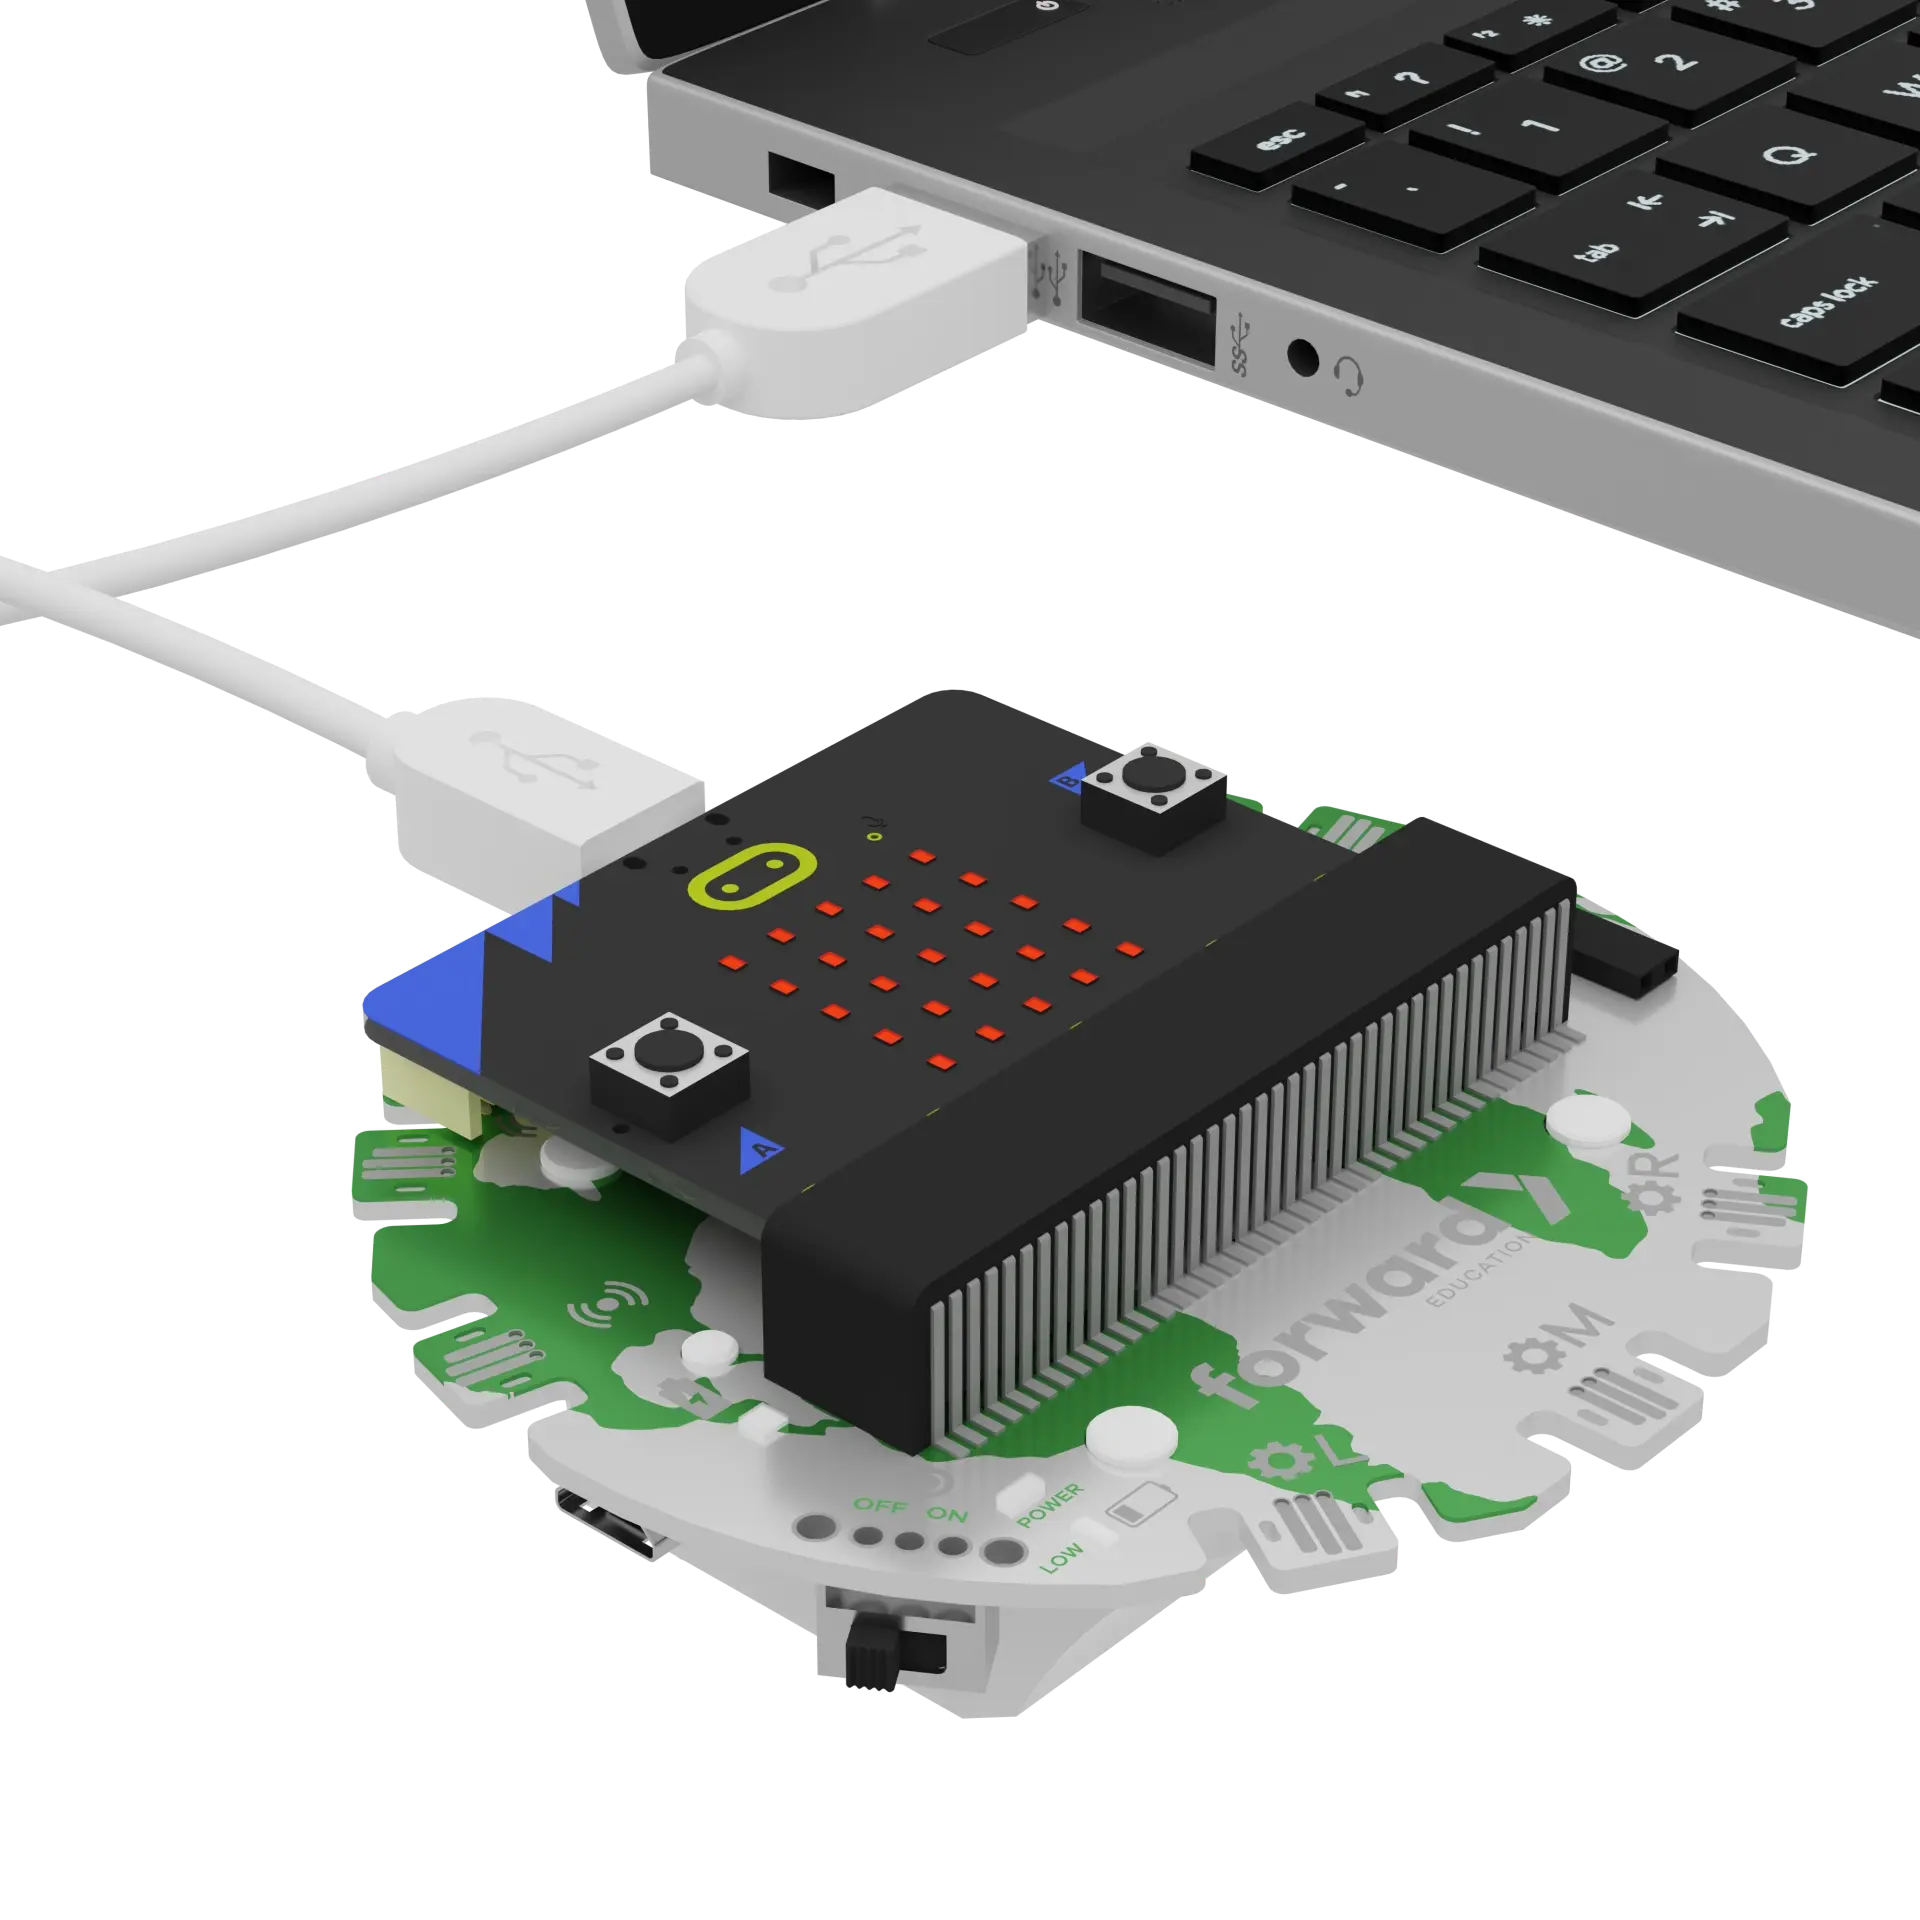
We need to connect our model to the computer to make it come to life with code!
The code will be the instructions that tell our micro:bit what to do.
IMPORTANT! Make sure your Climate Action Kit Breakout Board is turned on and your micro:bit is plugged into your computer.
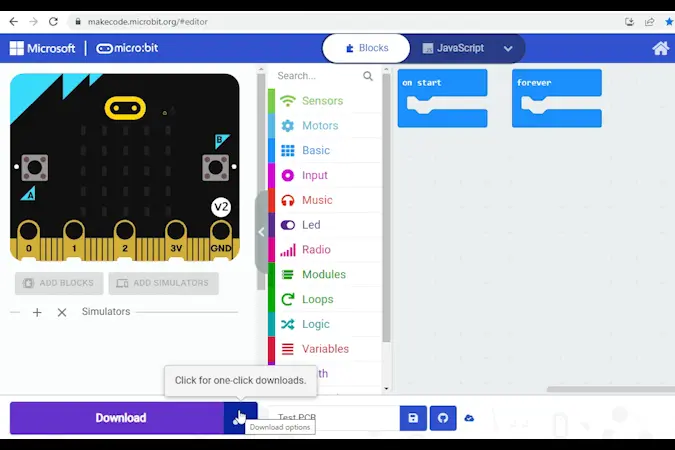
Click the three dots beside the |Download| button, then click on Connect Device.
Next, follow the steps to pair your micro:bit.
Next, click the |Download| button to download the code to your project.
We are now ready to use our coral reef model to see how coral bleaching happens when the water gets too warm.
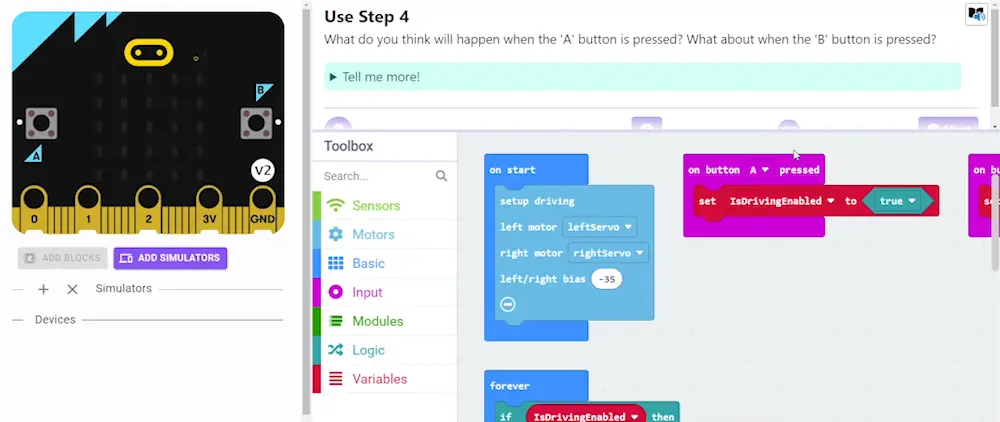
Tutorial Tips
- Follow the steps at the top of the screen.
- When you are ready for more details, click 'Tell me more!'
- If you need help with the code, click the lightbulb!
Take a close look at the model you just built. Can you name the different parts you used to make it? Be specific!
~hint Tell me more! This model uses:
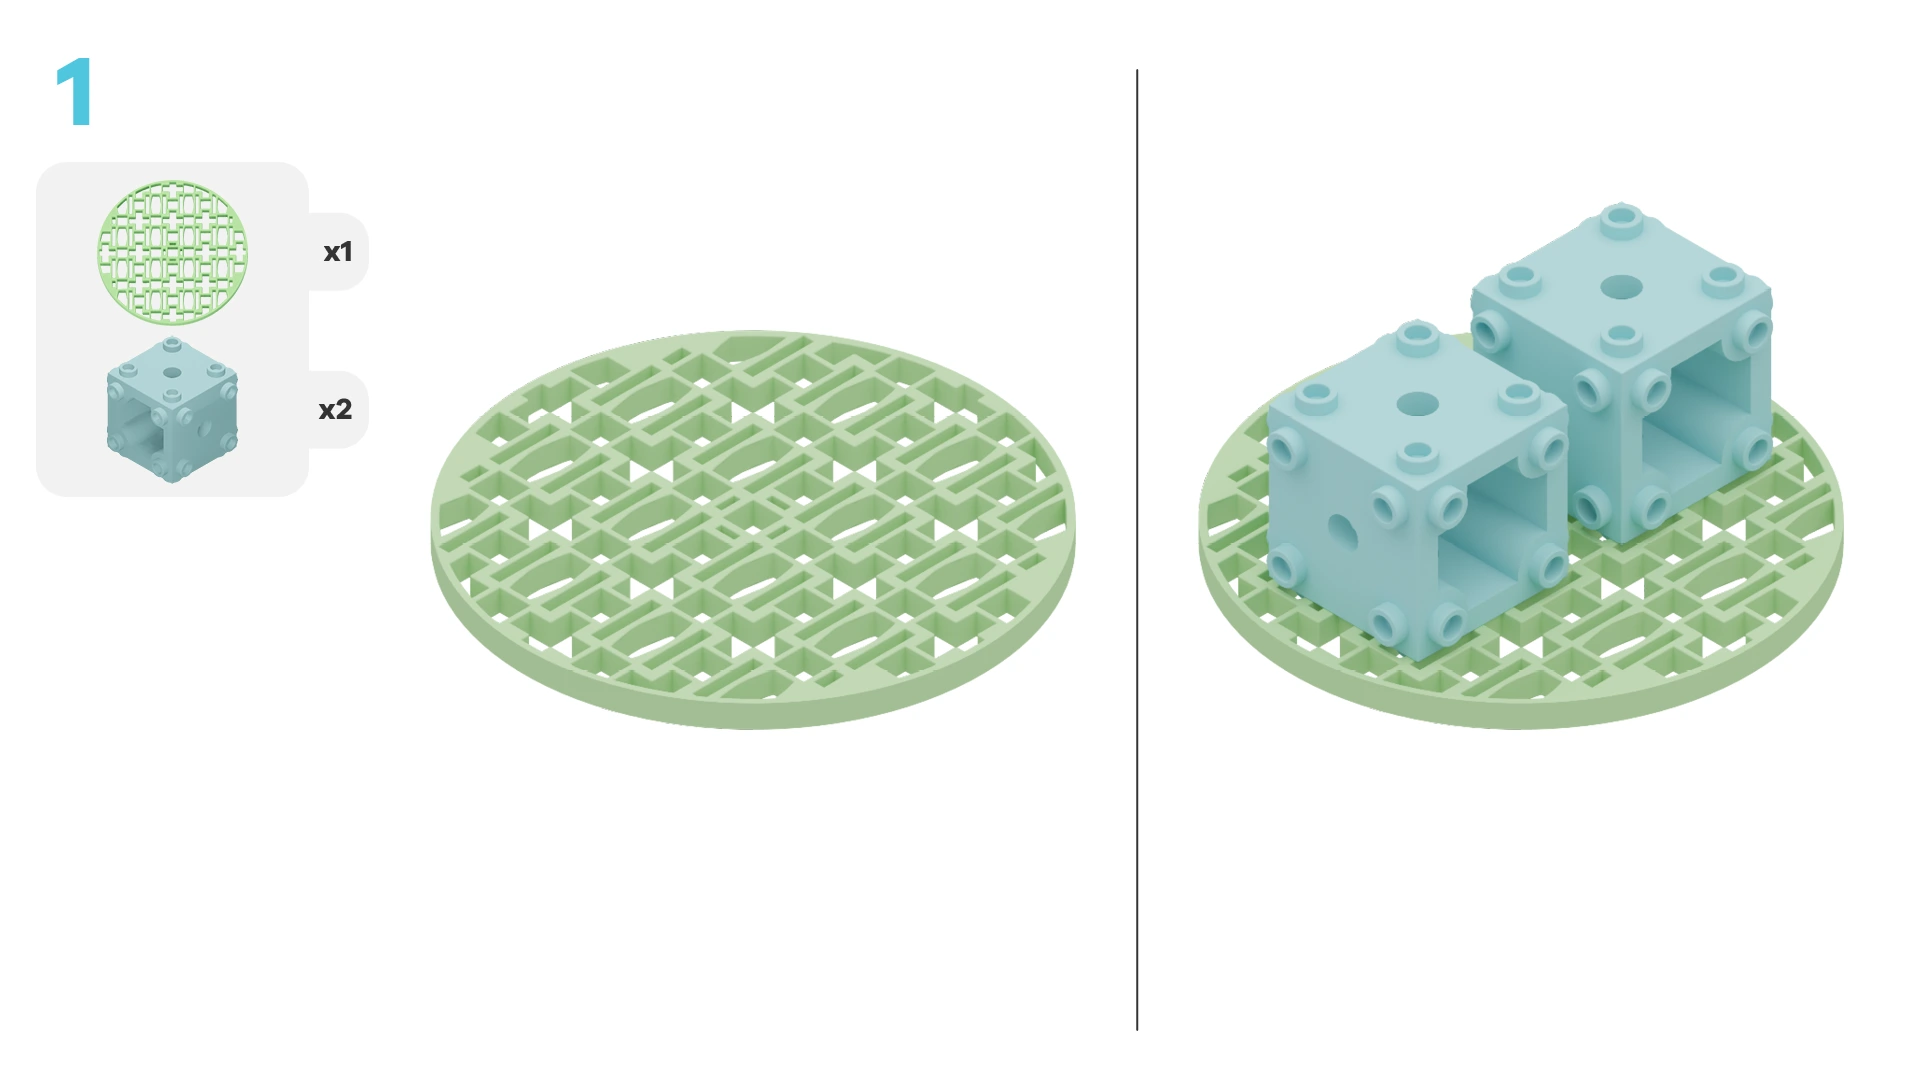
- Building Blocks: One baseplate, one circle, four cube connectors, and two medium white frames
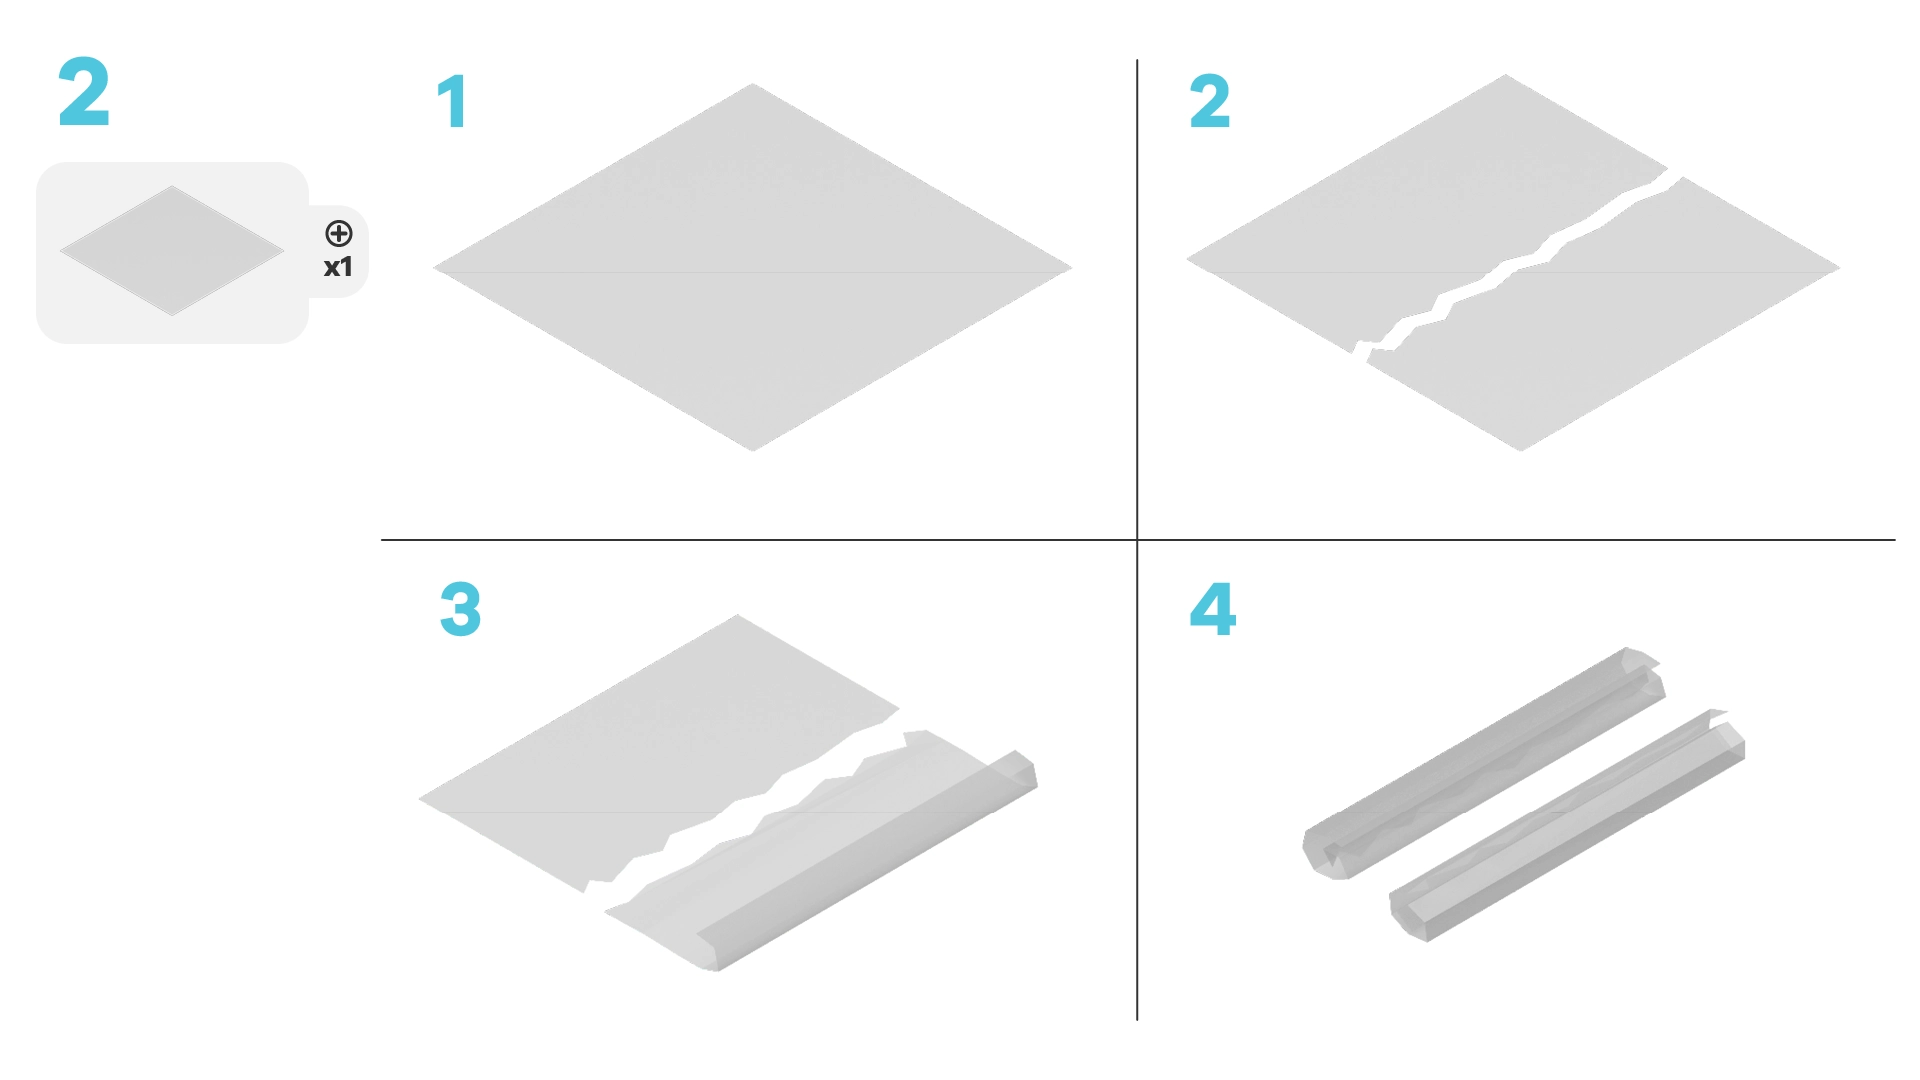
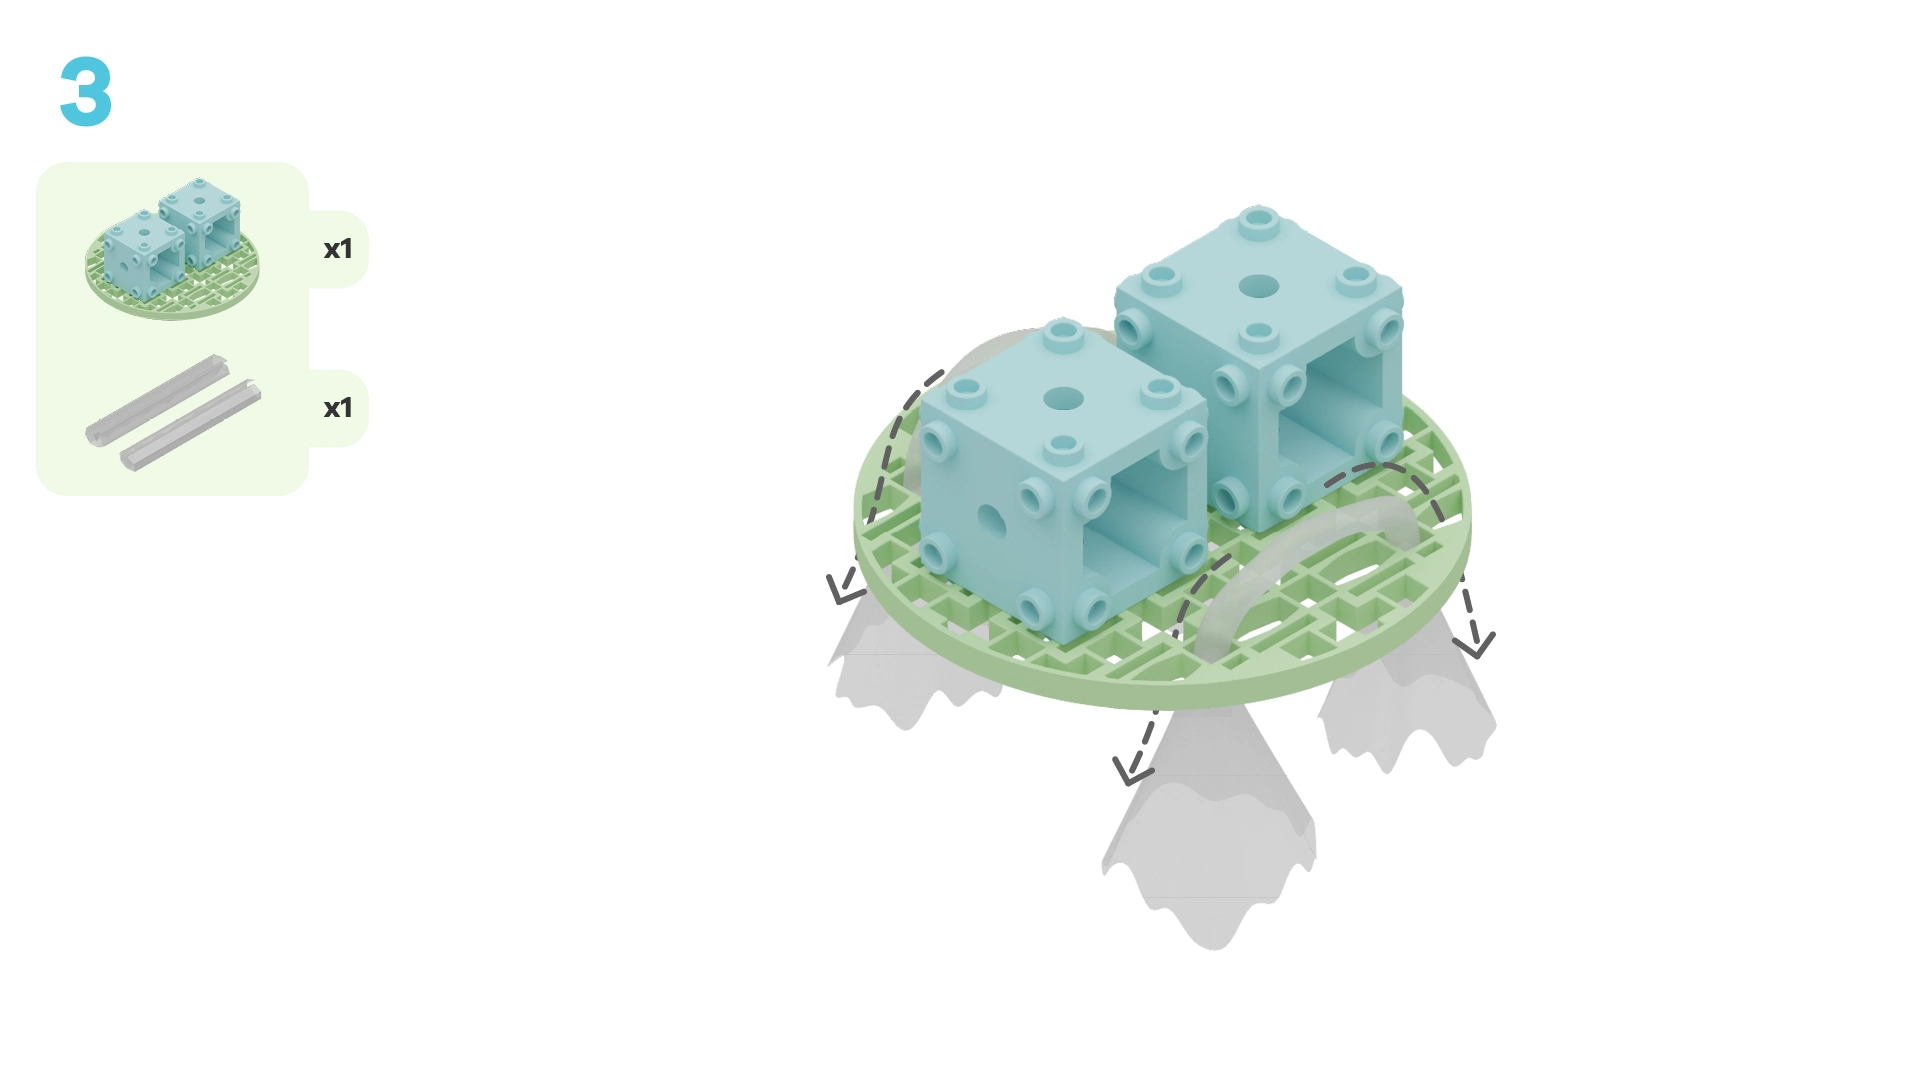
- Craft supplies: Tissue paper
- Robotic Parts: A breakout board, micro:bit, dial, and LED ring hint~
What do you think the different parts of your model represent?
~hint Tell me more!
- The LED ring represents the coral. Its colour will show whether the coral is healthy or bleached. We use tissue paper to make the LED ring look more like coral. It represents the coral polyp's tentacles! hint~
Time to test out the model by slowly turning the dial one notch to the right.
What do you notice?
~hint Tell me more!
- The number on the micro:bit's LED screen increased by 1.
- This number is going to represent the current temperature of the ocean. hint~
We are using a variable to store the temperature. Variables are like boxes that hold information for us.
Each time you turn the dial, the temperature variable changes based on the direction you turn it. Try turning the dial one notch to the left. What happens?
~hint Tell me more! Here's how it works:
- The variable holds the current temperature. In this program, the temperature starts at 28°C.
- When you turn the dial, the variable changes. Turning the dial to the right increases the temperature, and turning it to the left decreases the temperature.
- The micro:bit keeps checking number inside the temperature variable and shows it on the screen. hint~
let temperature = 28

fwdSensors.dial1.fwdOnDialTurned(fwdSensors.DialDirection.CW, function (difference) {
    temperature += 1
})

fwdSensors.dial1.fwdOnDialTurned(fwdSensors.DialDirection.CCW, function (difference) {
    temperature += -1
})

basic.forever(function () {
    basic.showNumber(temperature)
})
Keep turning the dial until the temperature is above 30°C.
What do you notice?
~hint Tell me more!
- When the temperature is above 30°C, the LEDs on the LED ring turn white.
- This represents coral bleaching as the ocean gets warmer. hint~
We used something called a conditional statement to change the colour of our LED ring (aka coral!)
A conditional statement is a rule that tells the micro:bit what to do when certain conditions are met. In this model, the conditional statement changes the colour of the LED ring based on the temperature.
Can you find the conditional in the code below?
~hint Tell me more!
- If the temperature is above 30°C, the coral bleaches (the LED turns white).
- If the temperature is 30°C or lower, the coral stays healthy (the LED stays pink). hint~
    if (temperature > 30) {
        fwdSensors.ledRing.fwdSetAllPixelsColour(0xffffff)
    } else {
        fwdSensors.ledRing.fwdSetAllPixelsColour(0xff0080)
    }
Now that you've tested your coral reef model, let's reflect.
How is this a good model for coral bleaching in real life?
~hint Tell me more! Strengths:
- This model clearly shows how warmer water can cause coral bleaching.
- It shows that even a small increase in temperature can cause coral bleaching.
- The model uses colour in a helpful way. In real life, coral starts off coloured but turns white as it bleaches - just like our LED ring!
- In our model, humans can affect the ocean's temperature by turning the dial. While we can't turn a dial in real life, we can take actions like reducing pollution to help lower the ocean’s temperature and protect coral reefs. hint~
What are some limitations of this model? Does it show everything that happens in a real coral reef?
~hint Tell me more!
- In this model, bleaching happens suddenly. In real life, coral bleaching happens slowly over time as the water temperature rises.
- The model only shows temperature changes, but in real life, factors like pollution or too much sunlight can also cause coral bleaching.
- This model doesn’t show the ways corals can recover and become healthy again.
- The model doesn’t show how coral bleaching affects other animals that live in the reef.
Pick one of these limitations. How could we improve the model to address it? What components of the Climate Action Kit would you add? hint~
You've completed the activity!
List 2 new things you learned today.
What is one thing you want to learn more about?
In the next step, you can click the |Done| button to finish the tutorial.
