fwd-edu-breakout=github:climate-action-kits/pxt-fwd-edu/fwd-breakout
sonar=github:climate-action-kits/pxt-fwd-edu
datalogger=datalogger
basic.forever(function () {
    while (fwdSensors.solar1.fwdIsLightLevelPastThreshold(95, fwdSensors.ThresholdDirection.Over)) {
        fwdMotors.leftServo.fwdSetEnabled(true)
        basic.pause(2000)
        fwdMotors.leftServo.fwdSetEnabled(false)
        basic.pause(5000)
    }
})
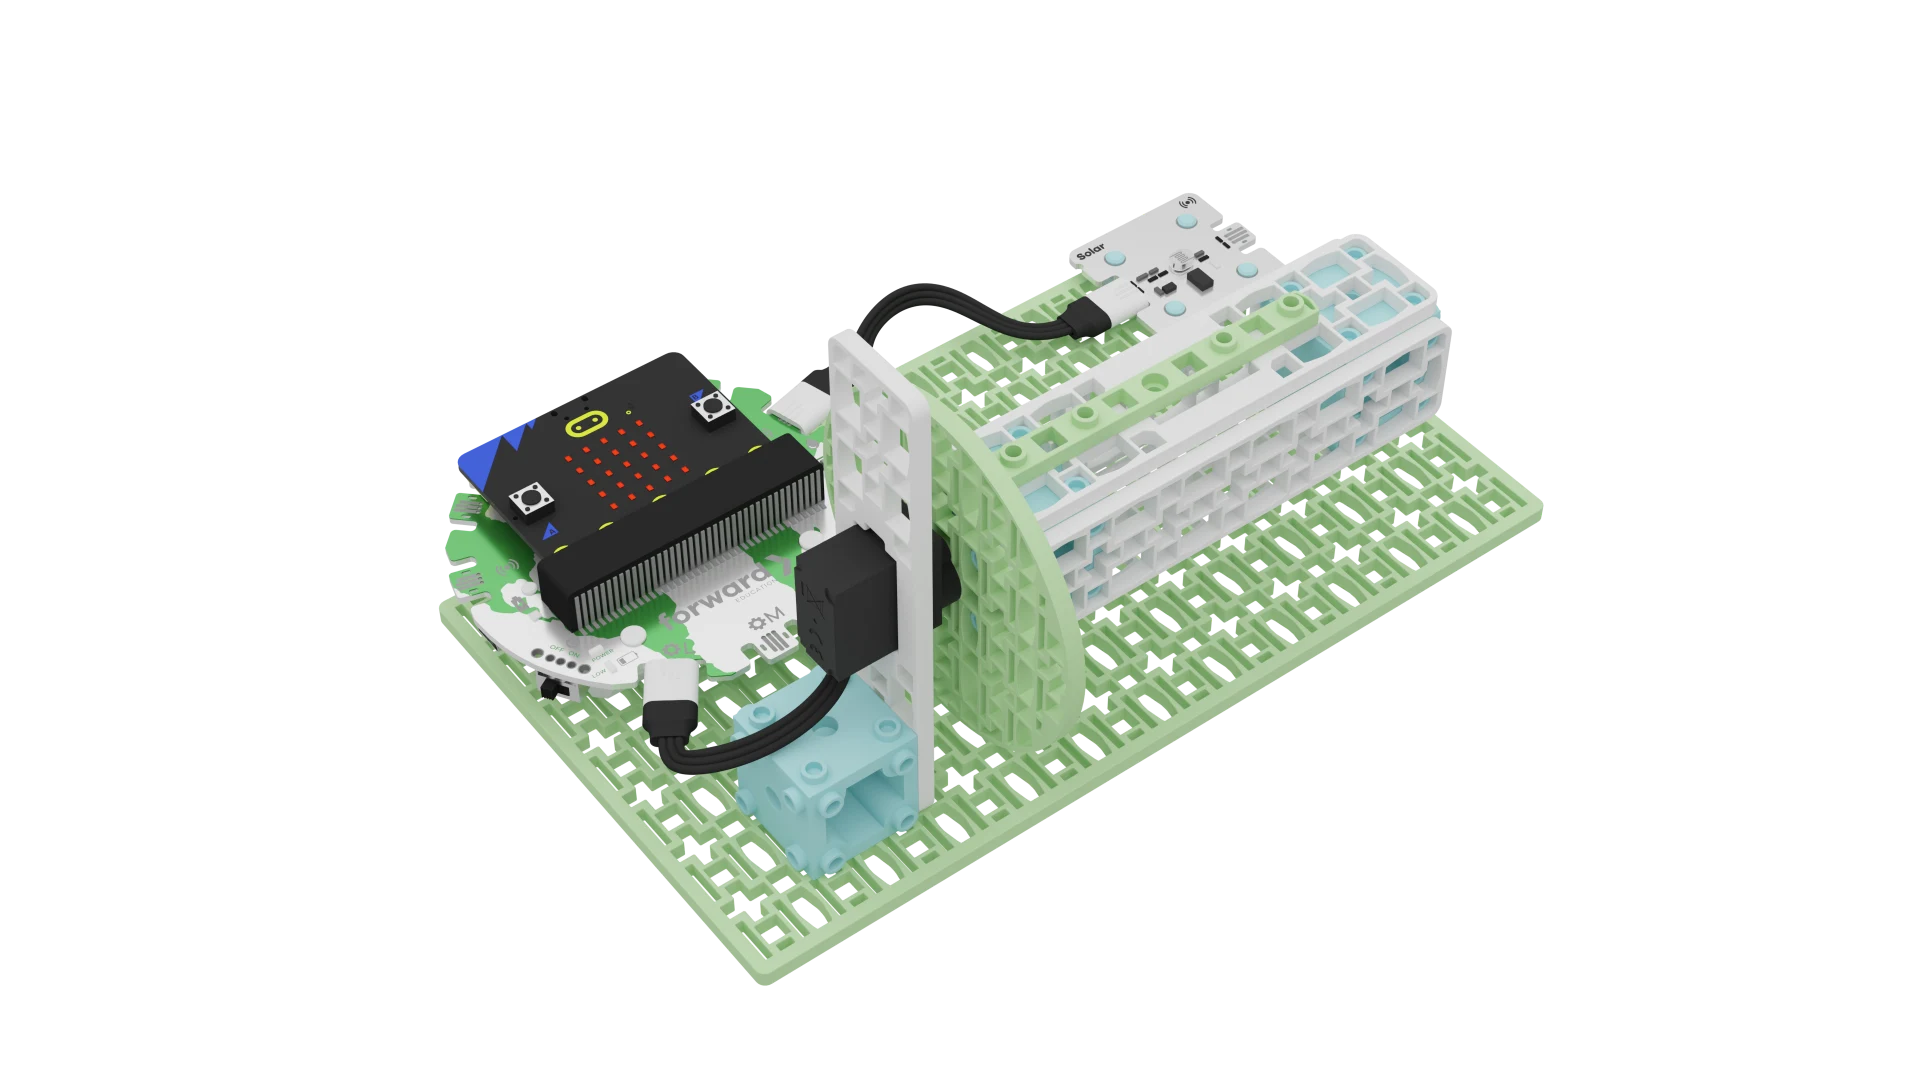
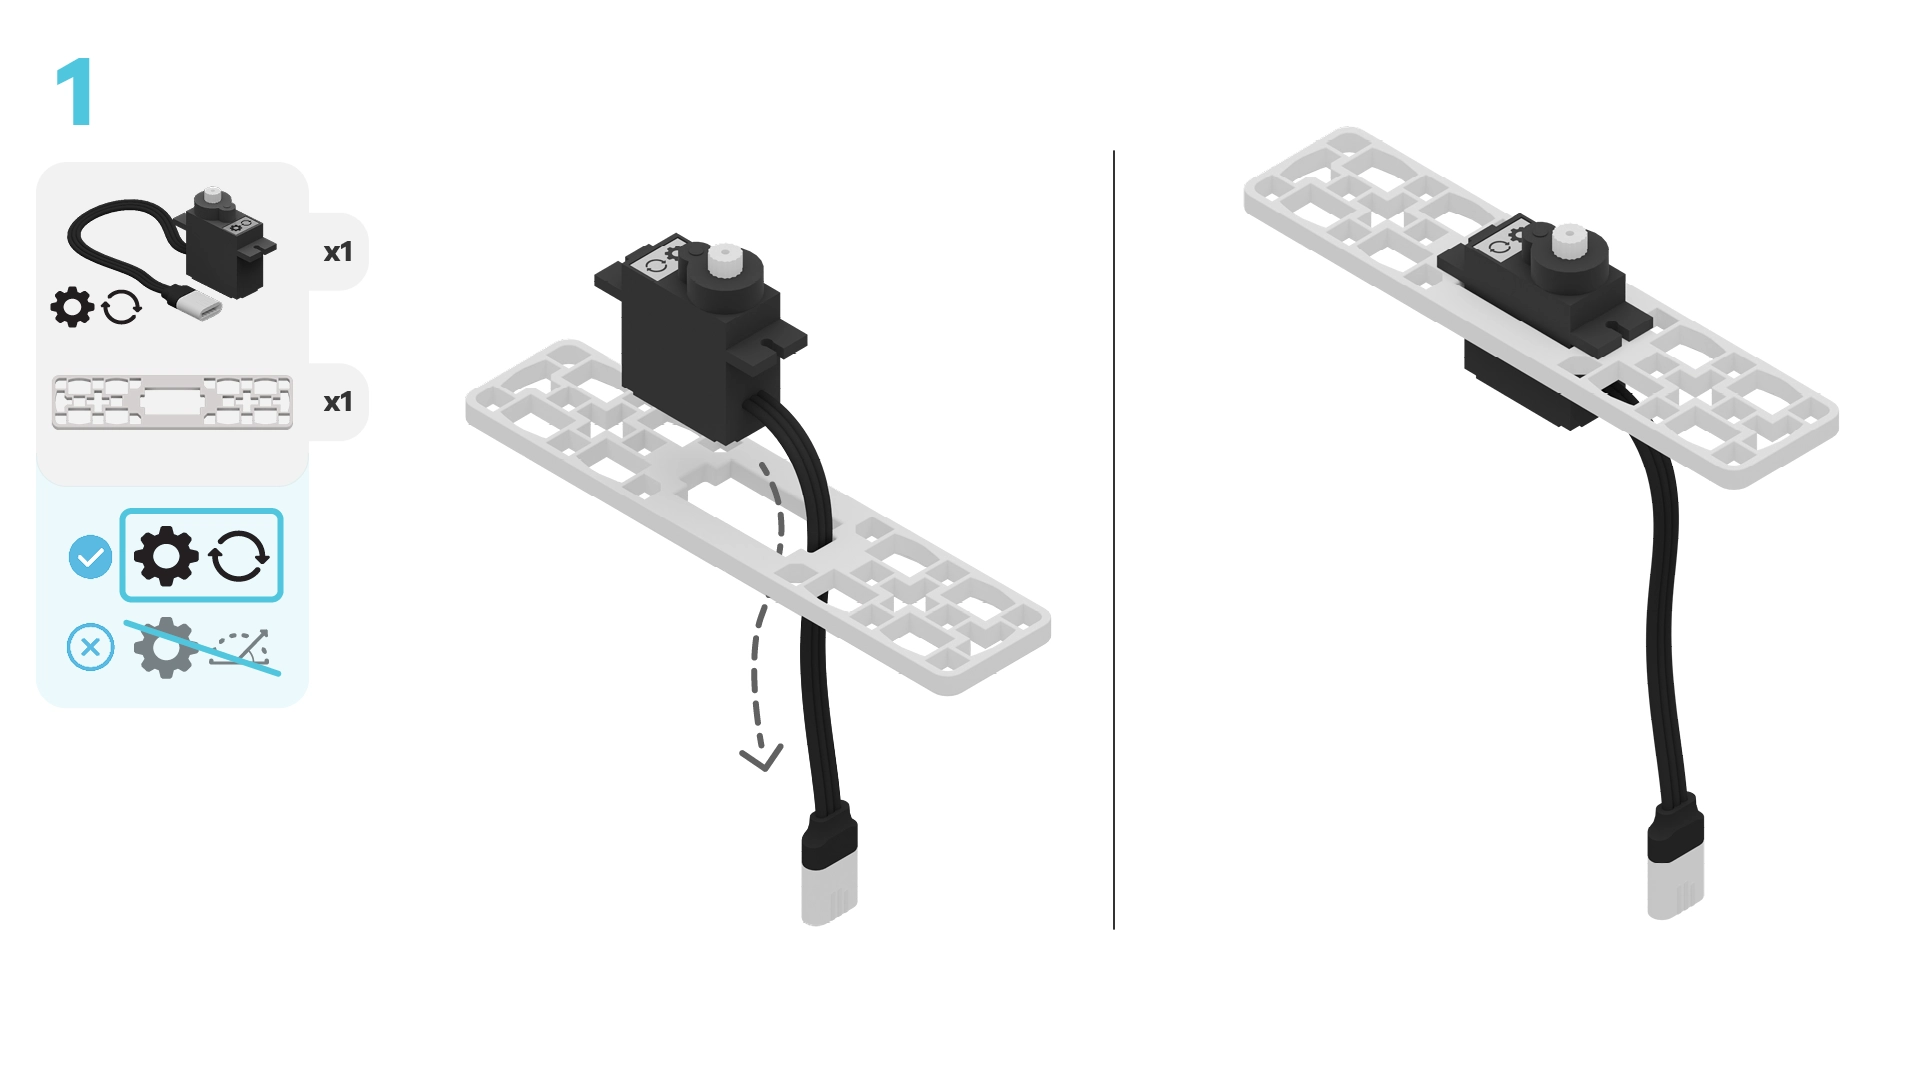
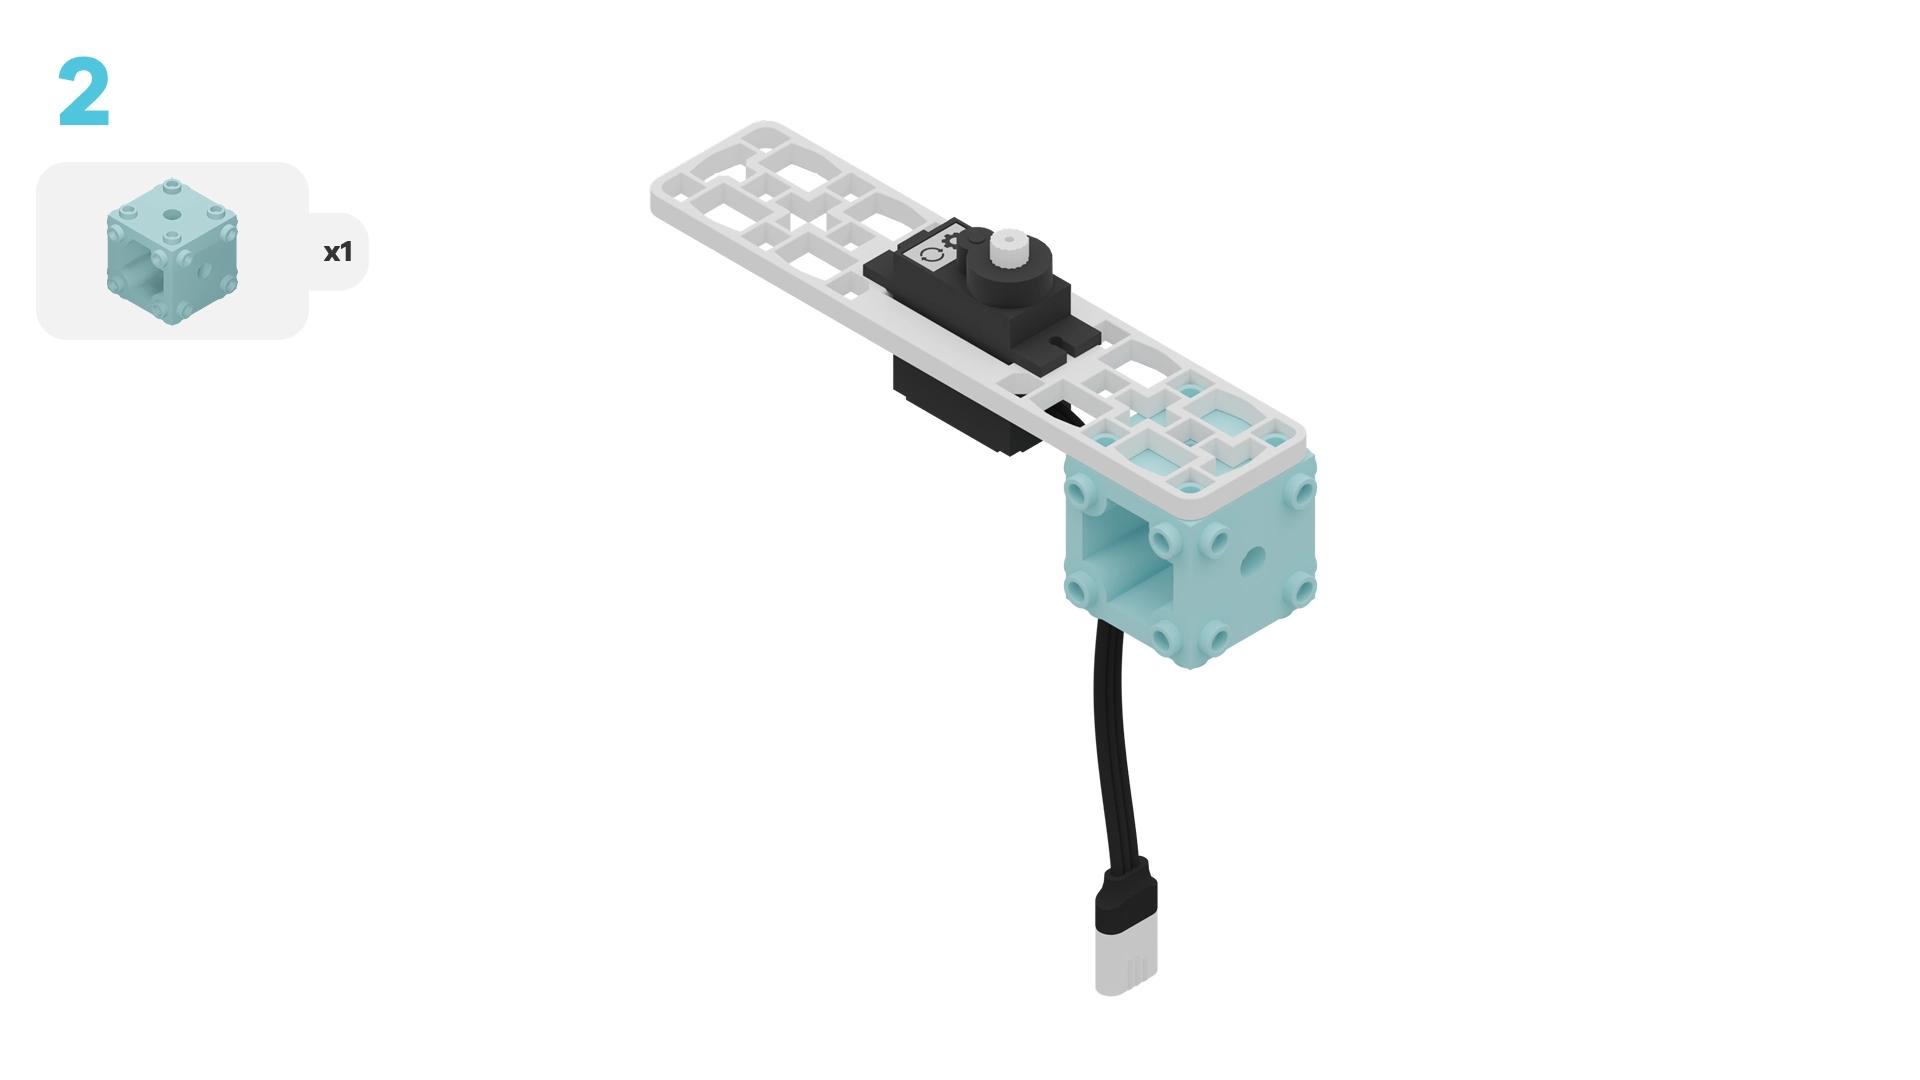
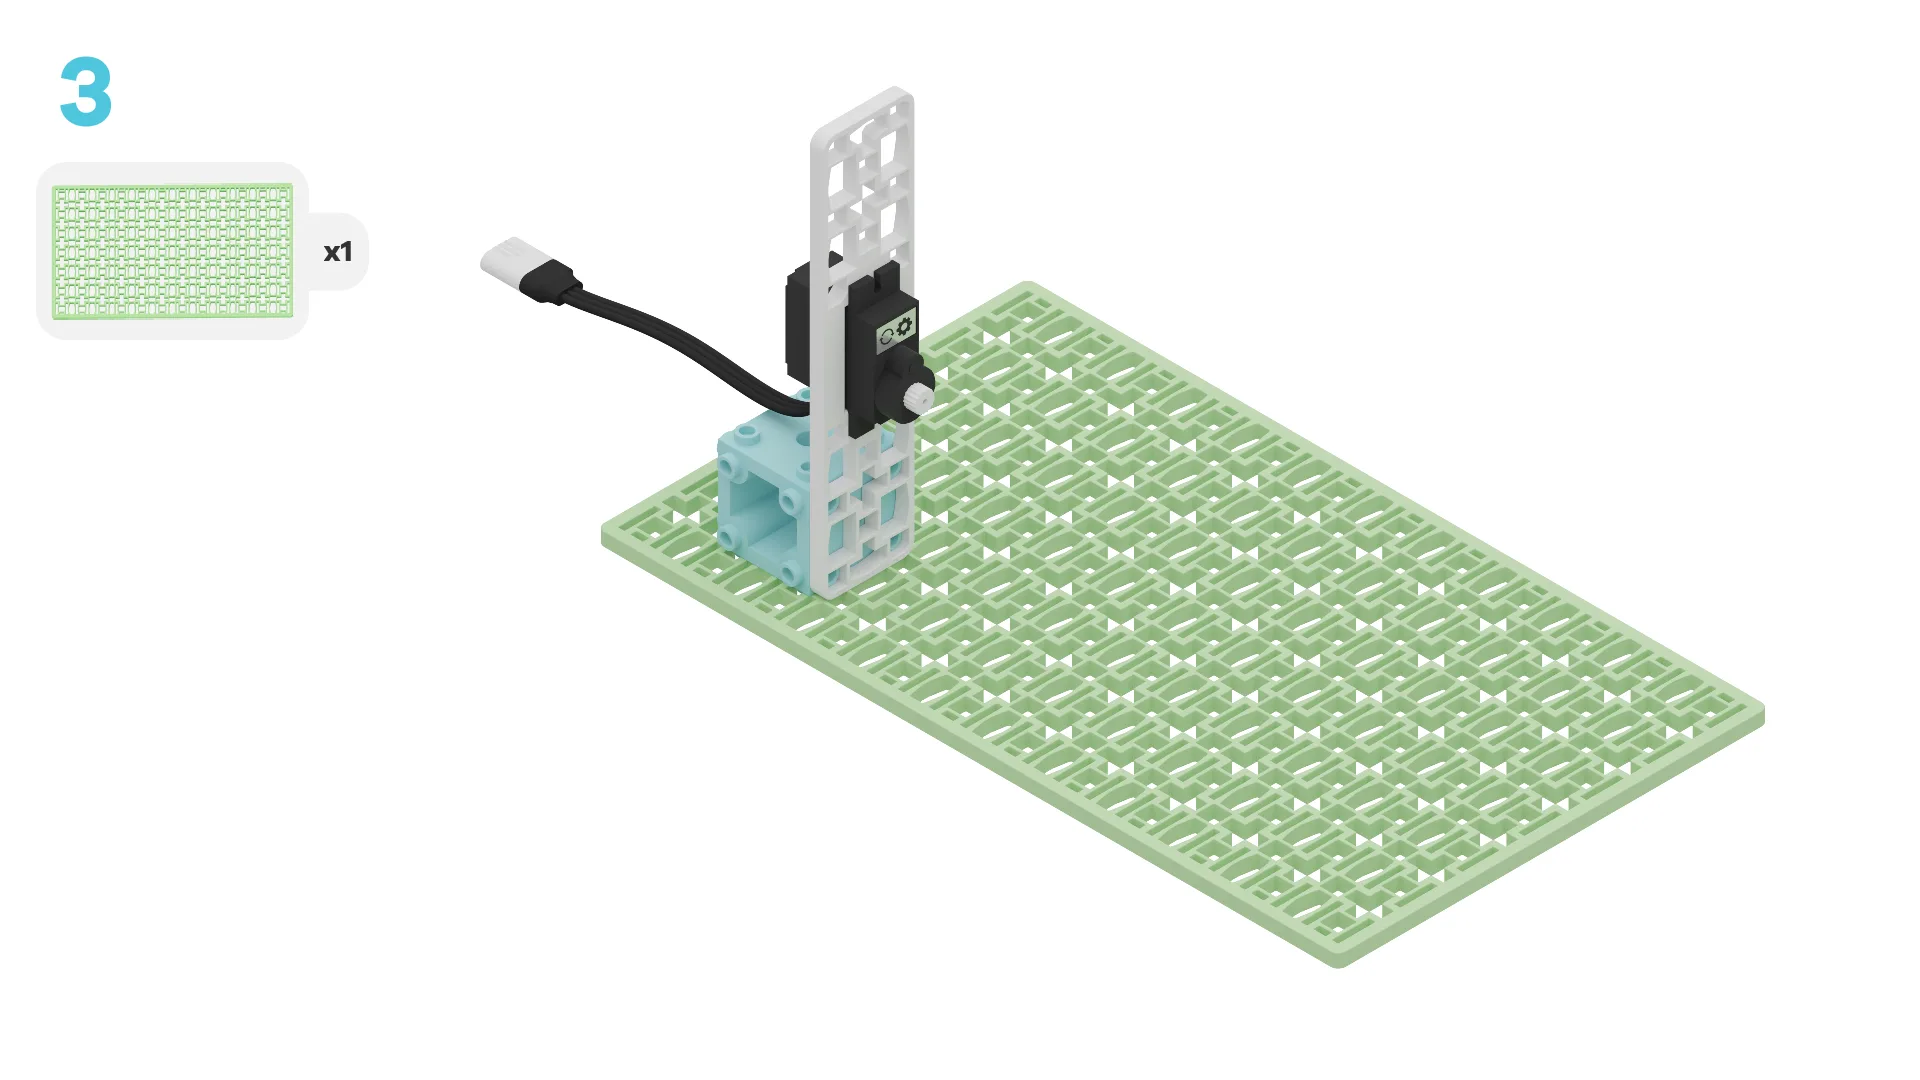
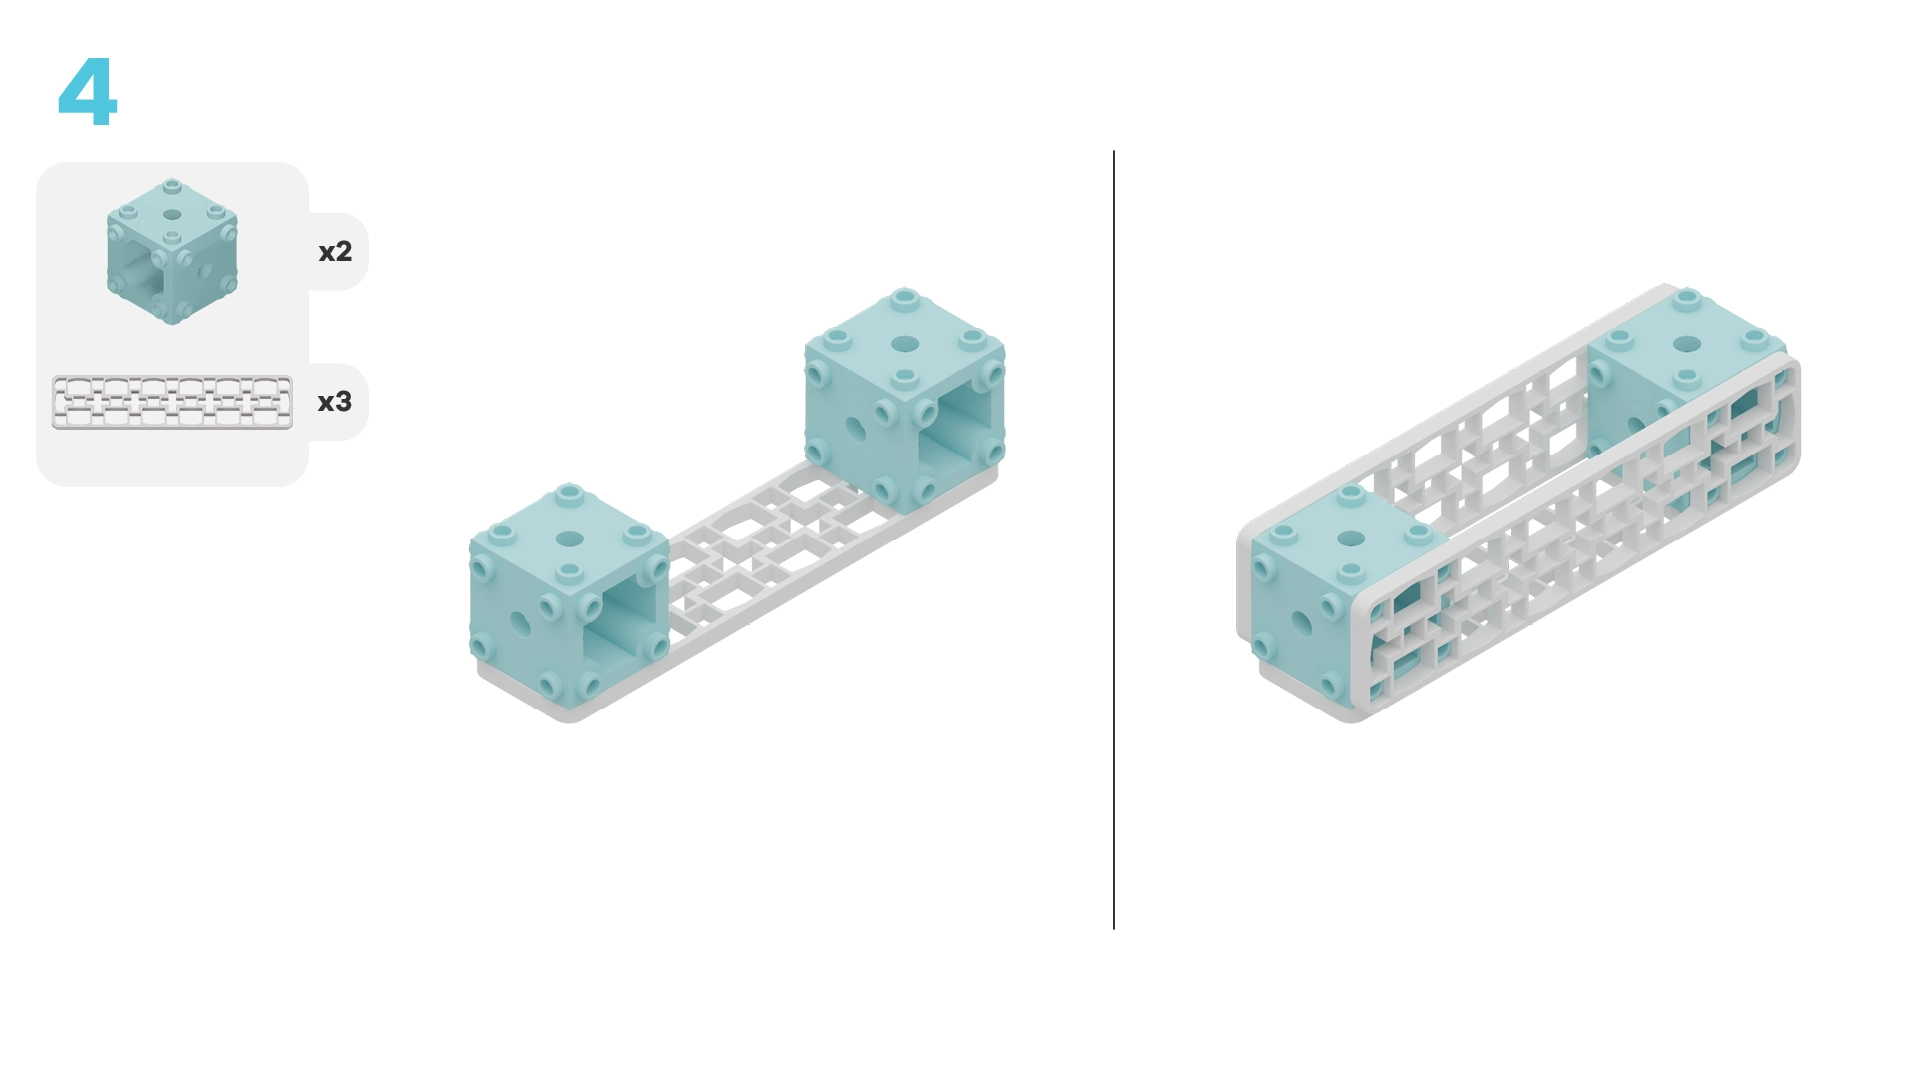
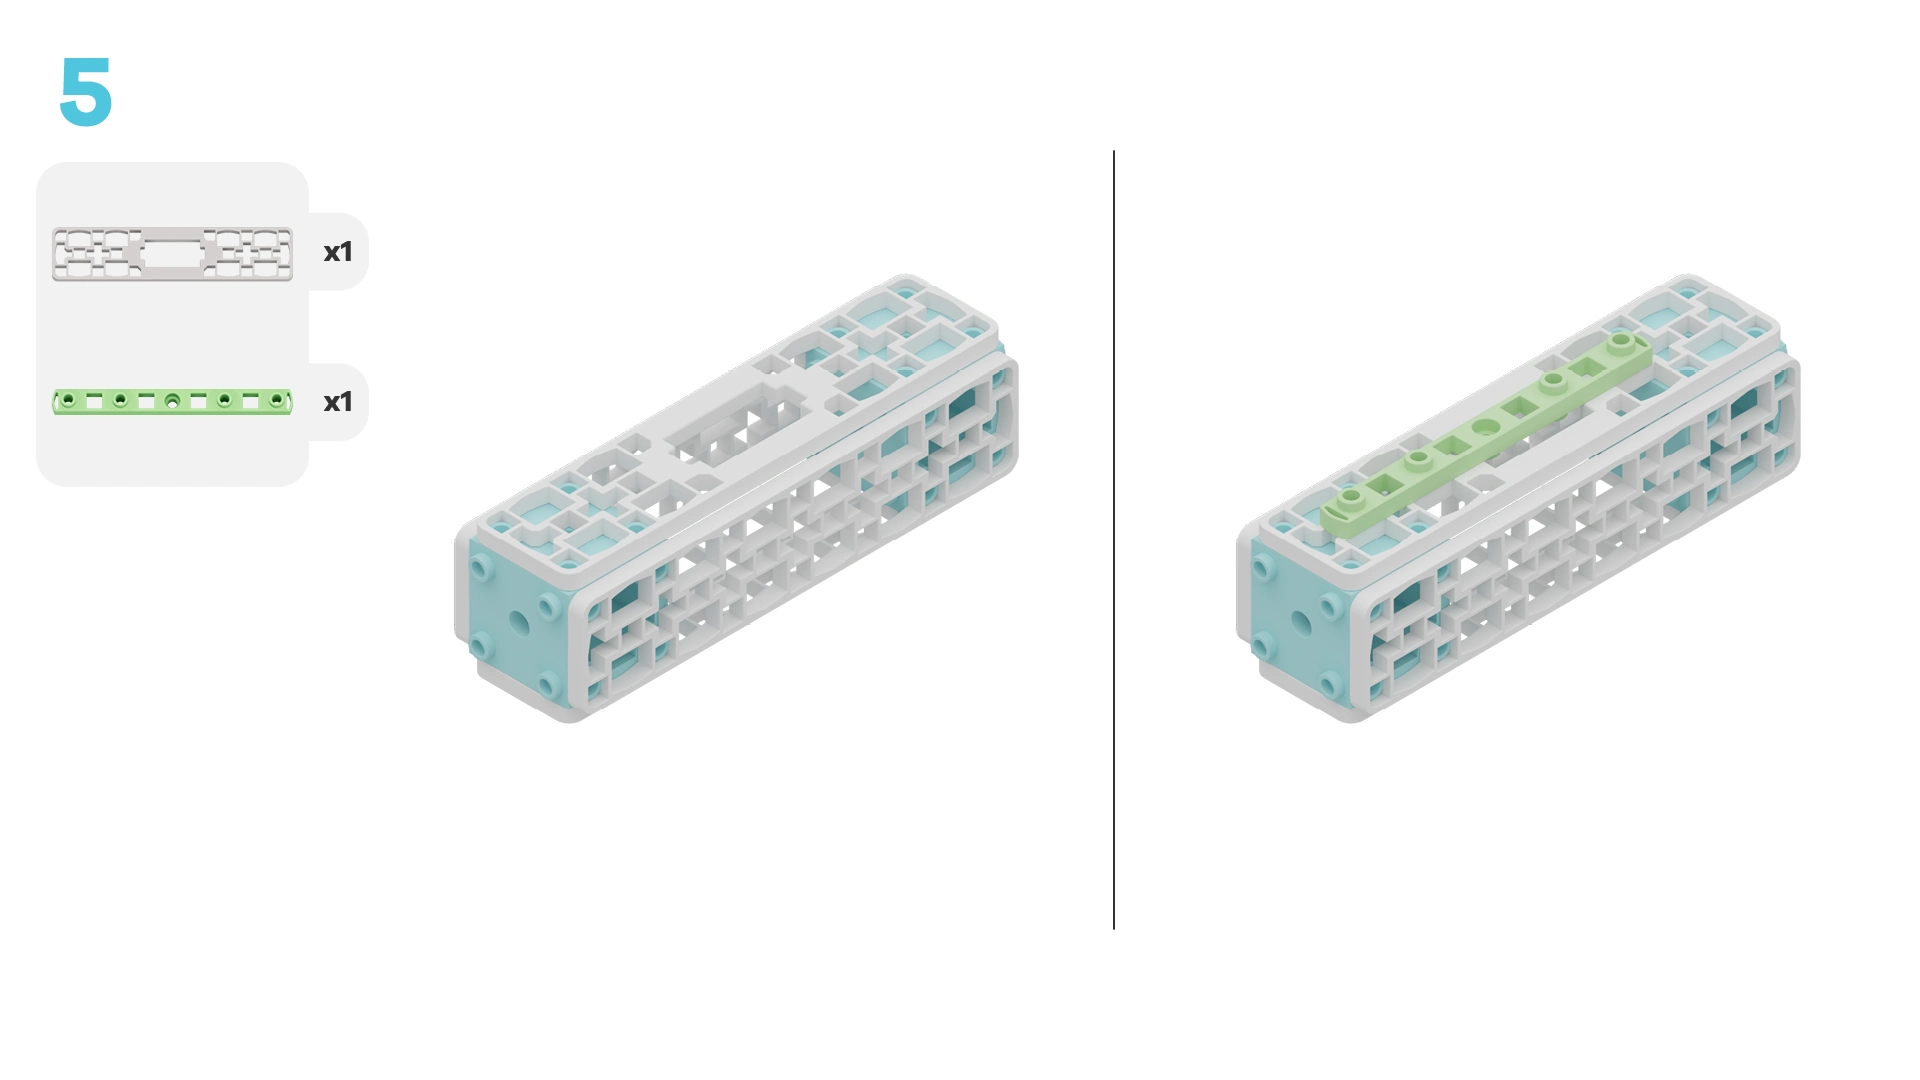
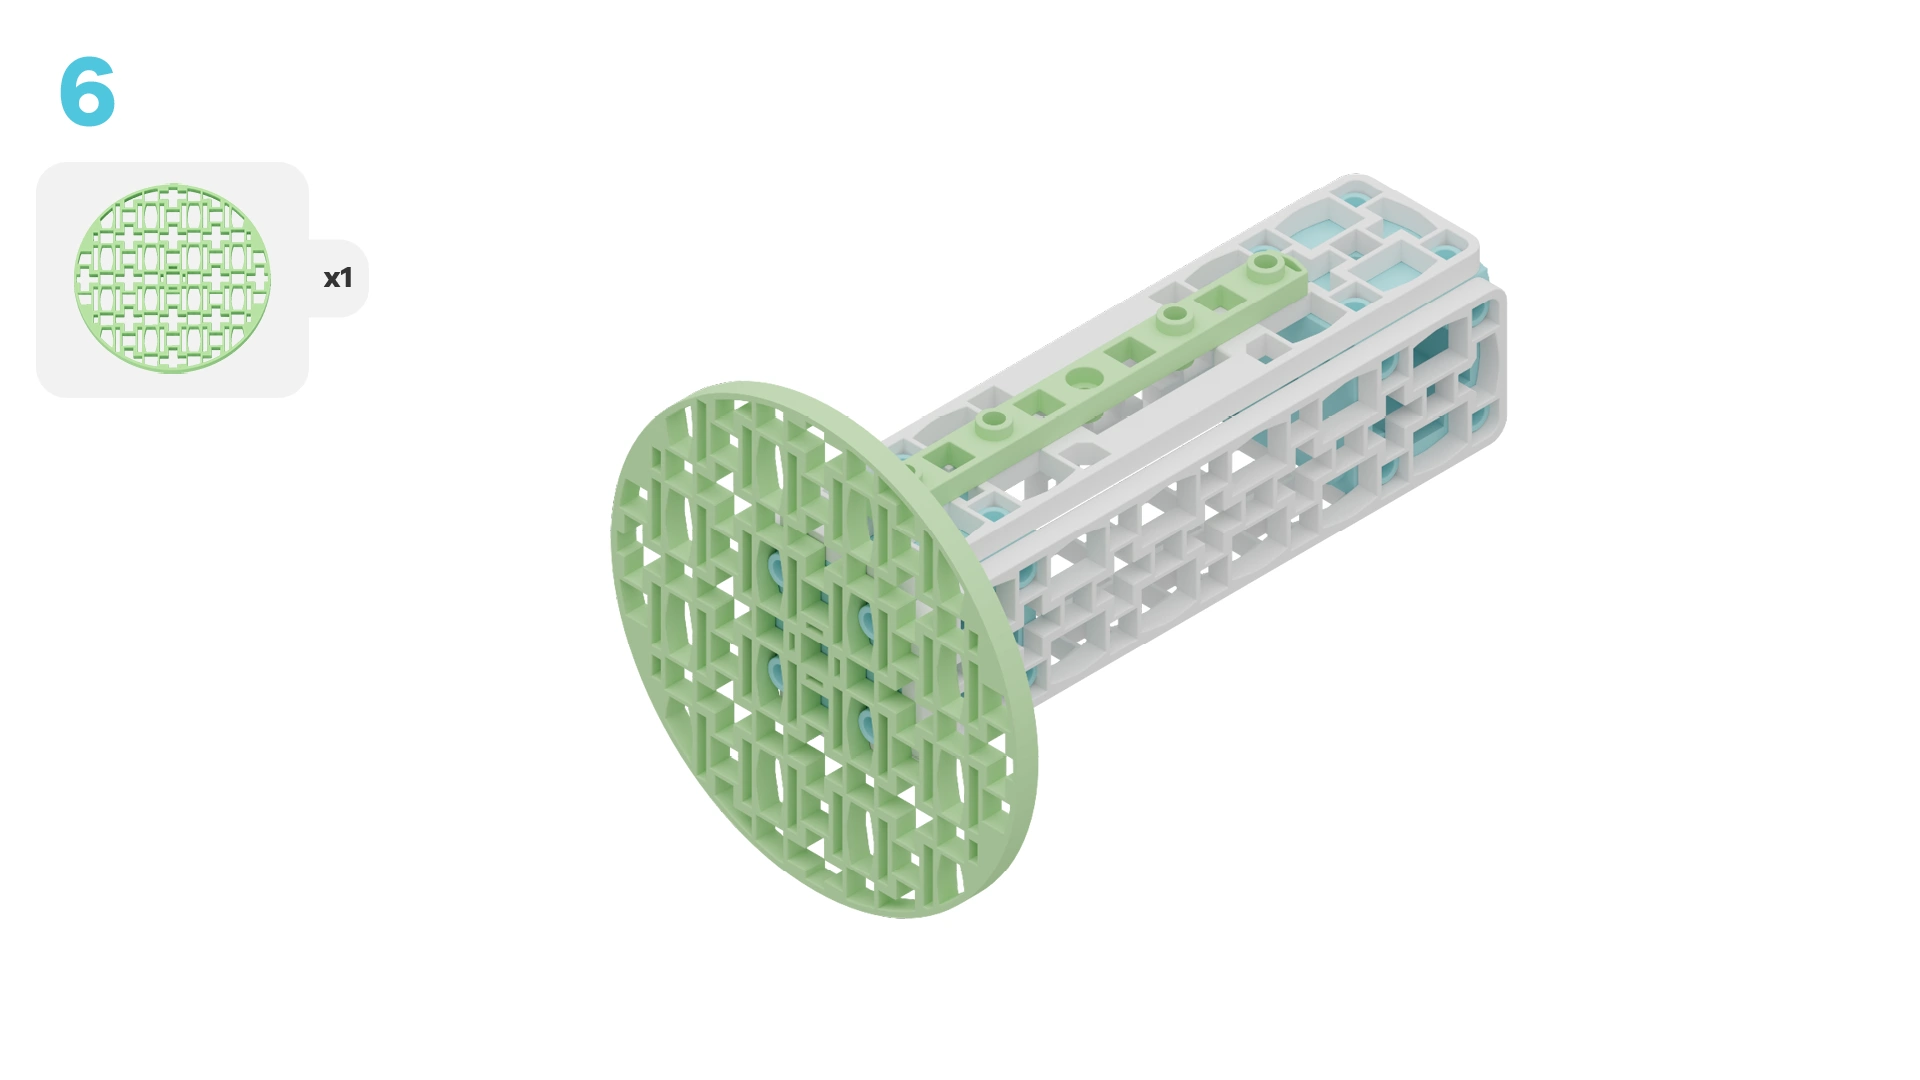
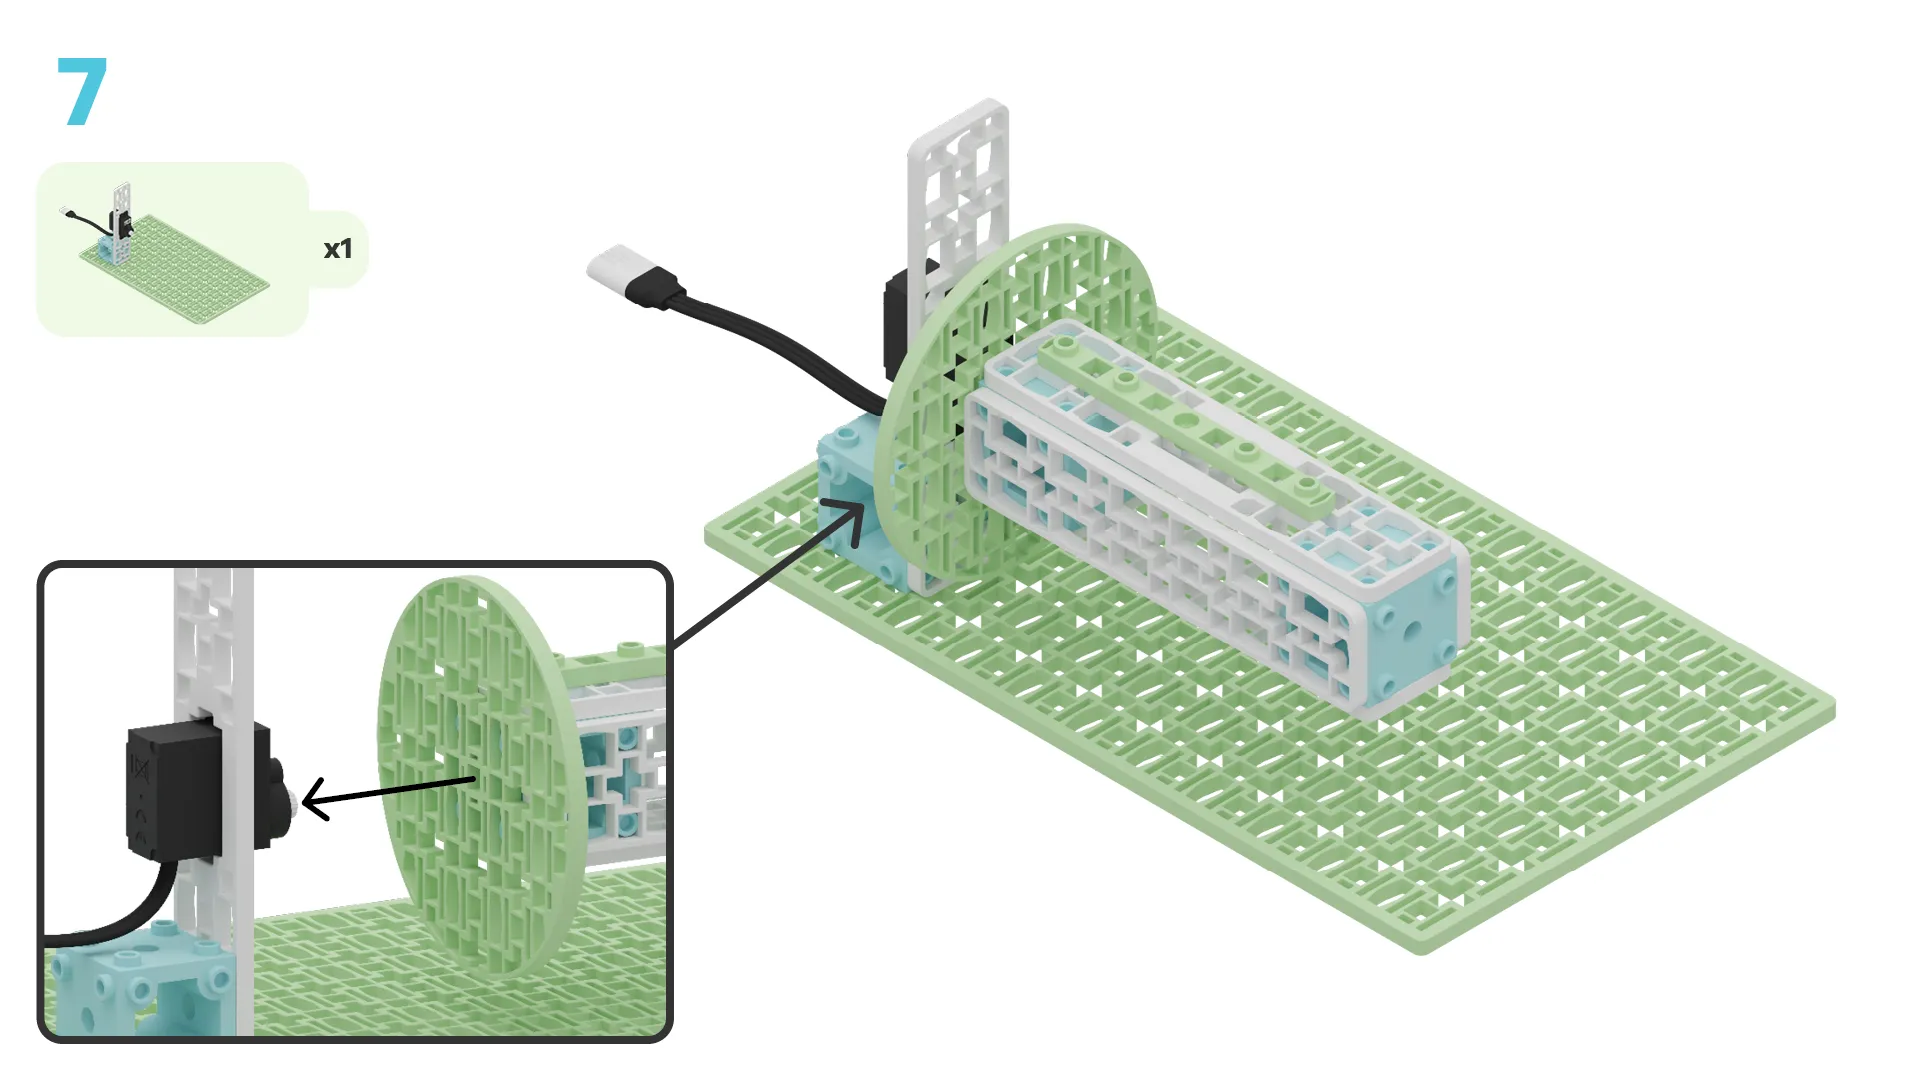
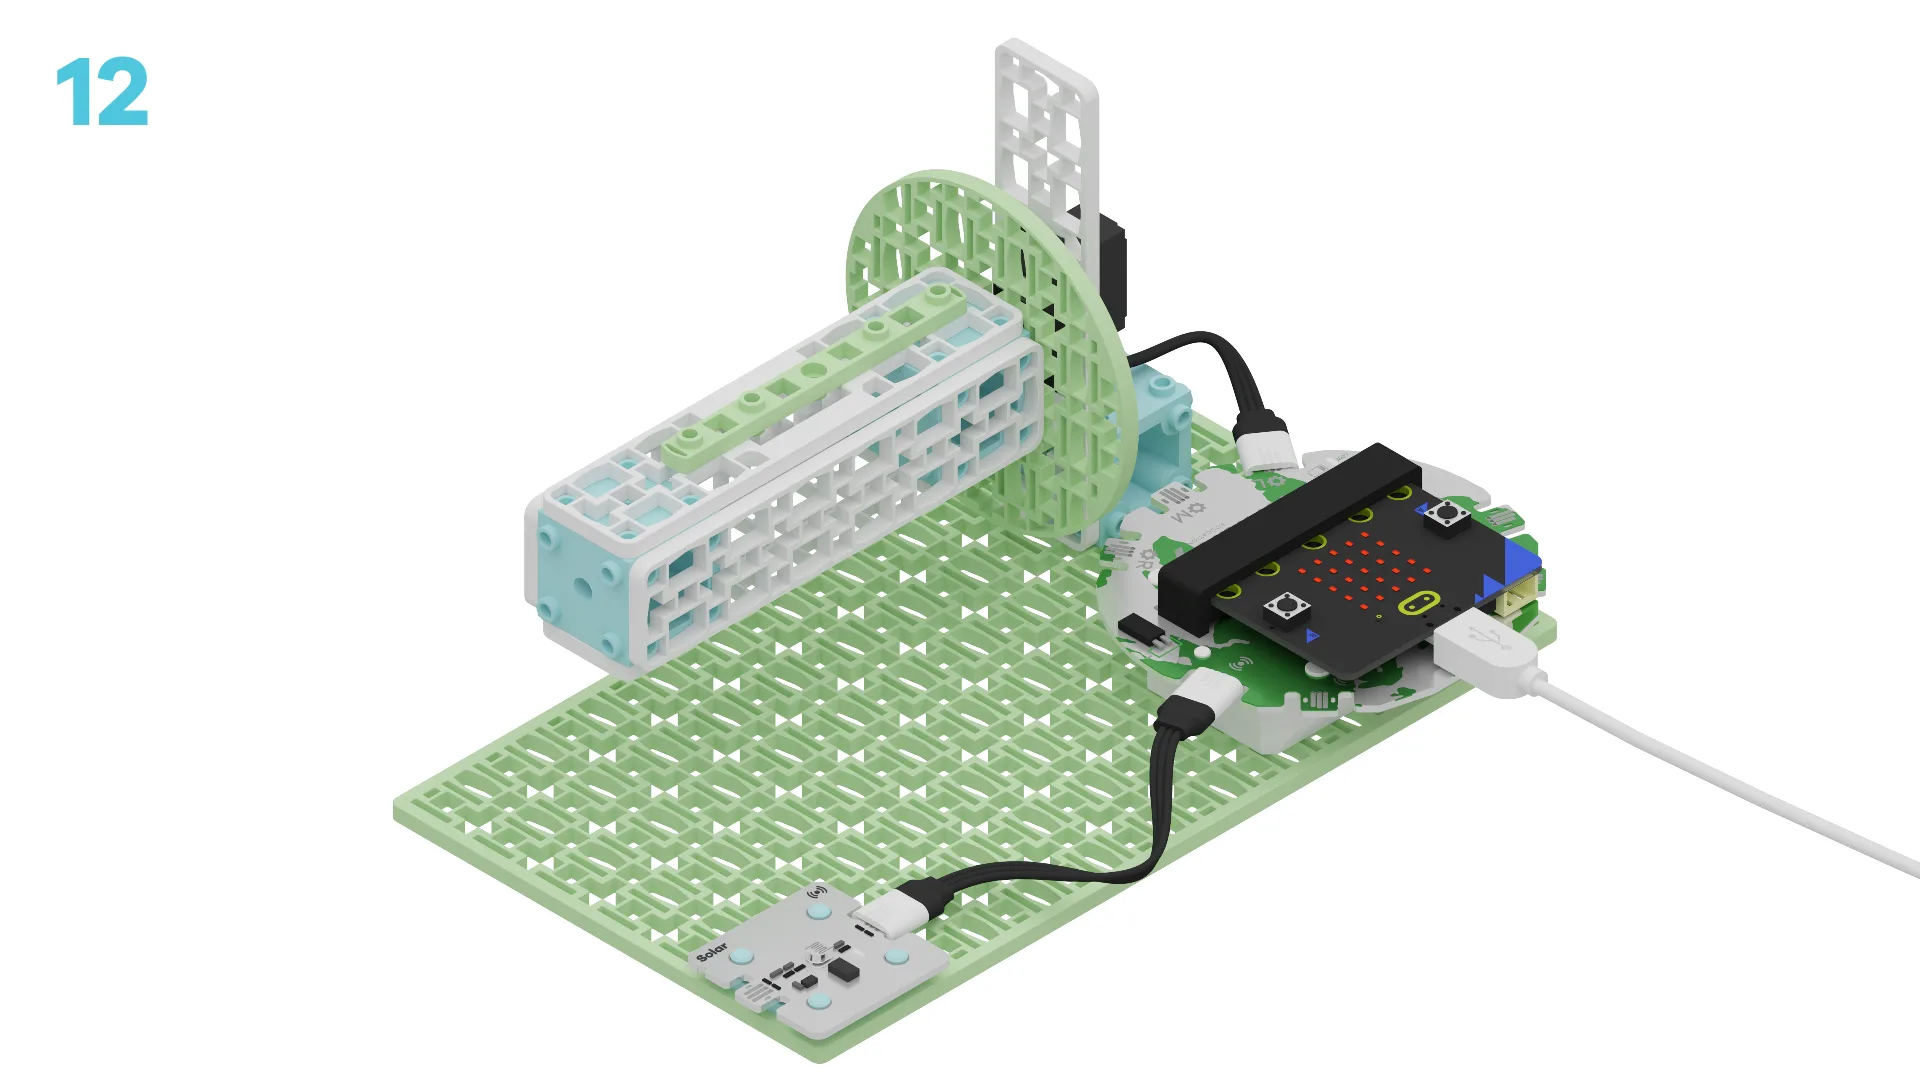
Let's build a compost tumbler that is powered by the sun! We are going to do this in three parts:
- Build your tumbler
- Add code to your tumbler to bring it to life
- Use your tumbler to learn how it works
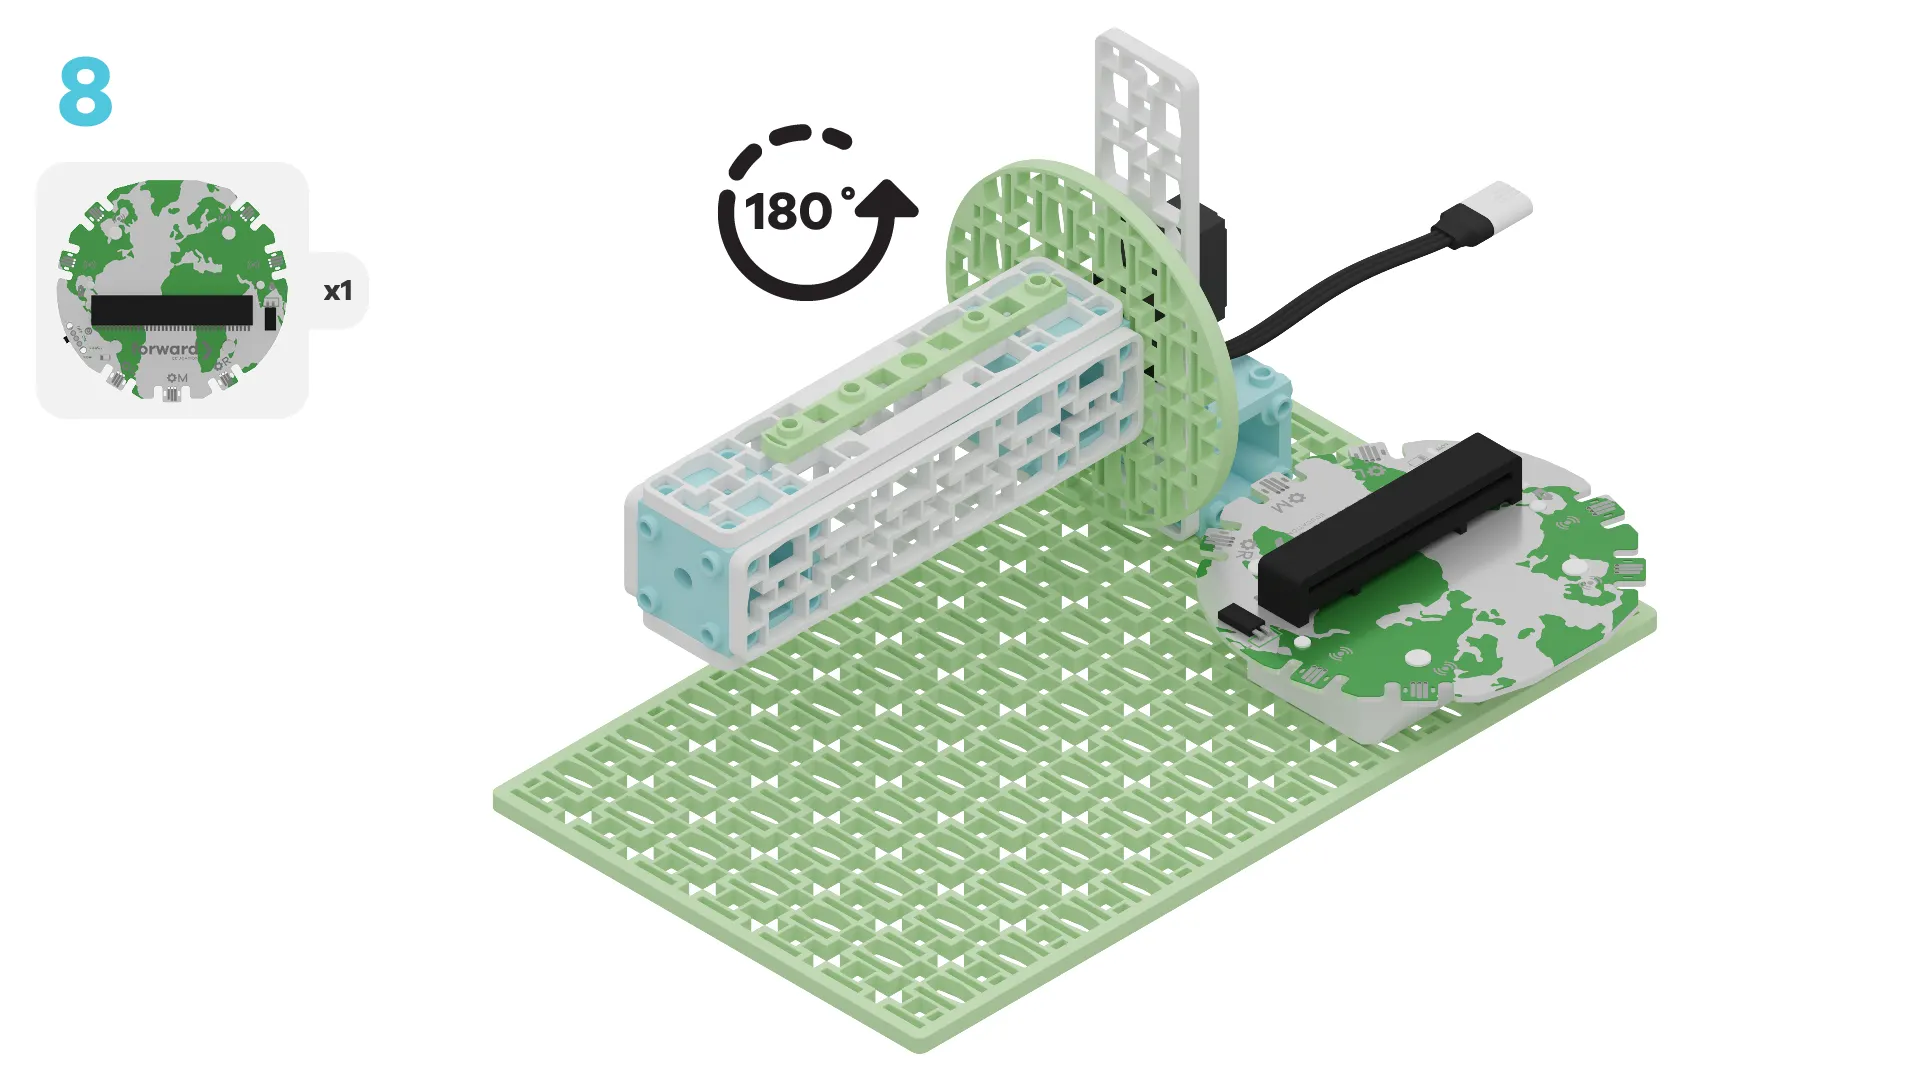
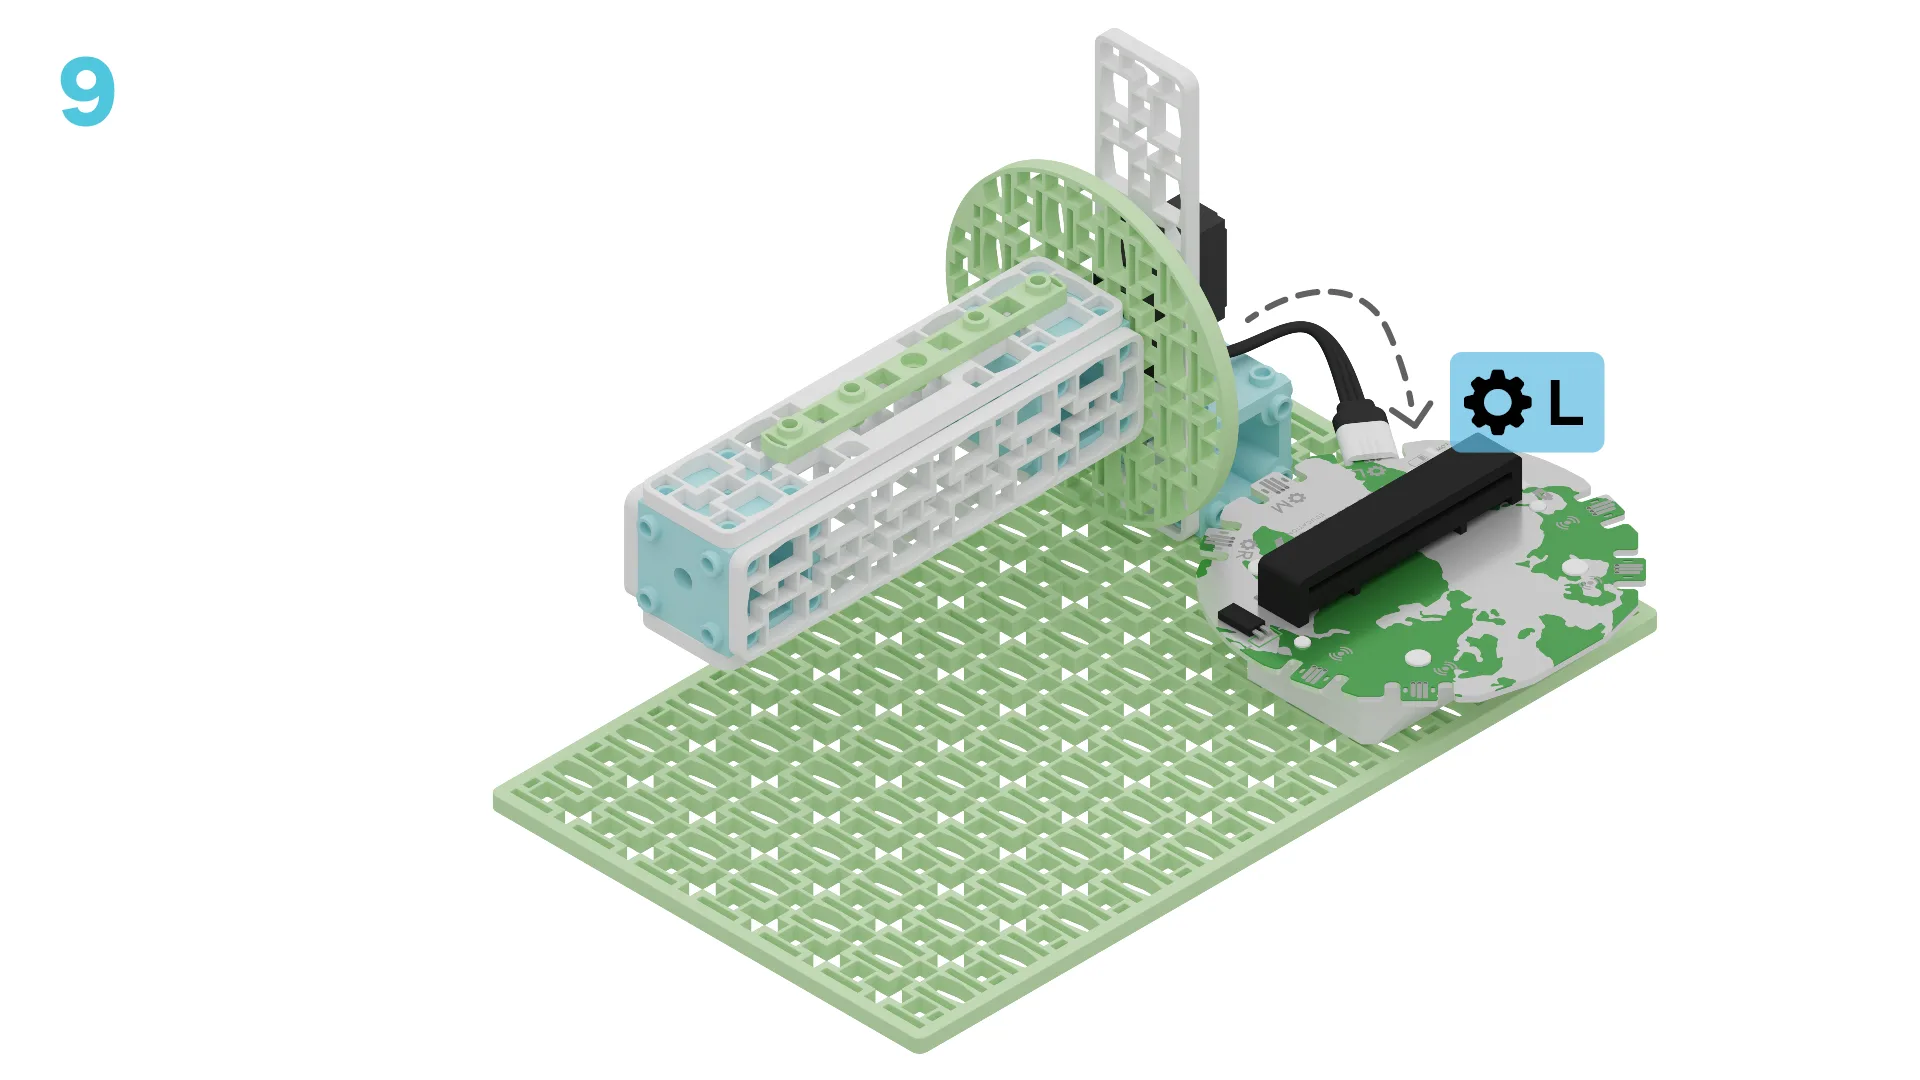
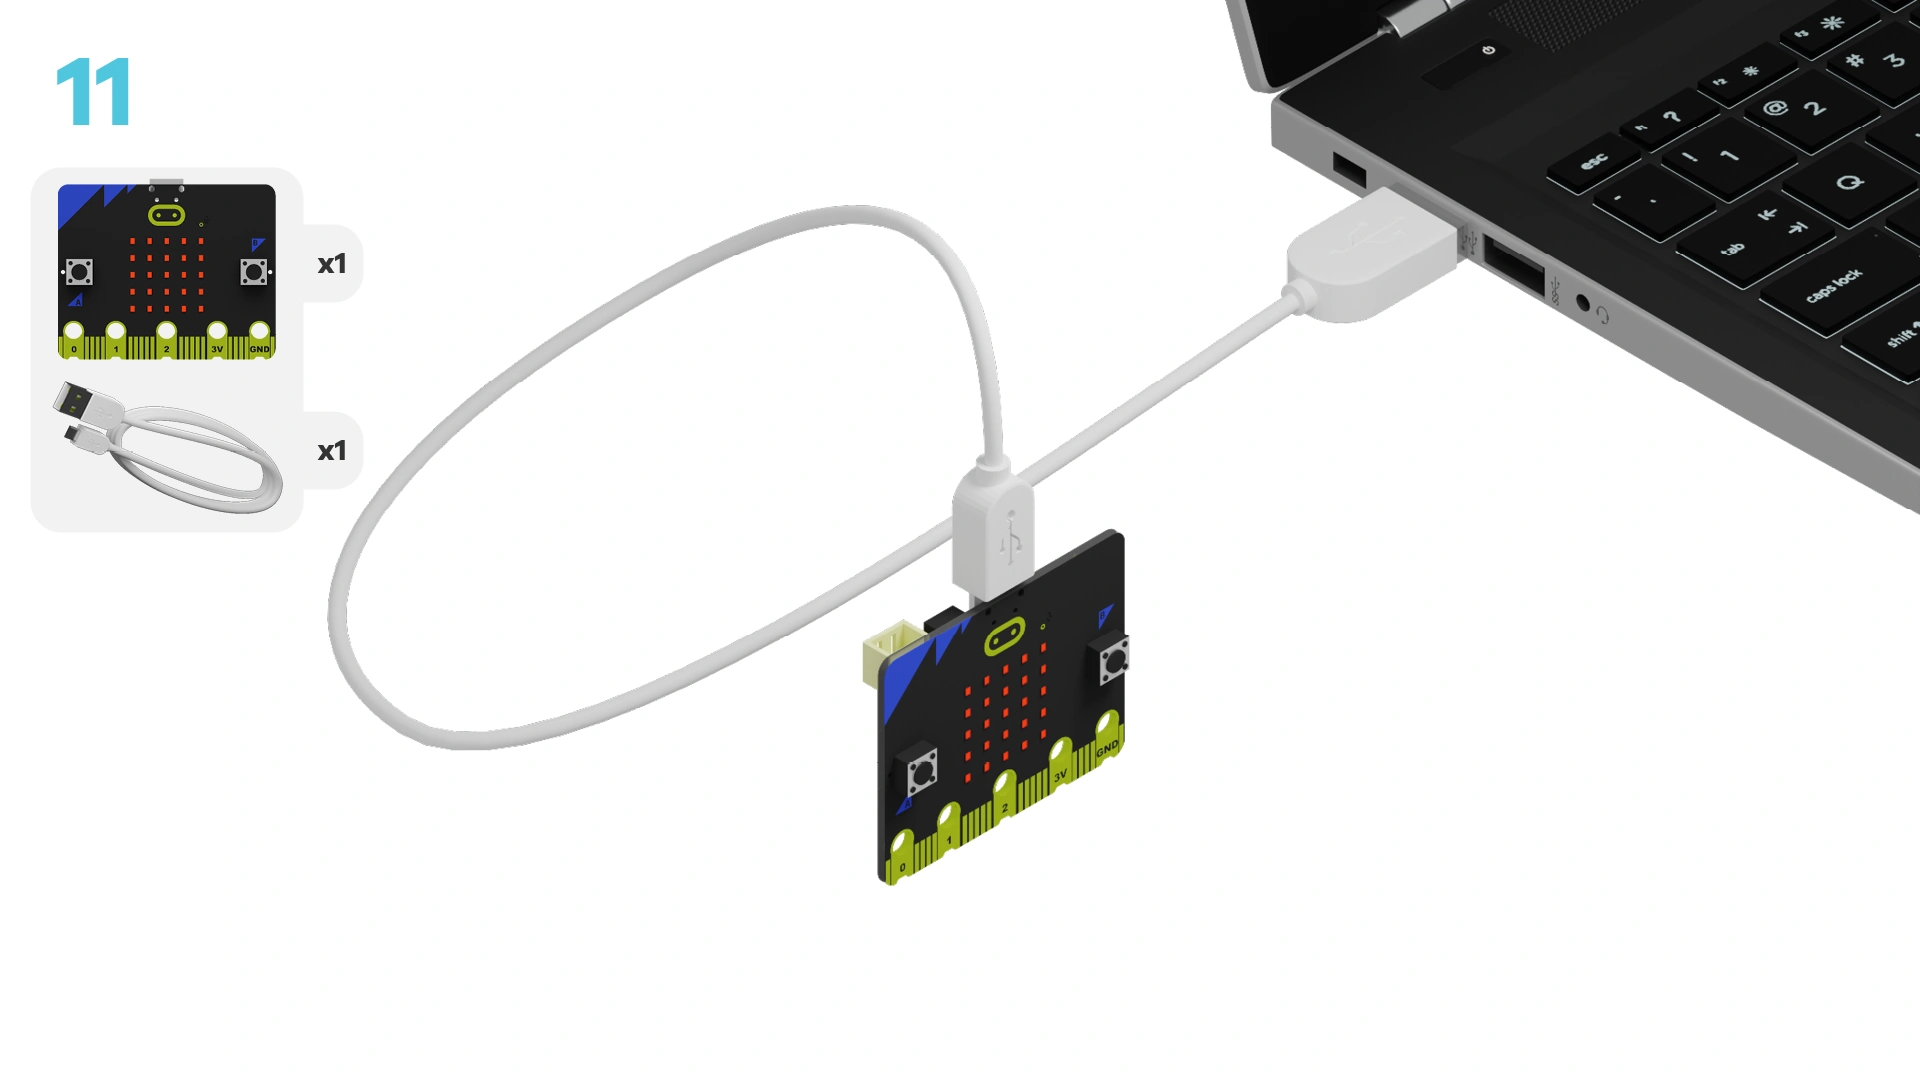
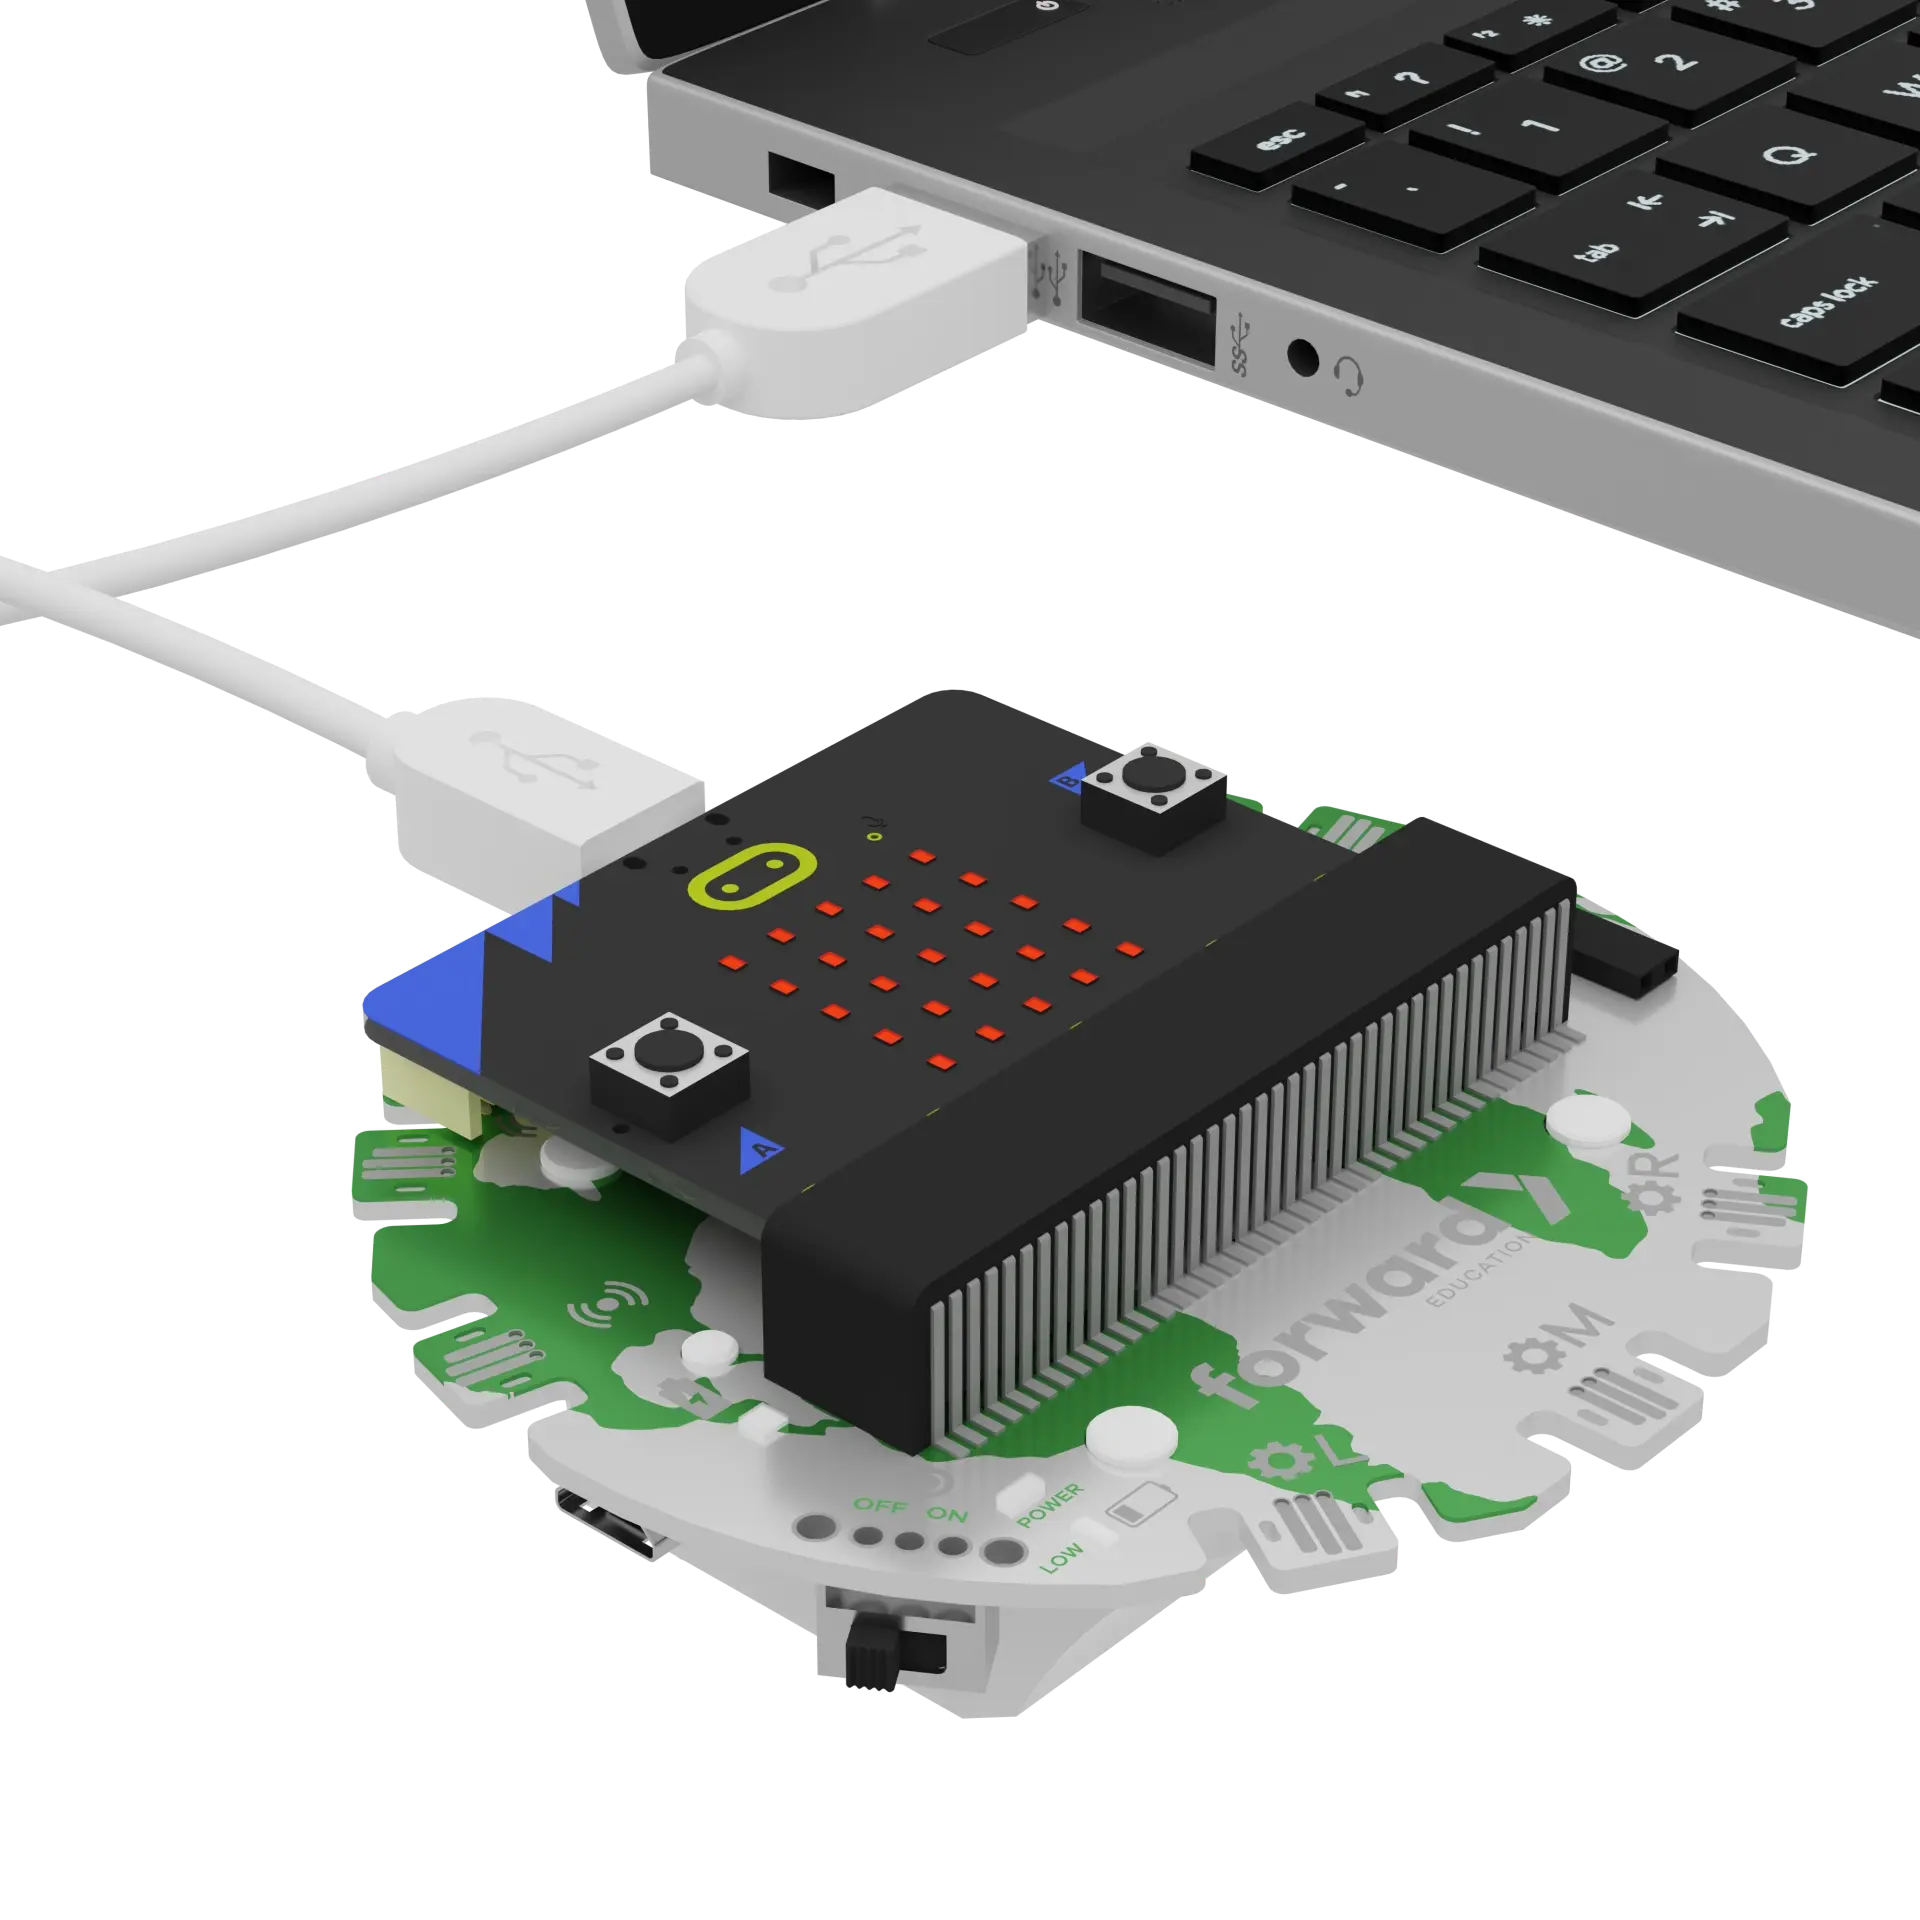
We need to connect our project to the computer to make it come to life with code!
The code will be the instructions that tell our micro:bit what to do.
IMPORTANT! Make sure your Climate Action Kit Breakout Board is turned on and your micro:bit is plugged into your computer.
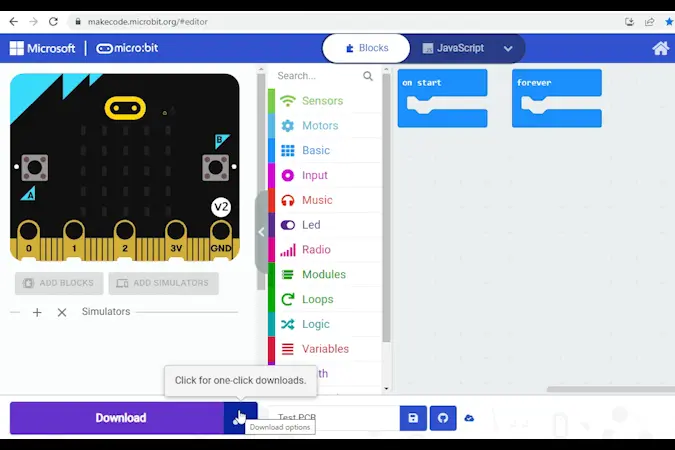
Click the three dots beside the |Download| button, then click on Connect Device.
Next, follow the steps to pair your micro:bit.
Next, click the |Download| button to download the code to your project.
We are now ready to use our compost tumbler!
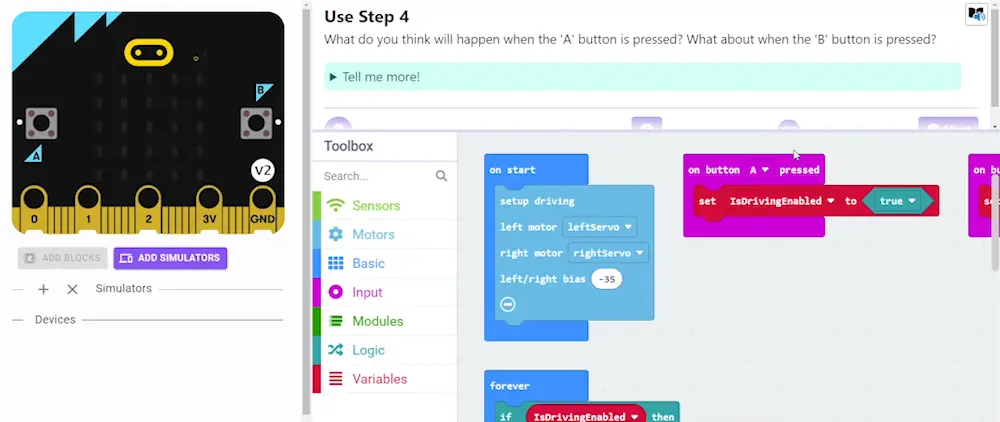
Tutorial Tips
- Follow the steps at the top of the screen.
- When you are ready for more details, click 'Tell me more!'
- If you need help with the code, click the lightbulb!
Take a close look at the compost tumbler you just built. Can you name the different parts you used to make it? Be specific!
~hint Tell me more! This tumbler uses:
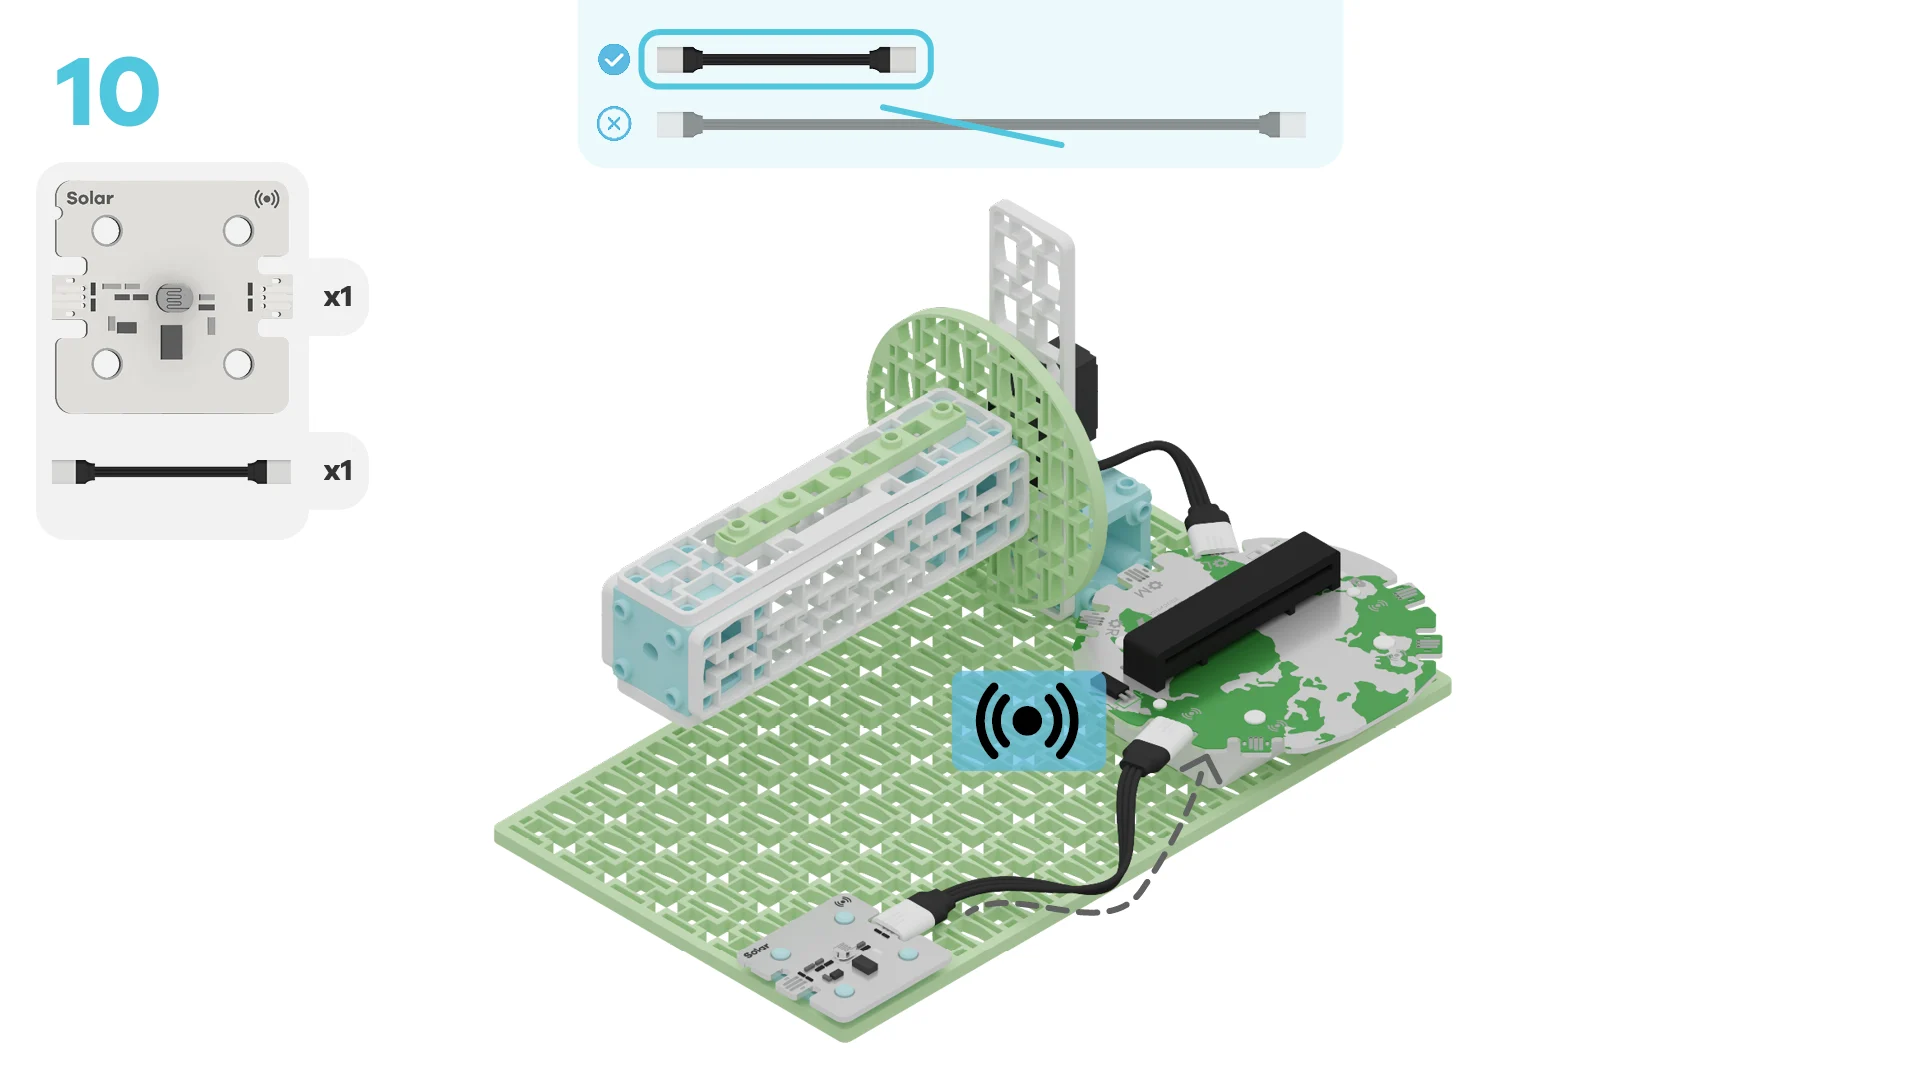
- Building Blocks: One baseplate, one circle, three cube connectors, three medium white frames, two medium white frames with holes for the servo motor, and one thin green frame
- Robotic Parts: A breakout board, micro:bit, servo motor, and solar sensor hint~
How do you think all these parts work together to turn our scraps into soil?
~hint Tell me more!
- The building blocks create the tumbler that holds the waste. The thin green frame is our door!
- The motor spins the tumbler to mix the waste, which helps air get in so the decomposers can break the scraps down.
- The solar sensor checks if there is enough sunlight to power the motor. Using sunlight makes the tumbler even more eco-friendly. hint~
How do we make our compost tumbler work?
~hint Tell me more!
- We write code (instructions) that tells the tumbler what to do and save it on our micro:bit.
- When everything is connected, the code is sent from the micro:bit (the brain) to the breakout board (the spine) to the motor and sensors (the limbs). It tells them exactly what to do. hint~
Take a look at the code below. When do you think our tumbler will spin?
Test it out! Were you right?
~hint Tell me more!
- The solar sensor is constantly measuring the amount of light in the environment.
- The tumbler only spins when the solar sensor detects a lot of sunlight (greater than 95%).
- You can try shining a flashlight on the sensor to see how it works. hint~
    // @highlight
    while (fwdSensors.solar1.fwdIsLightLevelPastThreshold(95, fwdSensors.ThresholdDirection.Over)) {
        // @highlight
        fwdMotors.leftServo.fwdSetEnabled(true)
        basic.pause(2000)
        fwdMotors.leftServo.fwdSetEnabled(false)
        basic.pause(5000)
    }
We are using loops to check if there is enough light to spin the tumbler.
Can you identify the two loops in this code?
~hint Tell me more! Loops make things happen more than once. In this code:
- The
||basic:forever||loop keeps running all the time. It repeats the code inside it over and over. In our project, the forever loop monitors sunlight levels all the time. - The code inside the
||loops:while||loop runs as long as a certain condition is true. Here, it will only run when the solar sensor detects enough sunlight (more than 95%). hint~
// @highlight
basic.forever(function () {
    // @highlight
    while (fwdSensors.solar1.fwdIsLightLevelPastThreshold(95, fwdSensors.ThresholdDirection.Over)) {
        fwdMotors.leftServo.fwdSetEnabled(true)
        basic.pause(2000)
        fwdMotors.leftServo.fwdSetEnabled(false)
        basic.pause(5000)
    }
})
Look back at your project.
How big is your tumbler? How much waste can it hold?
~hint Tell me more!
- Measure the length, width, and height of your tumbler with a ruler.
- Then, figure out how much waste it can hold by calculating its volume.
- Remember: Volume = Length x Width x Height hint~
Imagine your school has 720 mL of waste to compost. How many tumblers like yours would you need to compost all of it?
~hint Tell me more!
- Divide 720 mL by your tumbler’s volume. hint~
What if you wanted to make a bigger tumbler to hold 720 mL instead of using a lot of smaller ones?
What size (length, width, height) would your tumbler need to be to hold all 720 mL?
~hint Tell me more!
- Know the volume: Your tumbler needs to hold 720 mL of waste.
- Use the volume formula: Volume = Length × Width × Height.
- Guess one side: Start with a length, like 10 cm. Then pick a width, like 6 cm.
- Find the height: Use the formula to find the height. Divide 720 mL by the product of the other two sides: Height = 720 mL ÷ (10 cm × 6 cm).
- Double-check: Make sure your measurements give you the right volume: 10 cm × 6 cm × 12 cm = 720 mL. hint~
You've completed the activity!
List 2 new things you learned today.
What is one thing you want to learn more about?
In the next step, you can click the |Done| button to finish the tutorial.
