-
Notifications
You must be signed in to change notification settings - Fork 3
Calibration procedure
Once you have selected the camera to use on the device, and chosen a resolution, you are ready to start a calibration run.
To start, on mobile platforms touch the + symbol on the toolbar. On desktop platforms, press the space bar.
The display changes to a greyscale image of the camere feed, and you may notice some reduction in the camera frame rate as the calibration routine looks for the calibration target. Once the target is in view, the frame rate will improve. When all calibration corners are in view, red crosses will be drawn on the identified corners. If only some corners are found, the crosses will be drawn in green.
To obtain a good calibration, it is important that
- the calibration target fills the display as much as possible
- the camera is held as still as possible during image capture
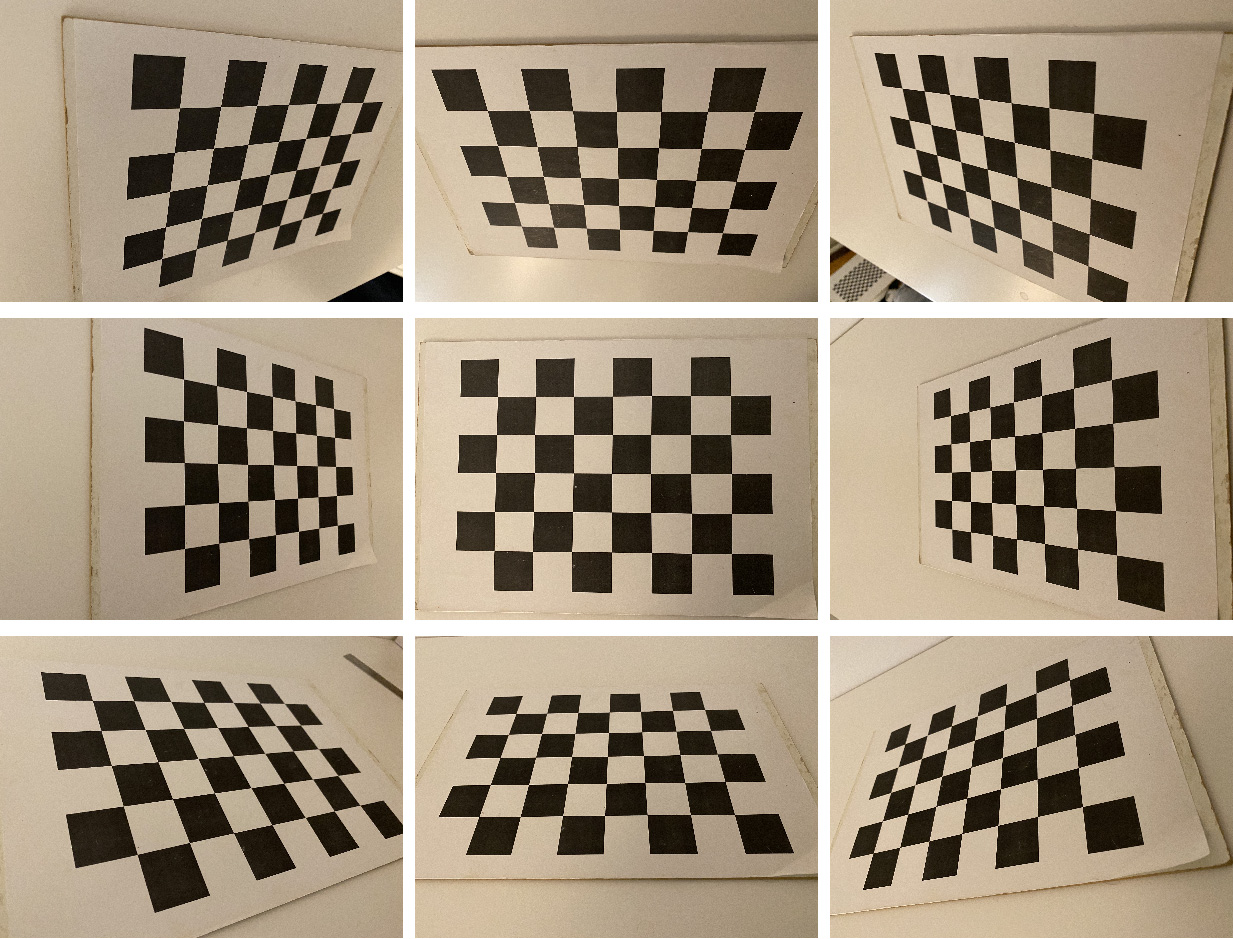
- the ten captured frames show a variety of angles of the calibration target. This image shows recommended angles for use:

To capture a calibration frame, on mobile tap + again, or on desktop press the space bar. To discard a previously captured frame, tap the X symbol on mobile, or press the esc key on desktop
Immediately after capturing the tenth frame, the calibration will be calculated. If the calibration reprojection error is sufficiently low, the calibration will be either saved or uploaded (or both), depending on the chosen settings.
Congratulations! At this point, you can change camera or camera resolutions and capture the next calibration for your device.