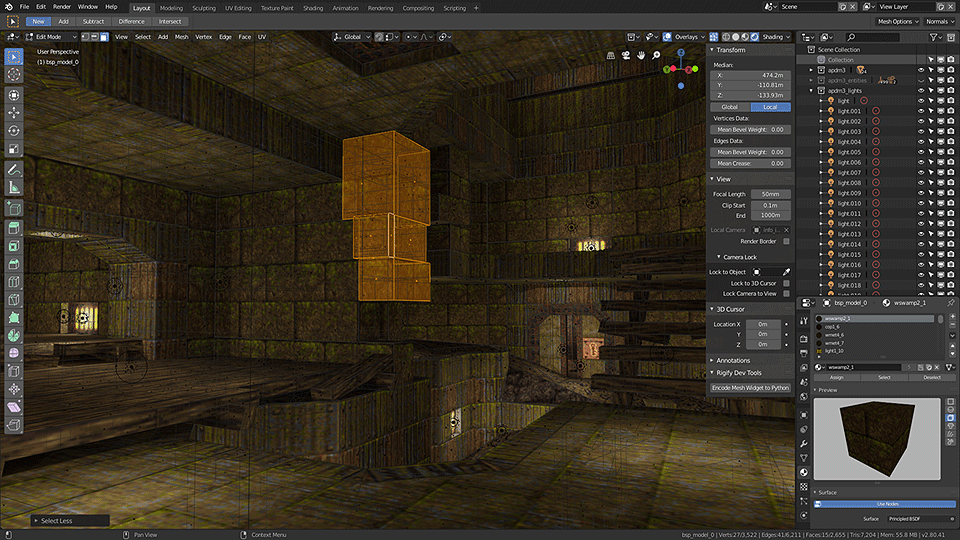
An add-on for Blender that makes it possible to import Quake BSP files, including textures (which are stored in the BSP) as materials. It works with Blender 2.80 and there is an older release for the Blender 2.7x series, which can be downloaded by clicking here.
Note: You will need Blender 2.80 Beta (available here) to run this addon. At the time of writing, Blender 2.80 is still in development, and this addon may stop functioning due to a change in Blender, but I will try and keep it working.
- Download the latest release from GitHub by clicking here.
- In Blender, open Preferences (Edit > Preferences) and switch to the Add-ons section.
- Select 'Install Add-on from file...' and select the file that you downloaded.
- Search for the add-on in the list (enter 'bsp' to quickly find it) and enable it.
- Save the preferences if you would like the script to always be enabled.
Once the addon has been installed, you will be able to import Quake bsp files from File > Import > Quake BSP (.bsp). Selecting this option will open the file browser and allow you to select a file to load. Before loading the file, you can tweak some options to change how the BSP will be imported into Blender.
Changes the size of the imported geometry. The size of a unit in Quake is not the same as in Blender. Scale is set so that 32 units in Quake is 1m in Blender, so setting scale to 1 will make everything huge.
Enable or Disable the creation of materials and storing of texture data in the .blend file.
Remove Hidden (default: On)
There are some objects in a typical Quake BSP, such as triggers, that are hidden in the game, but included in the BSP. Disable this to import these objects too. Importing hidden objects can make it hard to see all the details in the BSP.
Adjust the value of this setting to increase or decrease the brightness of imported textures.
Worldspawn is the name given to the first model inside a BSP file. It represents the static level geometry. Subseqent models in the BSP are dynamic, such as doors, platforms and triggers. Enabling this will only import this first model.
Import any light entity data in the BSP as lights in Blender. This works quite well for older maps, but modern maps often have static light data stripped from the BSP, since it doesn't ever change, so the only type of light data that will be imported is for lights that are animated or have an ambient effect.
Import info_intermission and info_player_start as cameras in Blender. Created cameras will face the same direction as in the BSP file, and the camera field of view will be set to match the default 90 degree FOV of Quake.
Import certain entity types as empties in Blender. By default, this will only import monsters, weapons and items. This is useful if you have imported a mesh you would like to place in the level at the same location as an entity in the game.
Rather than just importing a few entity types, this will import all entities contained in the BSP as empties. Useful if an entity you need the location of is not included by the default Create Entities option.
When a BSP is imported into Blender, the level geometry will be put in a collection named after the file. Entities and lights will also be placed into collections. If the map name is e1m1.bsp, the resulting collections will look like this:
- 'e1m1' - level geometry
- 'e1m1_entities' - entities
- 'e1m1_lights' - lights
Once a BSP has been imported, you might want to tweak some viewport settings to better see the geometry. I recommend using the Solid/Workbench display mode and adjusting the following:
- Color: Texture
- Backface Culling: On
- Specular Lighting: Off
As of version 0.0.9, the importer will attempt to set up any active 3d views to use this kind of shading, saving you the hassle. Disabling Overlays is also recommended.

