| title | category | tag | ||
|---|---|---|---|---|
Spring Boot 整合 MyBatis-Plus AutoGenerator 生成编程喵项目骨架代码 |
|
|
作为一名 Java 后端开发,日常工作中免不了要生成数据库表对应的持久化对象 PO,操作数据库的接口 DAO,以及 CRUD 的 XML,也就是 mapper。
Mybatis Generator 是 MyBatis 官方提供的一个代码生成工具,完全可以胜任这个工作,不过最近在开发“编程喵🐱”开源网站的时候试用了一下 MyBatis-Plus 官方提供 AutoGenerator,发现配置更简单,开发效率更高!于是就来给小伙伴们安利一波。
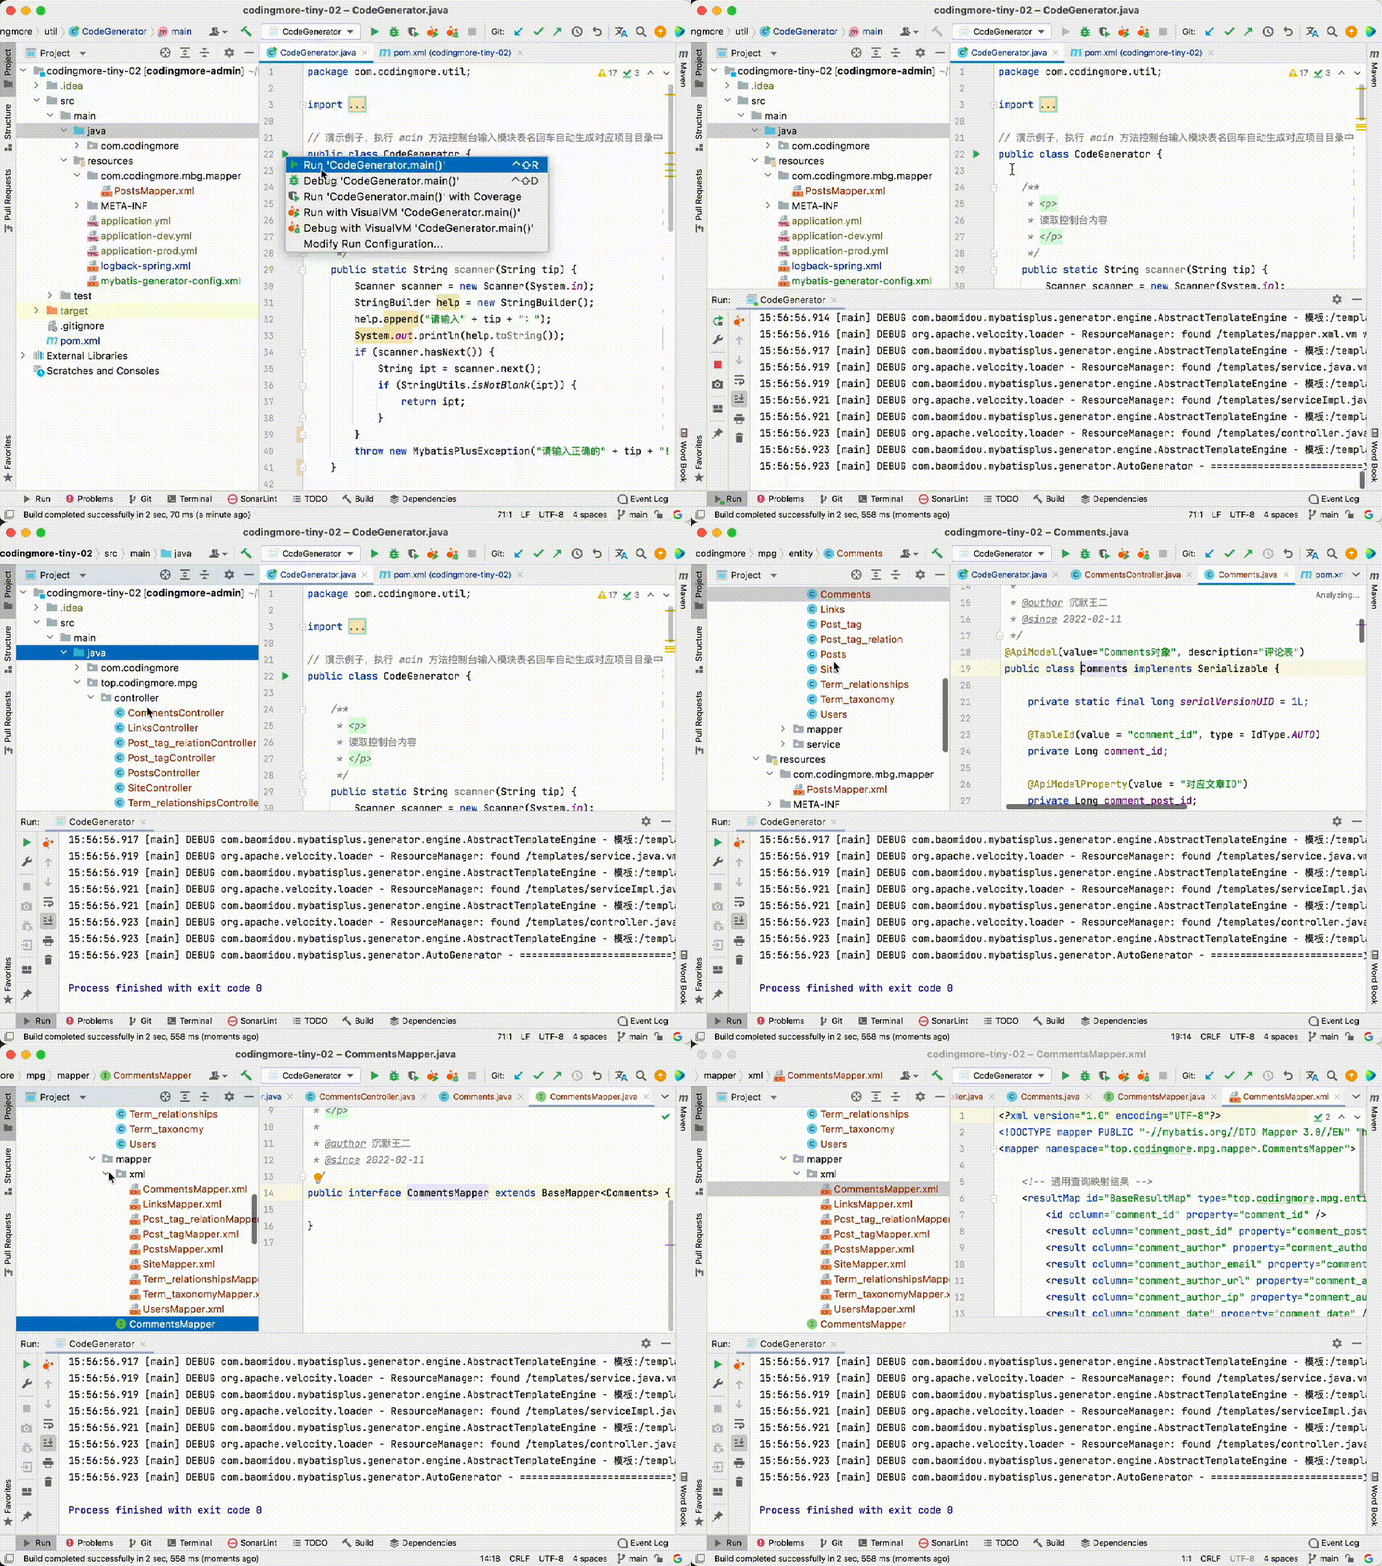
让我们来通过一个 gif 感受一下 AutoGenerator 的强大。
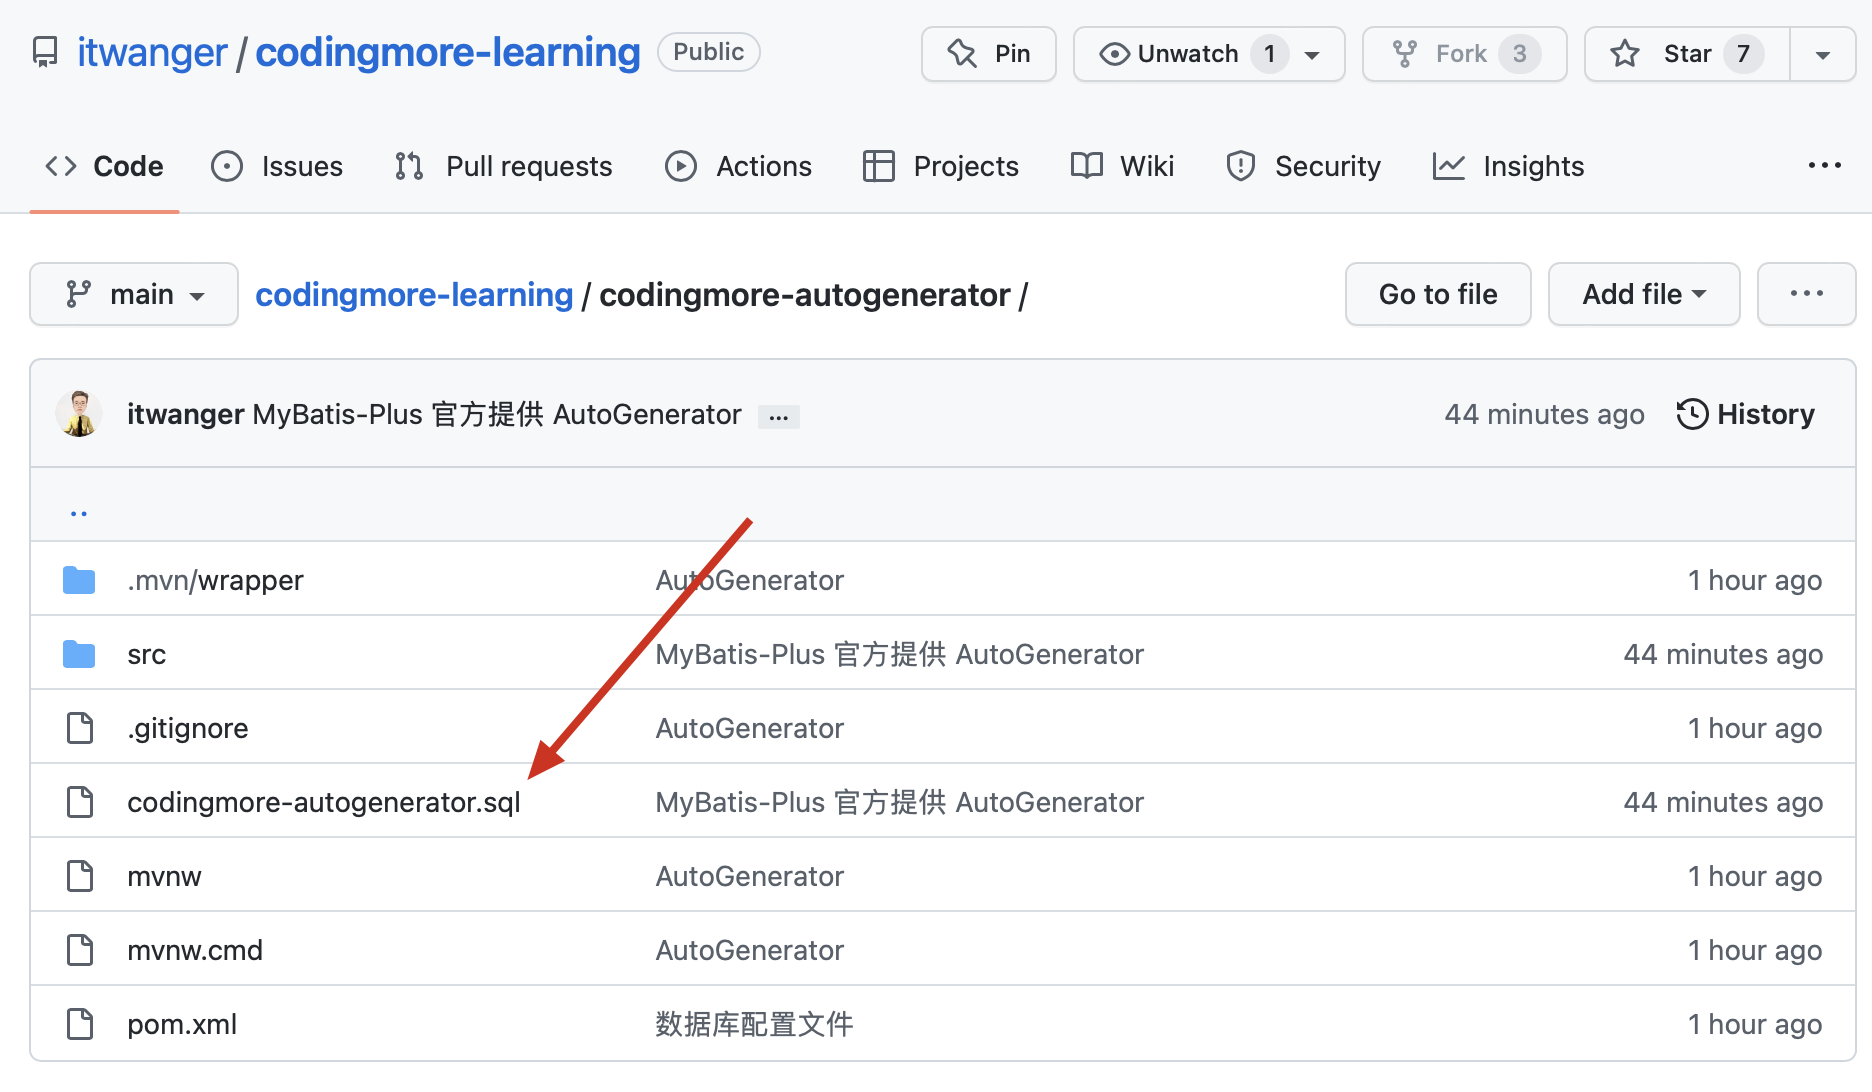
编程喵项目的 SQL 文件我已经同步到本教程所在的源码当中。
路径:https://github.com/itwanger/codingmore-learning/tree/main/codingmore-autogenerator
可以通过 GitHub 桌面版从 GitHub 上下载本教程专属的项目 codingmore-autogenerator 到本地,SQL 文件的位置参照下图。
编程喵使用的 MySQL 版本是 8.0,可以在链接上 MySQL 后使用 select version(); 命令查询版本。
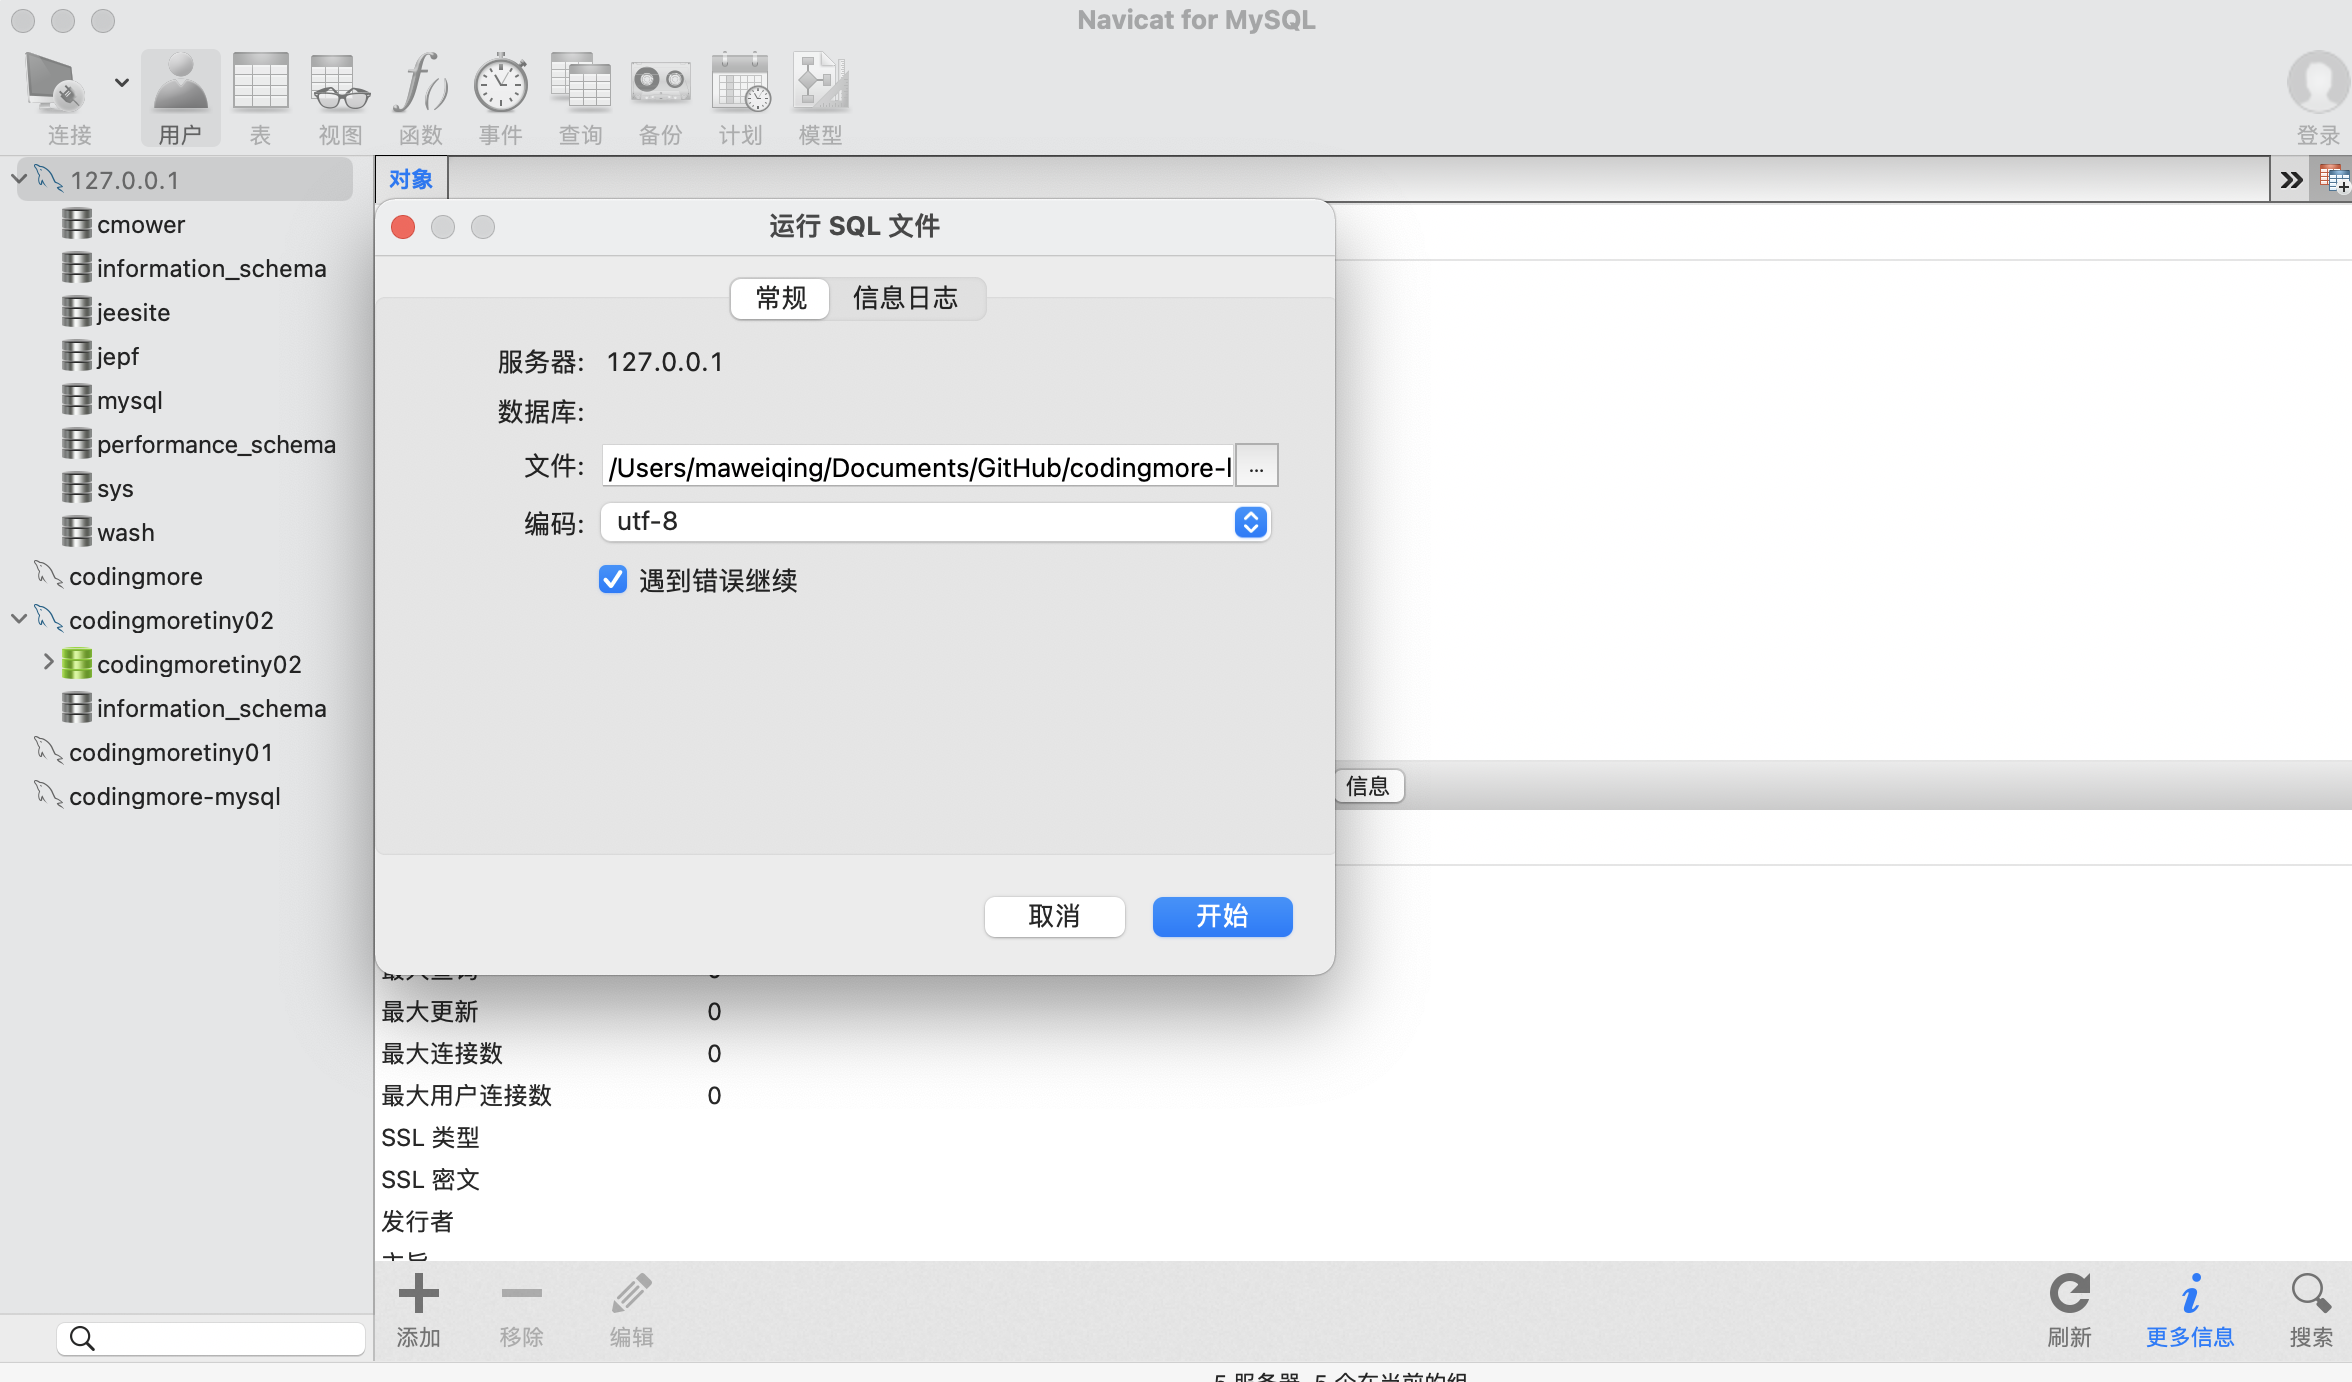
打开 Navicat,把 SQL 文件导入到本地数据库,
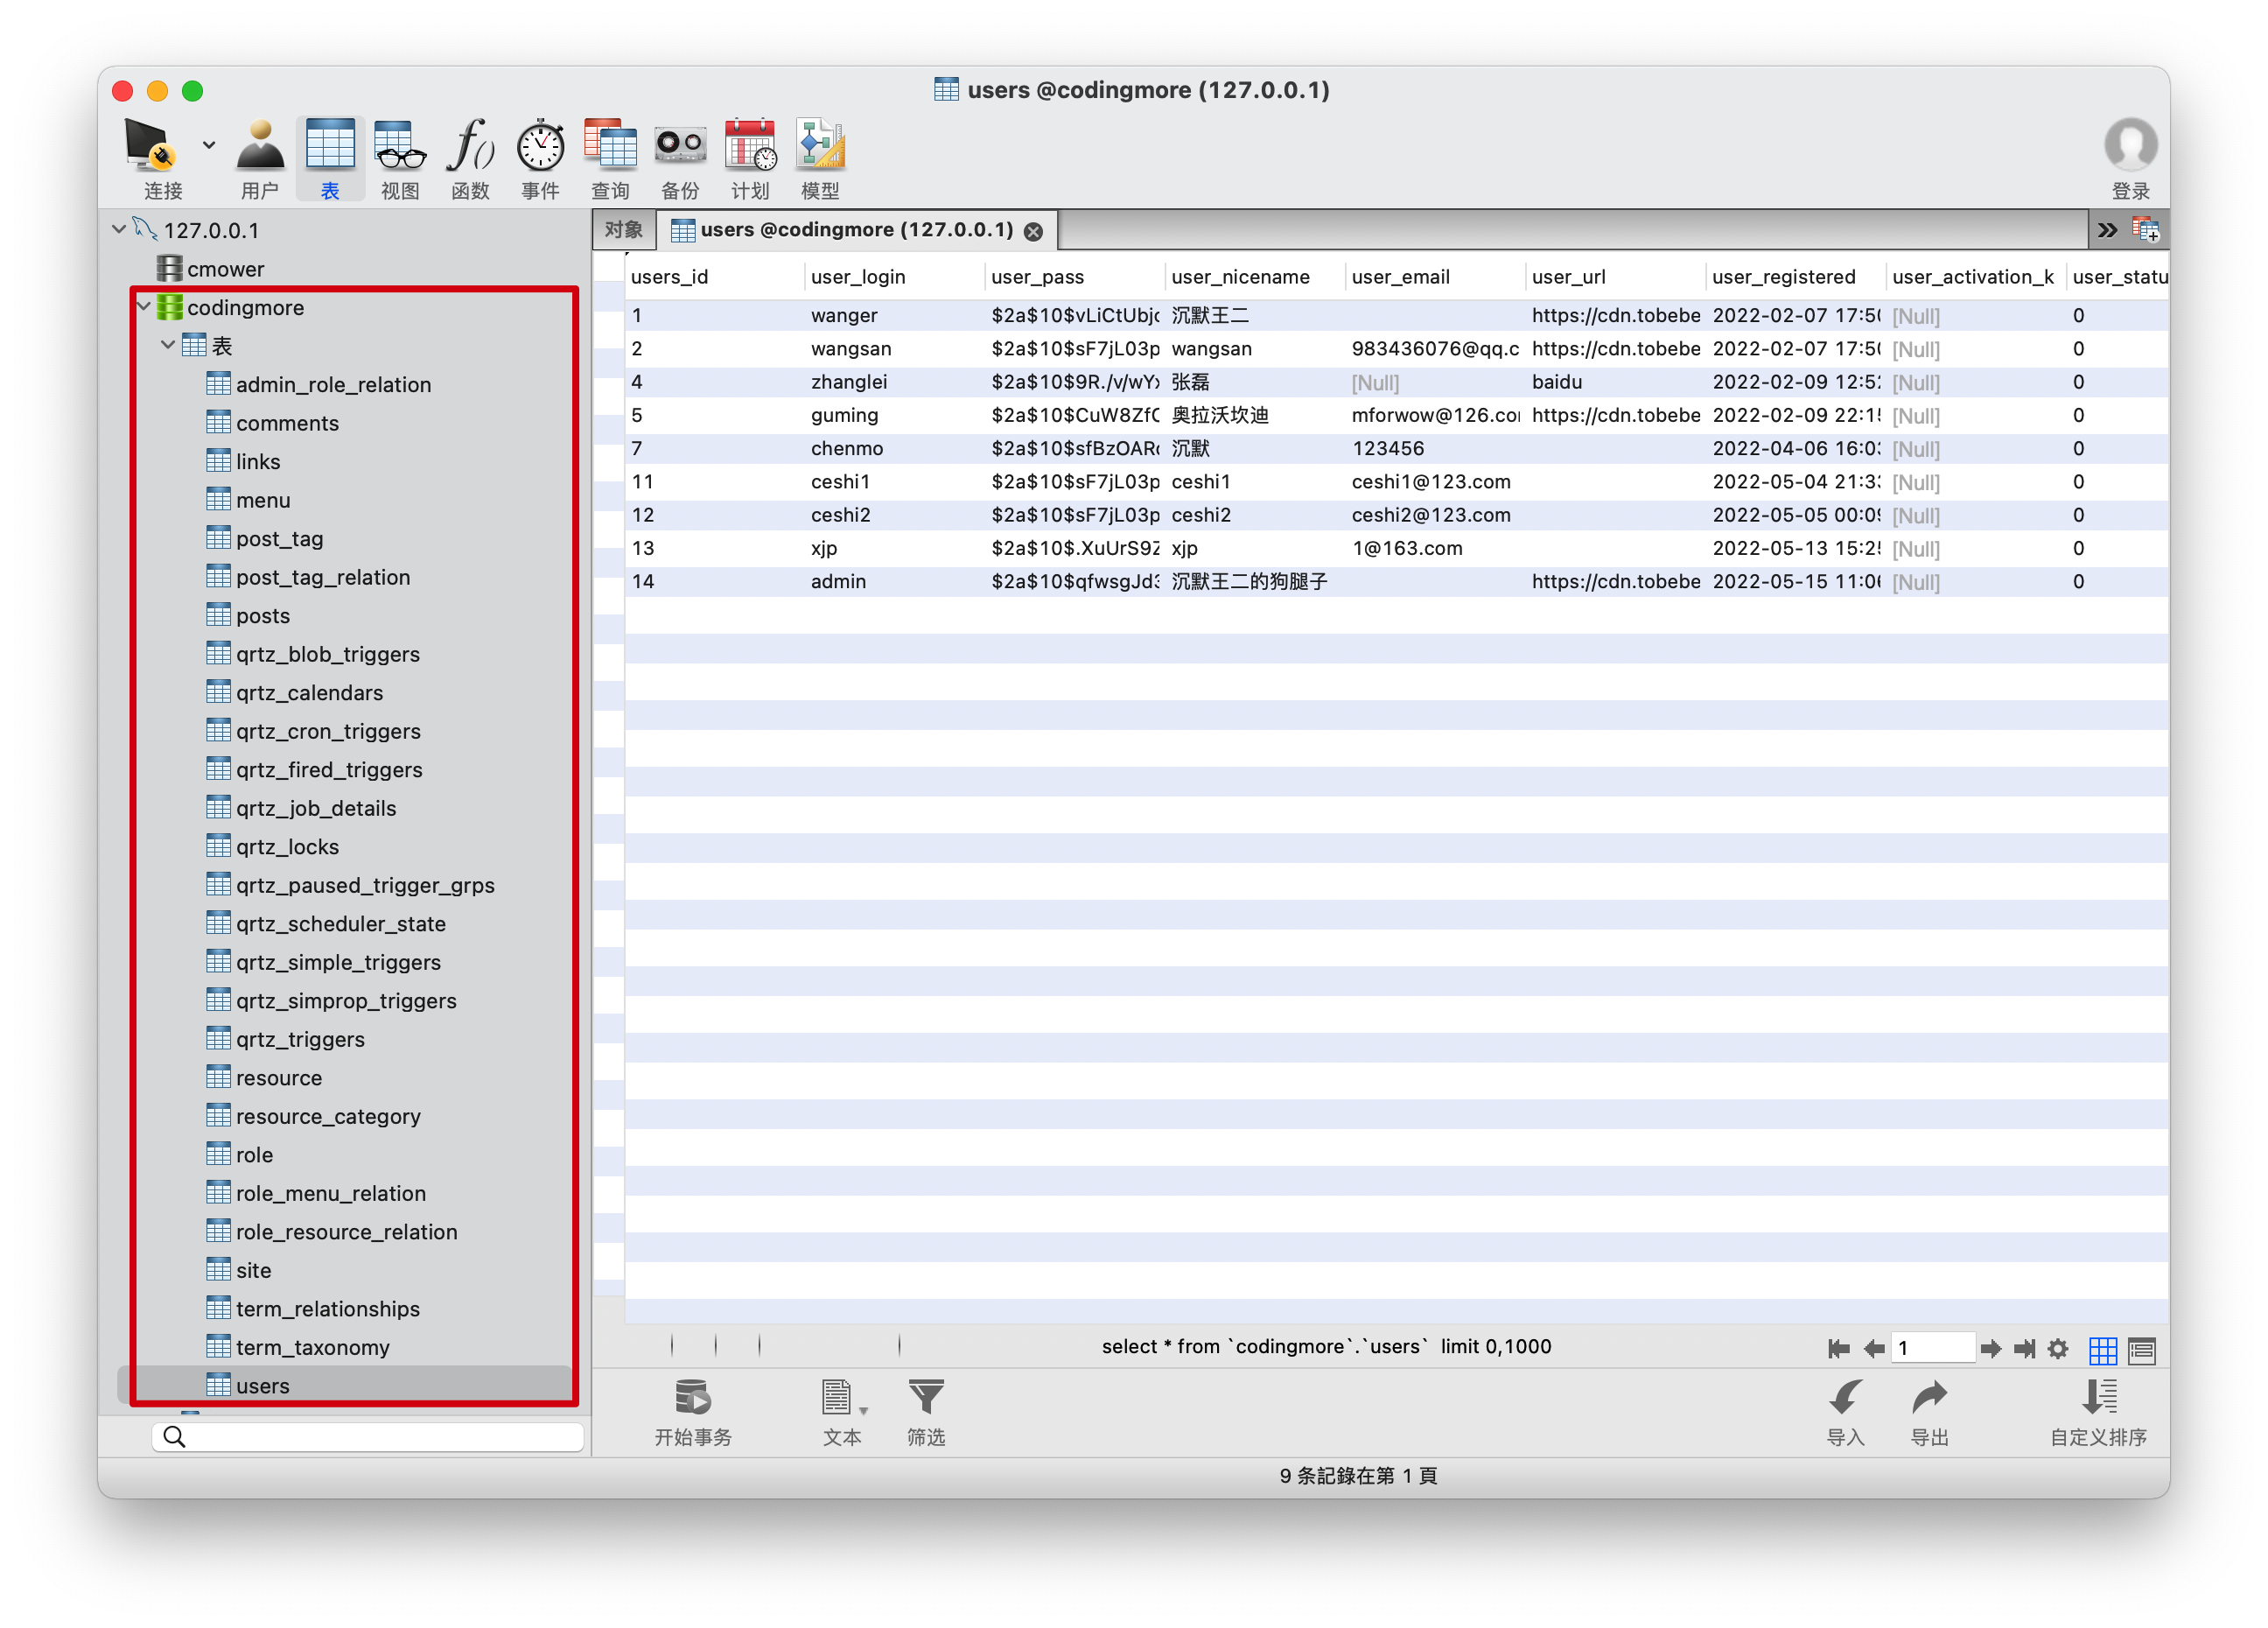
关闭链接,重新打开就可以看到导入后的数据库 codingmore,里面一共 27 张表。
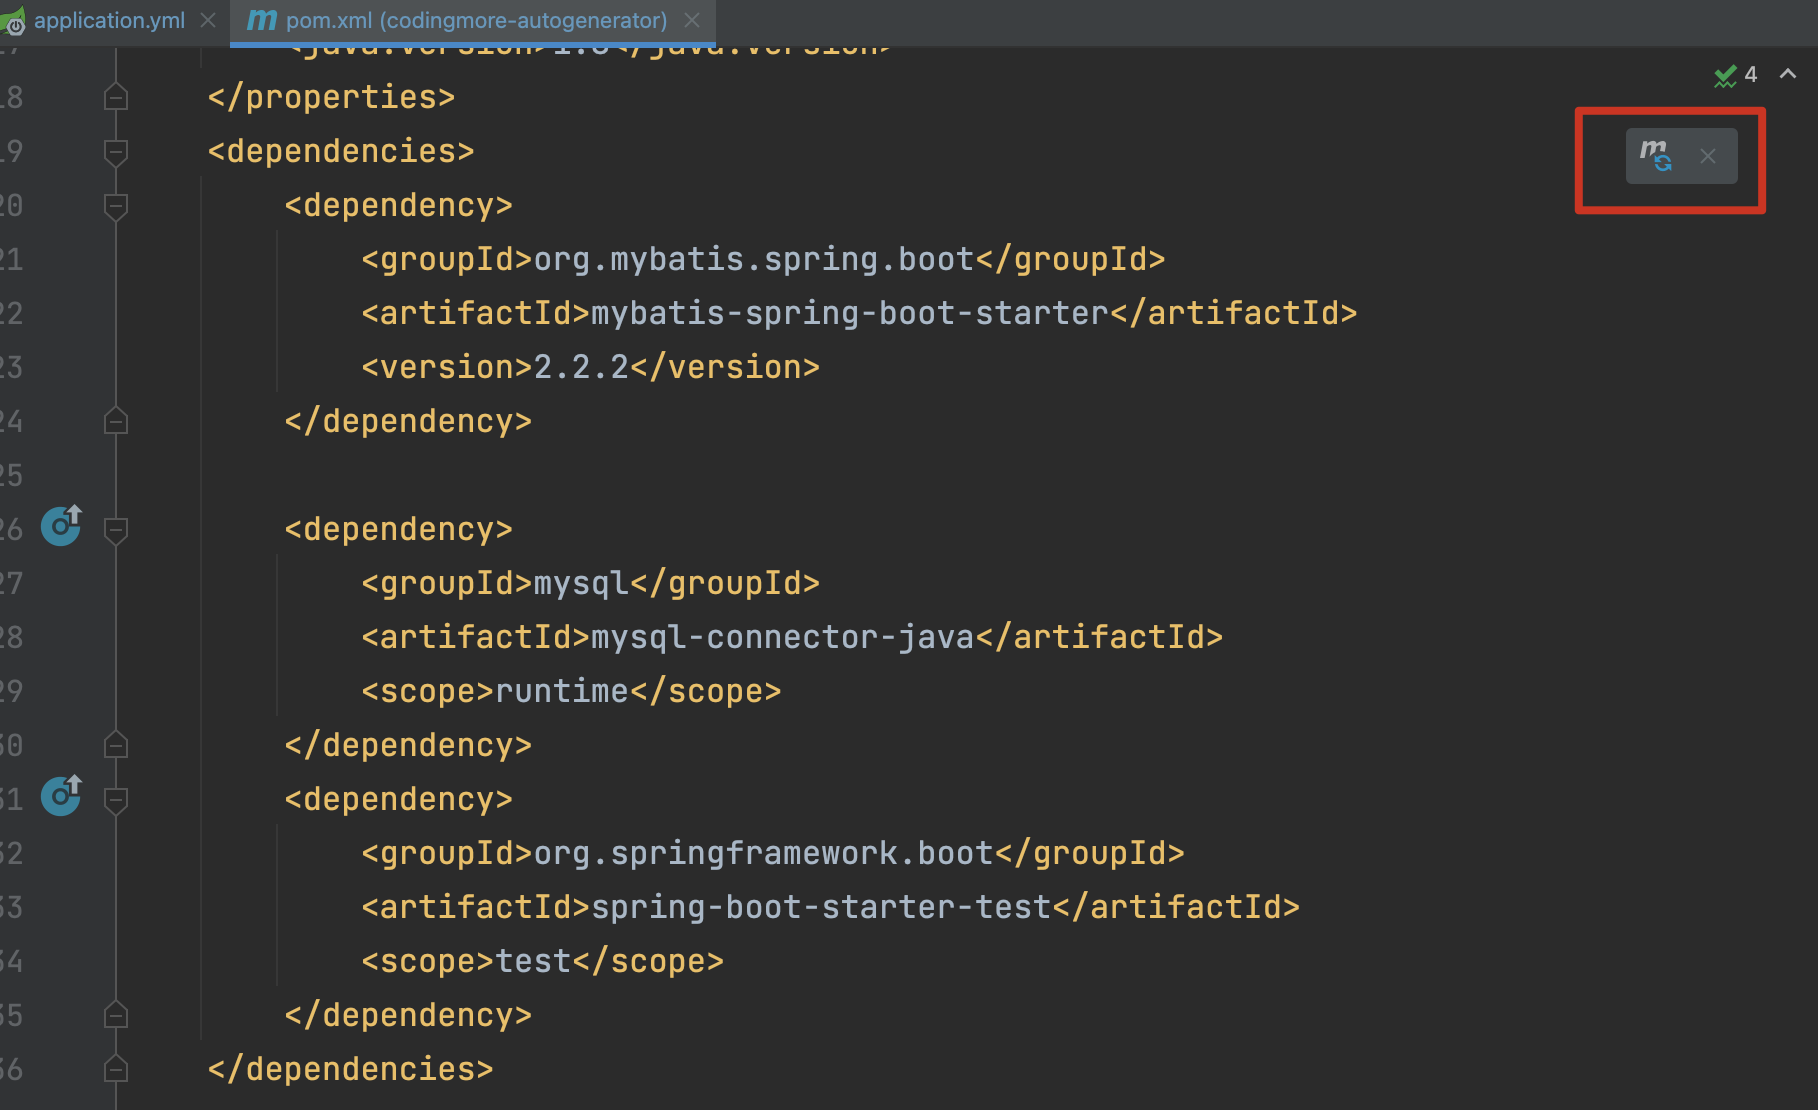
第一步,在 pom.xml 文件中添加 MySQL+MyBatis 的依赖(Mybatis Generator 的前置条件)。
<dependency>
    <groupId>org.mybatis.spring.boot</groupId>
    <artifactId>mybatis-spring-boot-starter</artifactId>
    <version>2.2.2</version>
</dependency>

<dependency>
    <groupId>mysql</groupId>
    <artifactId>mysql-connector-java</artifactId>
    <scope>runtime</scope>
</dependency>
添加完成后,一定要执行一次 Maven 重载(见下图),确保 MyBatis 的依赖加载完毕后再执行第二步。
否则下一步可能不通过,但又得不到任何错误提示。不要问我为什么,踩过坑后痛苦的领悟。
添加完成后,可以通过 Maven 插件来生成骨架代码,也可以通过 Java 代码来生成骨架代码,这里以 Maven 插件的形式来演示。Java 代码的形式可参照 Mybatis Generator:
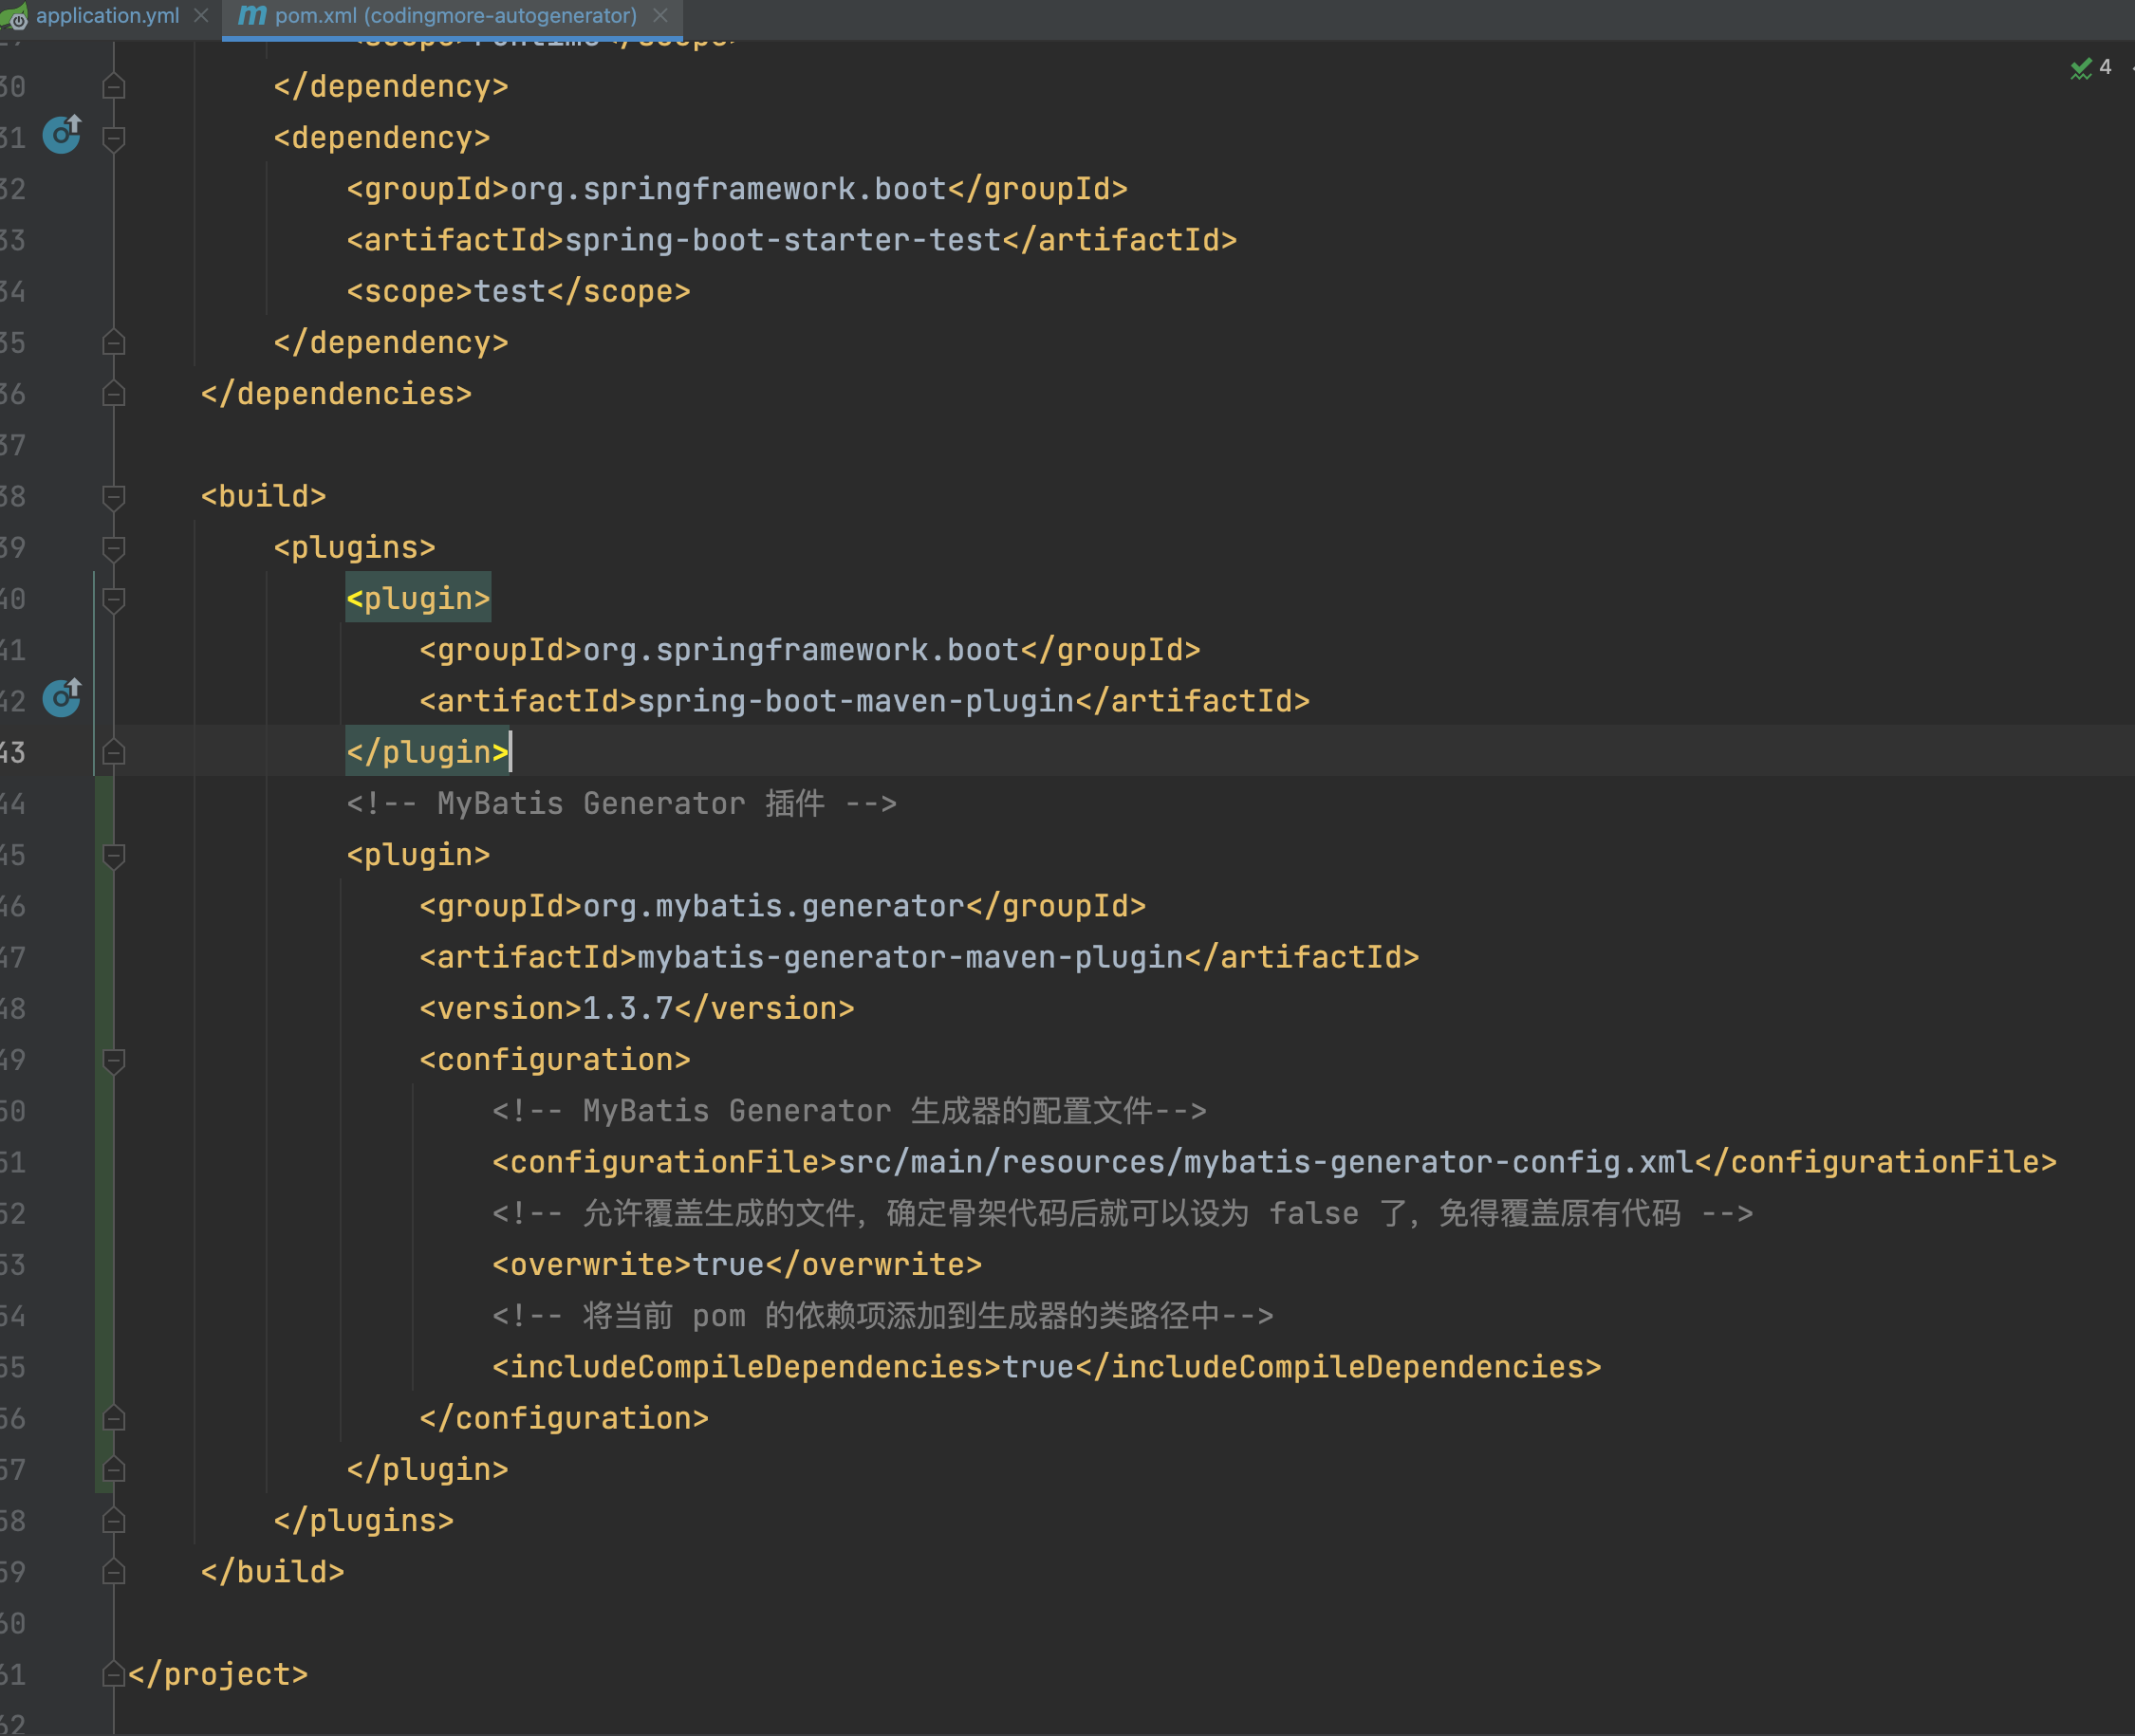
第二步,在 pom.xml 文件中,添加 MyBatis Generator 插件,注意是在 build→plugins 下节点下添加。
<!-- MyBatis Generator 插件 -->
<plugin>
    <groupId>org.mybatis.generator</groupId>
    <artifactId>mybatis-generator-maven-plugin</artifactId>
    <version>1.3.7</version>
    <configuration>
        <!-- MyBatis Generator 生成器的配置文件-->
        <configurationFile>src/main/resources/mybatis-generator-config.xml</configurationFile>
        <!-- 允许覆盖生成的文件,确定骨架代码后就可以设为 false 了,免得覆盖原有代码 -->
        <overwrite>true</overwrite>
        <!-- 将当前 pom 的依赖项添加到生成器的类路径中-->
        <includeCompileDependencies>true</includeCompileDependencies>
    </configuration>
</plugin>
MyBatis Generator 插件目前最新版是 1.4.0,我们采用上一个稳定版本 1.3.7,新版本容易有坑。
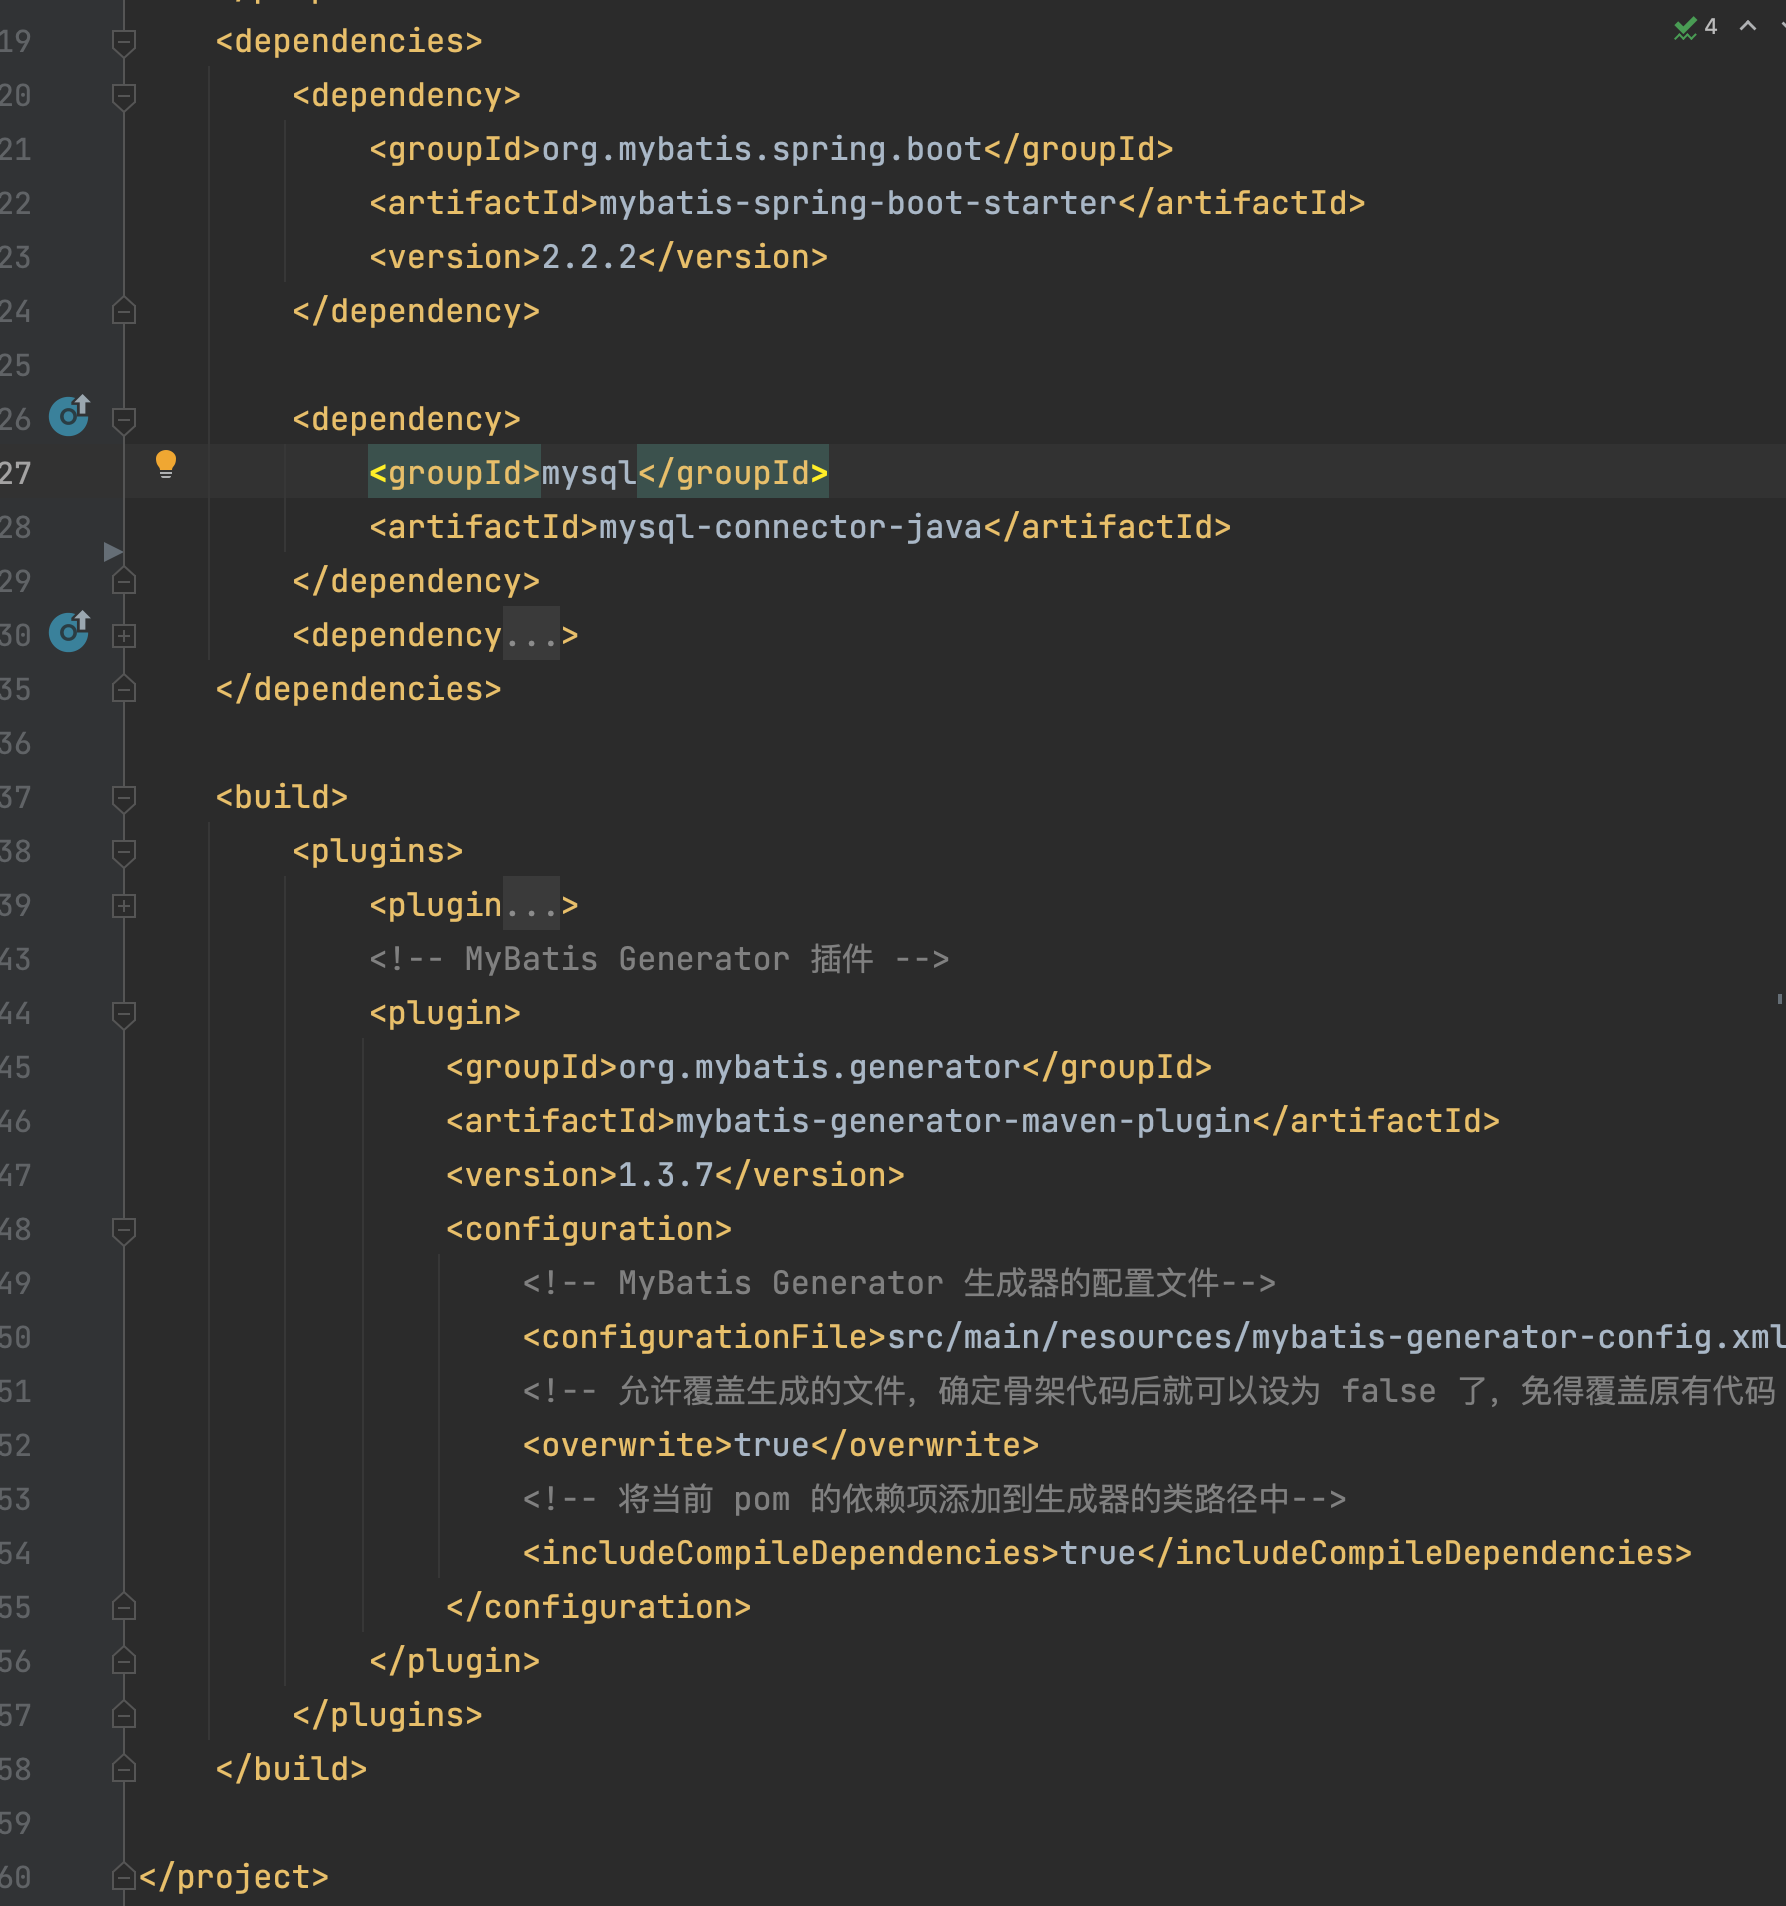
来看一下添加 MyBatis Generator 插件后 pom.xml 文件的结构图。
只添加插件还不够,还需要对其进行配置,我们使用 configurationFile 元素来指定一个配置文件 mybatis-generator-config.xml:
<configurationFile>src/main/resources/mybatis-generator-config.xml</configurationFile>
由于数据库表可能会发生变动,因此我们需要追加一个配置 <overwrite>true</overwrite>,允许覆盖旧的文件。为了防止我们编写的 SQL 语句被覆盖掉,MyBatis Generator 只会覆盖旧的 po、dao、而 *mapper.xml 不会覆盖,而是追加。
Mybatis Generator 需要连接数据库,所以还需要在 plugin 节点中添加数据库驱动依赖,就像这样:
<configuration>
</configuration>
<dependency>
    <groupId>mysql</groupId>
    <artifactId>mysql-connector-java</artifactId>
</dependency>
但我们在 pom.xml 文件中已经添加过 MySQL 的链接驱动了,这里再添加就会显得很多余。好在 Maven 为我们提供了 includeCompileDependencies 属性,可以让我们在插件中引用之前添加的依赖。
<includeCompileDependencies>true</includeCompileDependencies>
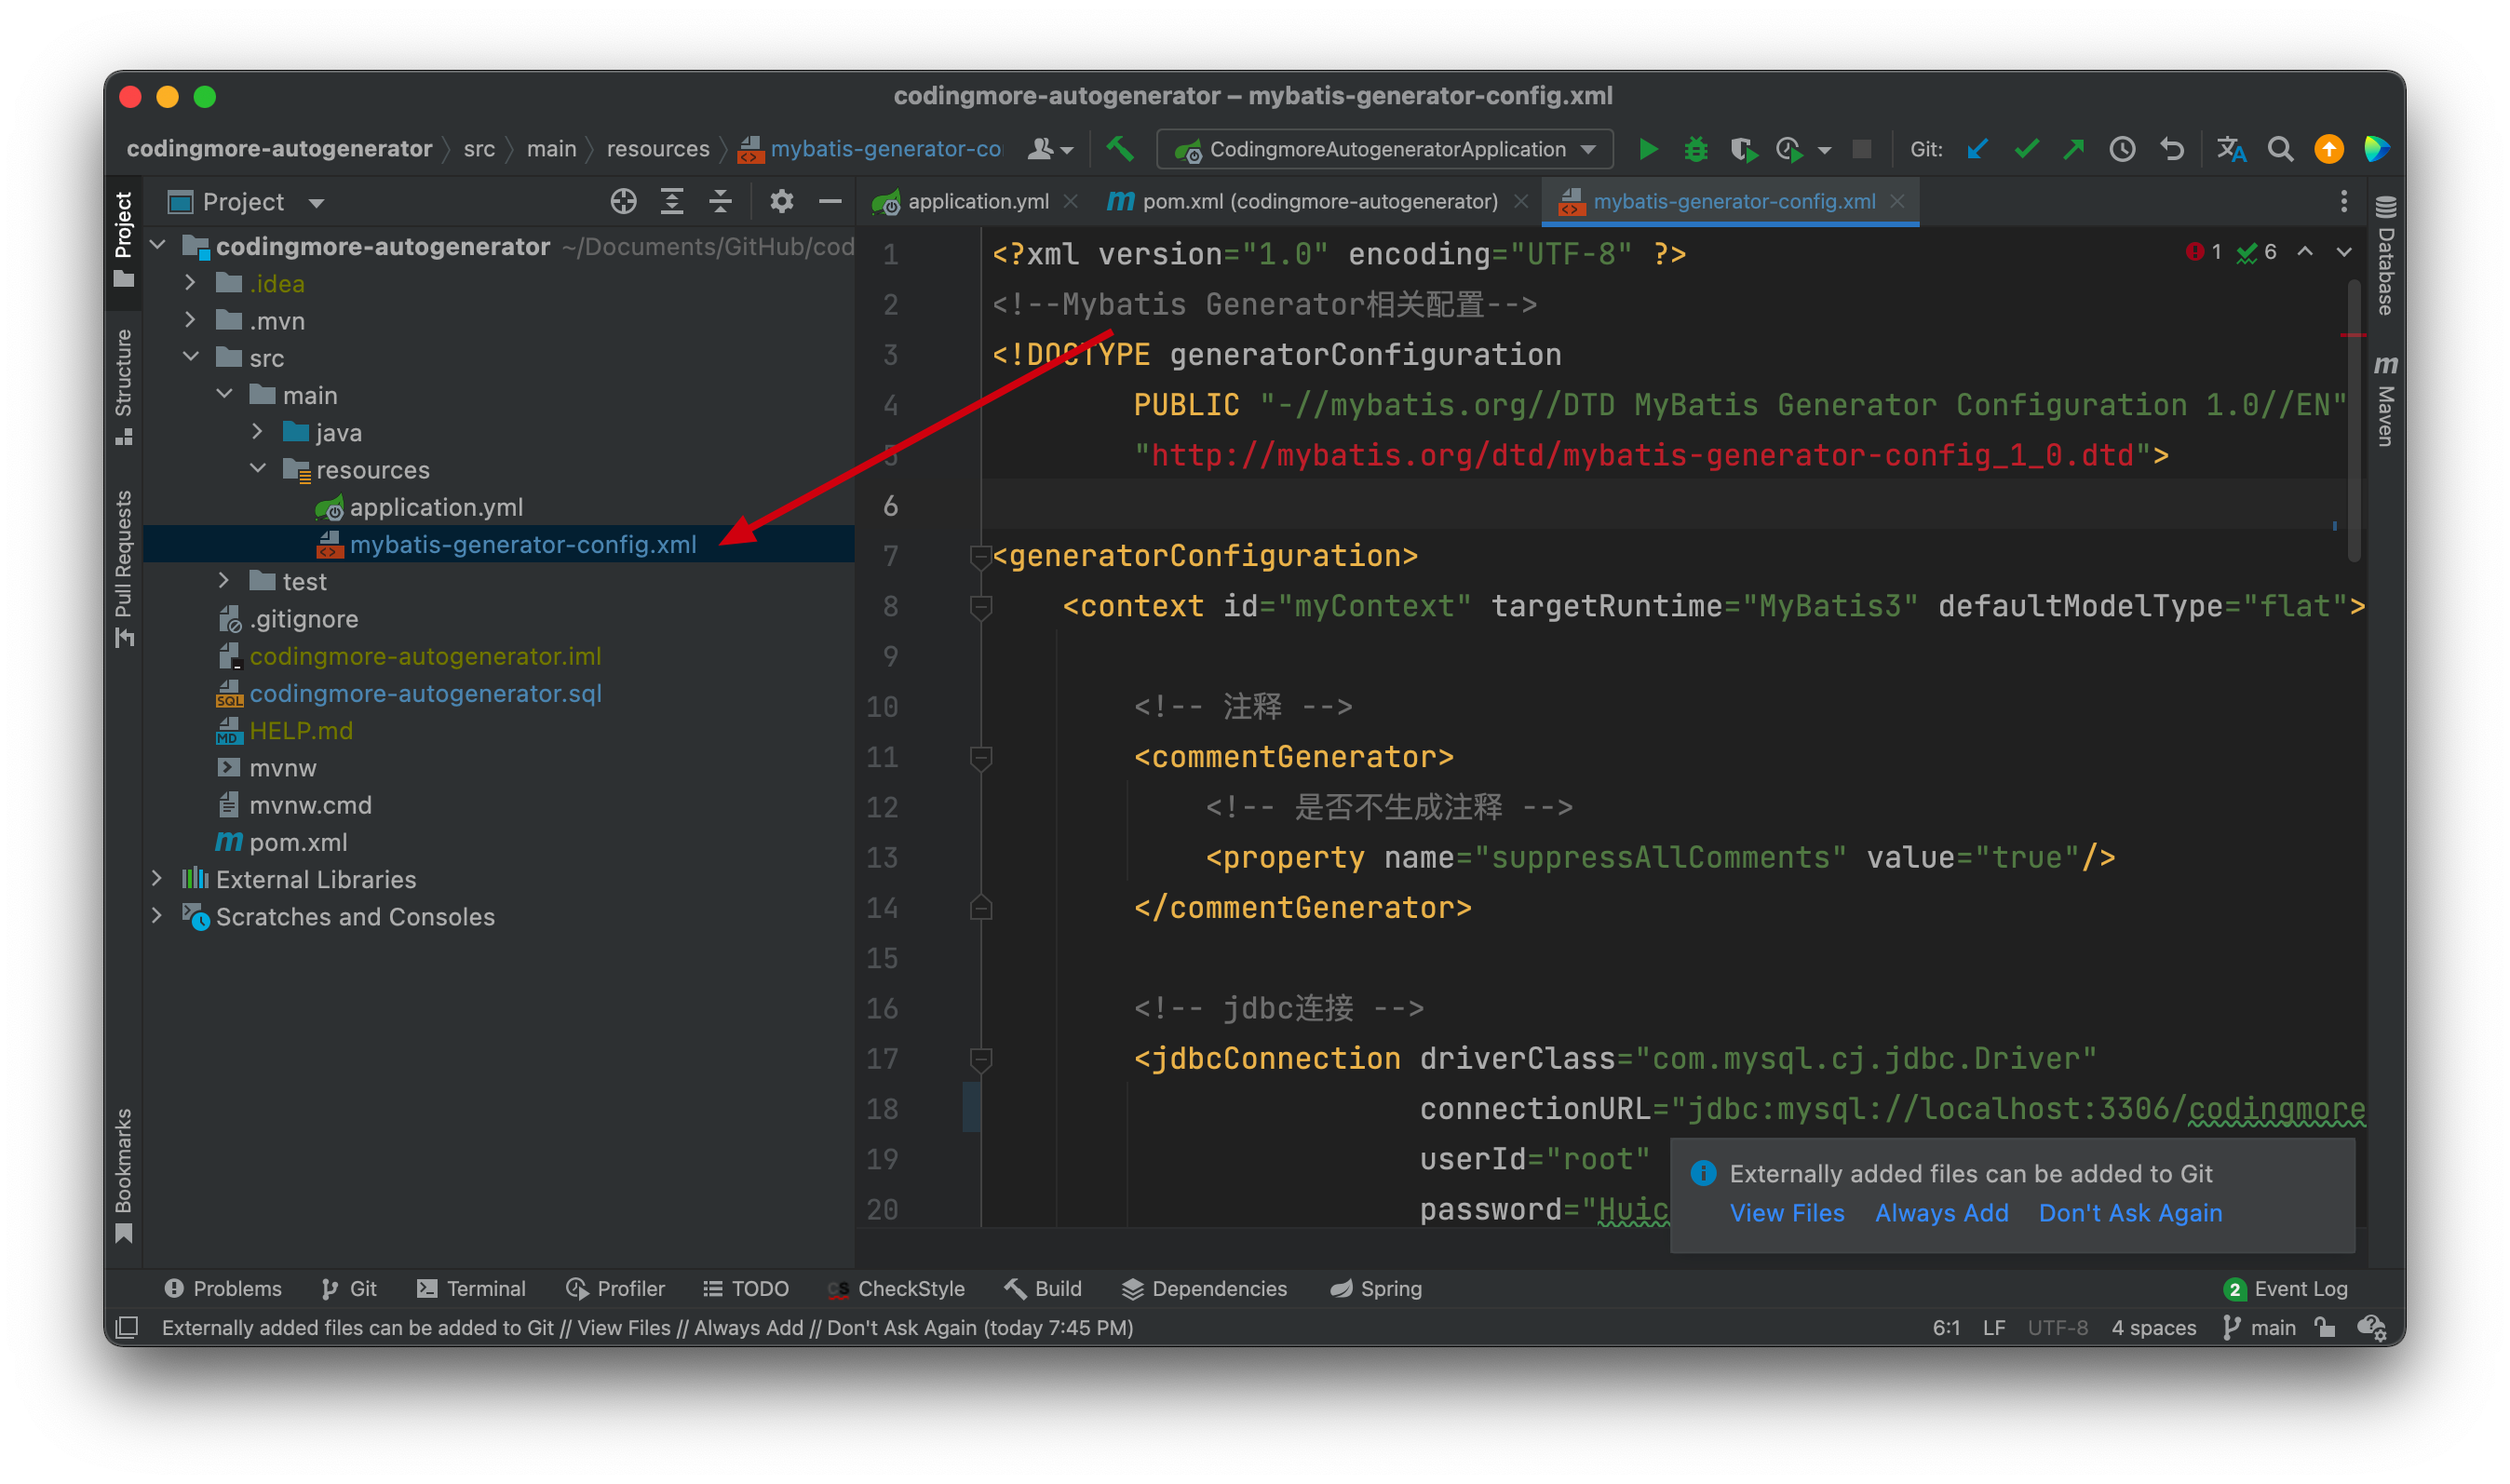
来看一下 mybatis-generator-config.xml 的位置。
来看一下 mybatis-generator-config.xml 的内容。
<generatorConfiguration>
<context id="myContext" targetRuntime="MyBatis3" defaultModelType="flat">
<!-- 注释 -->
<commentGenerator>
<!-- 是否不生成注释 -->
<property name="suppressAllComments" value="true"/>
</commentGenerator>
<!-- jdbc连接 -->
<jdbcConnection driverClass="com.mysql.cj.jdbc.Driver"
connectionURL="jdbc:mysql://localhost:3306/codingmore?useUnicode=true&characterEncoding=utf-8&serverTimezone=Asia/Shanghai&useSSL=false"
userId="root"
password="Huicheng123">
<!--高版本的 mysql-connector-java 需要设置 nullCatalogMeansCurrent=true-->
<property name="nullCatalogMeansCurrent" value="true"/>
</jdbcConnection>
<!-- 类型转换 -->
<javaTypeResolver>
<!--是否使用bigDecimal,默认false。
false,把JDBC DECIMAL 和 NUMERIC 类型解析为 Integer
true,把JDBC DECIMAL 和 NUMERIC 类型解析为java.math.BigDecimal-->
<property name="forceBigDecimals" value="true"/>
</javaTypeResolver>
<!-- 生成实体类地址 -->
<javaModelGenerator targetPackage="top.codingmore.mbg.po" targetProject="src/main/java">
<!-- 是否针对string类型的字段在set方法中进行修剪,默认false -->
<property name="trimStrings" value="true"/>
</javaModelGenerator>
<!-- 生成Mapper.xml文件 -->
<sqlMapGenerator targetPackage="top.codingmore.mbg.mapper" targetProject="src/main/resources">
</sqlMapGenerator>
<!-- 生成 XxxMapper.java 接口-->
<javaClientGenerator targetPackage="top.codingmore.mbg.dao" targetProject="src/main/java" type="XMLMAPPER">
</javaClientGenerator>
<!-- schema为数据库名,oracle需要配置,mysql不需要配置。
tableName为对应的数据库表名
domainObjectName 是要生成的实体类名(可以不指定,默认按帕斯卡命名法将表名转换成类名)
enableXXXByExample 默认为 true, 为 true 会生成一个对应Example帮助类,帮助你进行条件查询,不想要可以设为false
-->
<table schema="" tableName="posts" domainObjectName="Posts"
enableCountByExample="false" enableDeleteByExample="false" enableSelectByExample="false"
enableUpdateByExample="false" selectByExampleQueryId="false">
</table>
</context>
</generatorConfiguration>
- 配置文件至少得包含一个context
- commentGenerator 用来配置生成的注释
- jdbcConnection 用来链接数据库
- javaTypeResolver 配置 JDBC 与 Java 的类型转换规则
- javaModelGenerator 配置 po 生成的包路径和项目路径
- sqlMapGenerator 配置 mapper.xml 文件生成的目录
- javaClientGenerator 配置 mapper.java 文件生成的目录
- 一个 table 对应一张表,如果想同时生成多张表,需要配置多个 table
更多配置信息可以参照下面这篇文章:
到此为止,mybatis-generator-maven-plugin 就算是配置完成了,完整内容如下图所示:
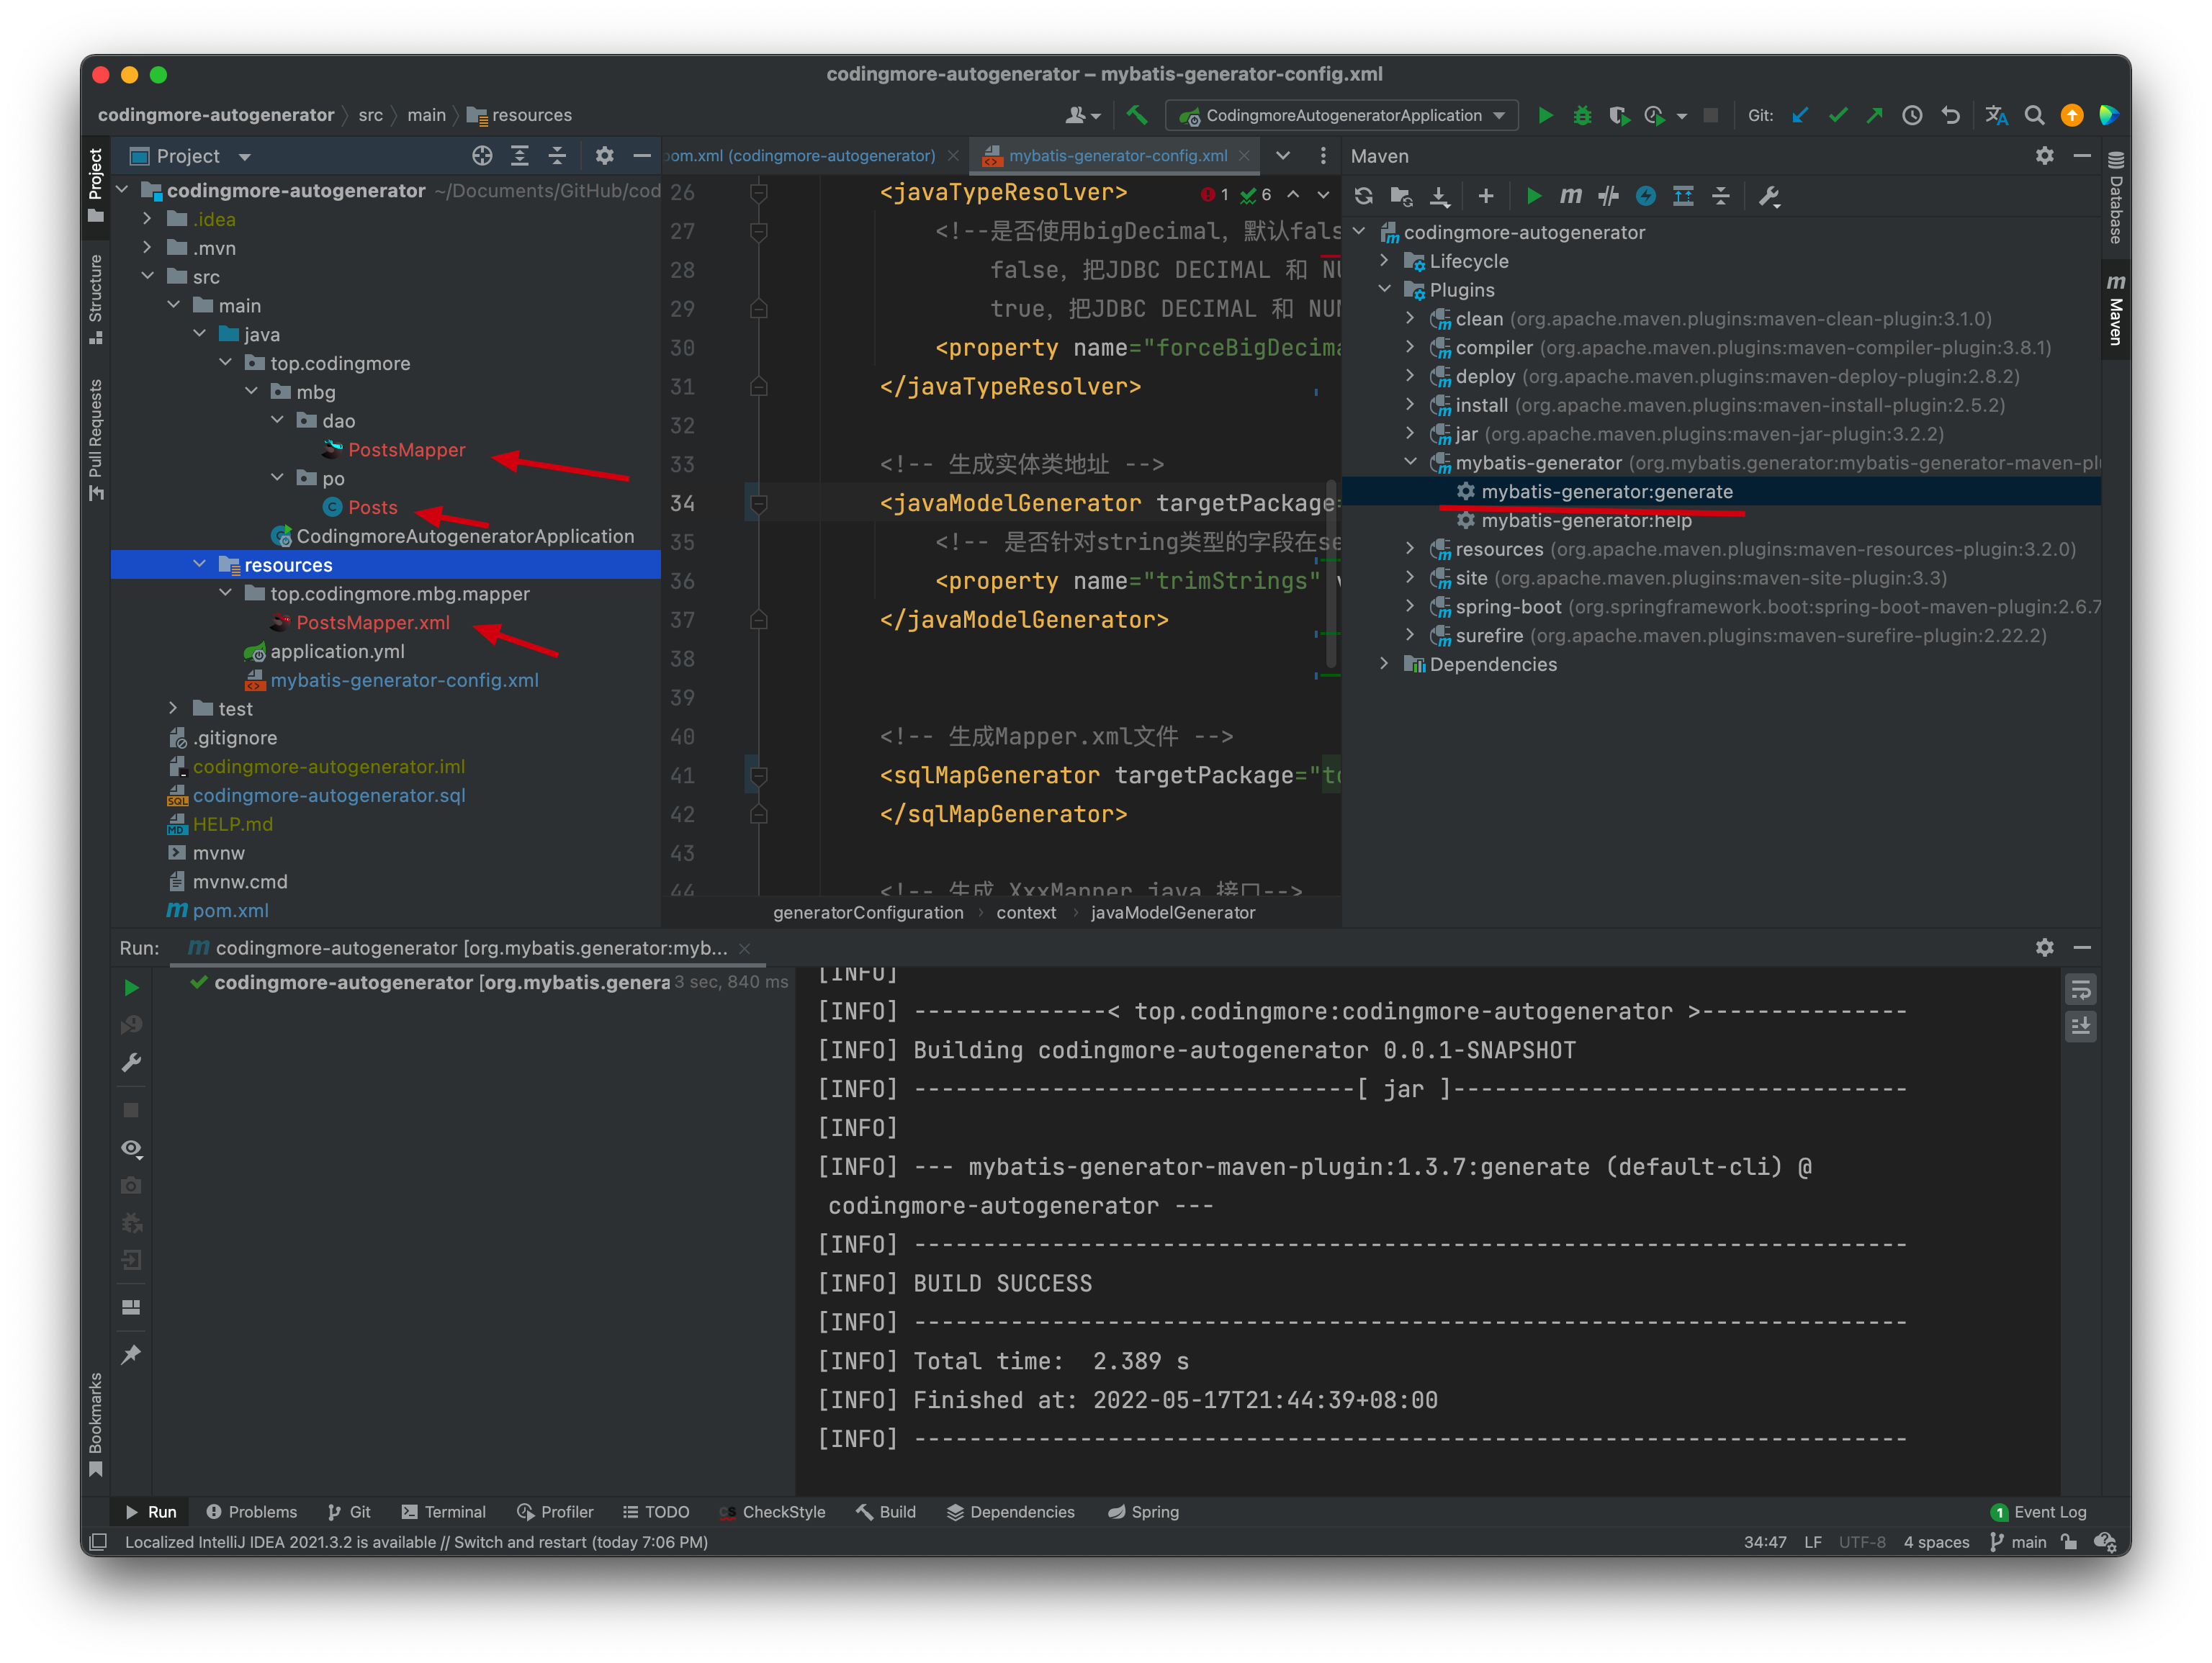
配置完成后可以双击运行 Maven 的插件 Mybatis Generator,没有问题的话,可以看到生成后的文件。
MyBatis-Plus(简写 MP)是 MyBatis 的增强工具,官方宣称 MP 和 MyBatis 的关系就好像魂斗罗中的 1P 和 2P,可谓好基友,天下走。
AutoGenerator 是 MyBatis-Plus 推出的代码生成器,可以快速生成 Entity、Mapper、Mapper XML、Service、Controller 等各个模块的代码,比 Mybatis Generator 更强大,开发效率更高。
通过前面的体验,想必大家确实感觉到了 Mybatis Generator 的繁琐,接下来,我们来体验一下 AutoGenerator,对比过后,大家心里就有答案了。
第一步,在 pom.xml 文件中添加 AutoGenerator 的依赖。
<dependency>
    <groupId>com.baomidou</groupId>
    <artifactId>mybatis-plus-generator</artifactId>
    <version>3.4.1</version>
</dependency>
第二步,添加模板引擎依赖,MyBatis-Plus 支持 Velocity(默认)、Freemarker、Beetl,这里使用 Velocity 引擎。
<dependency>
    <groupId>org.apache.velocity</groupId>
    <artifactId>velocity-engine-core</artifactId>
    <version>2.3</version>
</dependency>
第三步,新建 CodeGenerator.java 文件,在 main 方法中添加 MyBatis-Plus 的 AutoGenerator 对象。
package top.codingmore.generator;

import com.baomidou.mybatisplus.generator.AutoGenerator;

/**
 * 微信搜索「沉默王二」,回复 Java
 *
 * @author 沉默王二
 * @date 5/17/22
 */
public class CodeGenerator {
    public static void main(String[] args) {
        // 代码生成器
        AutoGenerator mpg = new AutoGenerator();
    }
}
在 main 方法中添加全局配置。
// 全局配置
GlobalConfig gc = new GlobalConfig();
String projectPath = System.getProperty("user.dir");
gc.setOutputDir(projectPath + "/src/main/java");
gc.setAuthor("沉默王二");
gc.setOpen(false);
gc.setDateType(DateType.ONLY_DATE);
gc.setSwagger2(true);
gc.setIdType(IdType.AUTO);
gc.setBaseColumnList(true);
gc.setBaseResultMap(true);
gc.setFileOverride(true);

mpg.setGlobalConfig(gc);
配置数据源。
// 数据源配置
DataSourceConfig dsc = new DataSourceConfig();
dsc.setUrl("jdbc:mysql://localhost:3306/codingmore?useUnicode=true&characterEncoding=utf-8&serverTimezone=Asia/Shanghai");
dsc.setDriverName("com.mysql.cj.jdbc.Driver");
dsc.setUsername("root");
dsc.setPassword("123456");

mpg.setDataSource(dsc);
第五步,配置包。
// 包配置
PackageConfig pc = new PackageConfig();
pc.setParent("top.codingmore.mpg");
更多配置项可以到官方查看:
完整代码如下所示:
更多内容,只针对《Java 程序员进阶之路》星球用户开放,需要的小伙伴可以戳链接🔗加入我们的星球,一起学习,一起卷。。编程喵🐱是一个 Spring Boot+Vue 的前后端分离项目,融合了市面上绝大多数流行的技术要点。通过学习实战项目,你可以将所学的知识通过实践进行检验、你可以拓宽自己的技术边界,你可以掌握一个真正的实战项目是如何从 0 到 1 的。
- 编程喵:https://github.com/itwanger/coding-more
- codingmore-autogenerator:https://github.com/itwanger/codingmore-learning
