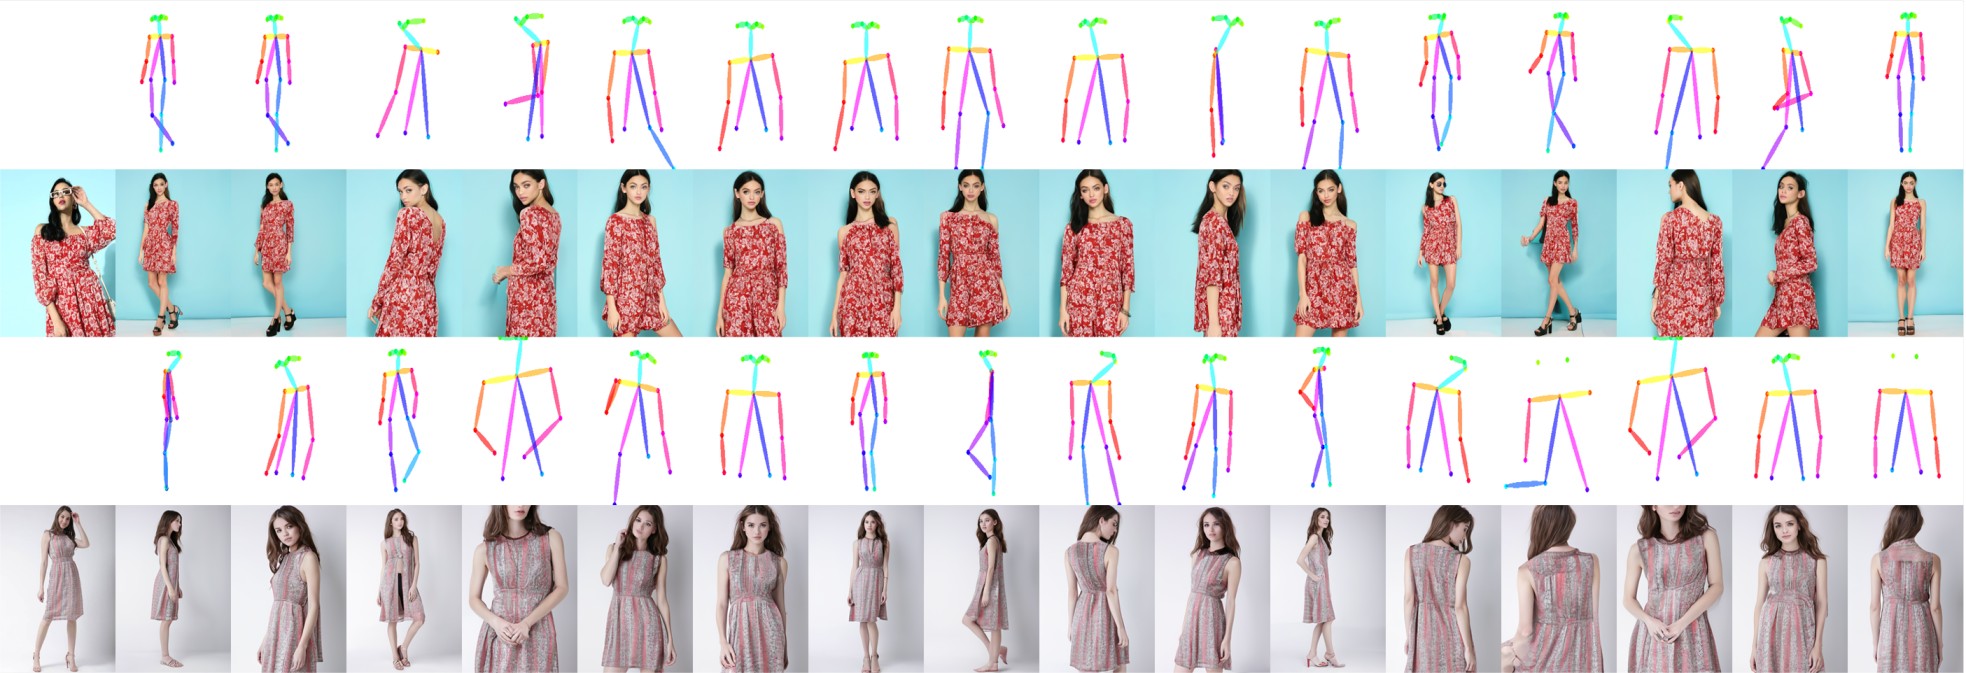
ArXiv | Project | Demo | Youtube
-
2023.02 A demo available through Google Colab:
You can directly download our test results from Google Drive: (1) PIDM.zip (2) PIDM_vs_Others.zip
The PIDM_vs_Others.zip file compares our method with several state-of-the-art methods e.g. ADGAN [14], PISE [24], GFLA [20], DPTN [25], CASD [29], NTED [19]. Each row contains target_pose, source_image, ground_truth, ADGAN, PISE, GFLA, DPTN, CASD, NTED, and PIDM (ours) respectively.
-
Download
img_highres.zipof the DeepFashion Dataset from In-shop Clothes Retrieval Benchmark. -
Unzip
img_highres.zip. You will need to ask for password from the dataset maintainers. Then rename the obtained folder as img and put it under the./dataset/deepfashiondirectory. -
We split the train/test set following GFLA. Several images with significant occlusions are removed from the training set. Download the train/test pairs and the keypoints
pose.zipextracted with Openpose by downloading the following files:
-
Download the train/test pairs from Google Drive including train_pairs.txt, test_pairs.txt, train.lst, test.lst. Put these files under the
./dataset/deepfashiondirectory. -
Download the keypoints
pose.rarextracted with Openpose from Google Driven. Unzip and put the obtained floder under the./dataset/deepfashiondirectory. -
Run the following code to save images to lmdb dataset.
python data/prepare_data.py \
--root ./dataset/deepfashion \
--out ./dataset/deepfashion
The folder structure of any custom dataset should be as follows:
- dataset/
-
- <dataset_name>/
-
-
- img/
-
-
-
- pose/
-
-
-
- train_pairs.txt
-
-
-
- test_pairs.txt
-
You basically will have all your images inside img folder. You can use different subfolders to store your images or put all your images inside the img folder as well. The corresponding poses are stored inside pose folder (as txt file if you use openpose. In our project, we use 18-point keypoint estimation). train_pairs.txt and test_pairs.txt will have paths of all possible pairs seperated by comma <src_path1>,<tgt_path1>.
After that, run the following command to process the data:
python data/prepare_data.py \
--root ./dataset/<dataset_name> \
--out ./dataset/<dataset_name>
--sizes ((256,256),)
This will create an lmdb dataset ./dataset/<dataset_name>/256-256/
# 1. Create a conda virtual environment.
conda create -n PIDM python=3.6
conda activate PIDM
conda install pytorch torchvision torchaudio pytorch-cuda=11.7 -c pytorch -c nvidia

# 2. Clone the Repo and Install dependencies
git clone https://github.com/ankanbhunia/PIDM
pip install -r requirements.txt
This code supports multi-GPUs training.
python -m torch.distributed.launch --nproc_per_node=8 --master_port 48949 train.py \
--dataset_path "./dataset/deepfashion" --batch_size 8 --exp_name "pidm_deepfashion"
Download the pretrained model from here and place it in the checkpoints folder.
For pose control use obj.predict_pose as in the following code snippets.
from predict import Predictor
obj = Predictor()

obj.predict_pose(image=<PATH_OF_SOURCE_IMAGE>, sample_algorithm='ddim', num_poses=4, nsteps=50)
For apperance control use obj.predict_appearance
from predict import Predictor
obj = Predictor()

src = <PATH_OF_SOURCE_IMAGE>
ref_img = <PATH_OF_REF_IMAGE>
ref_mask = <PATH_OF_REF_MASK>
ref_pose = <PATH_OF_REF_POSE>

obj.predict_appearance(image=src, ref_img = ref_img, ref_mask = ref_mask, ref_pose = ref_pose, sample_algorithm = 'ddim',  nsteps = 50)
The output will be saved as output.png filename.
If you use the results and code for your research, please cite our paper:
@article{bhunia2022pidm,
  title={Person Image Synthesis via Denoising Diffusion Model},
  author={Bhunia, Ankan Kumar and Khan, Salman and Cholakkal, Hisham and Anwer, Rao Muhammad and Laaksonen, Jorma and Shah, Mubarak and Khan, Fahad Shahbaz},
  journal={CVPR},
  year={2023}
}
Ankan Kumar Bhunia, Salman Khan, Hisham Cholakkal, Rao Anwer, Jorma Laaksonen, Mubarak Shah & Fahad Khan


